CloudPress is an online WordPress theme builder that can be used to create your own unique WordPress design. All designs are based on a fluid grid system so that designs look great on mobiles, tablets, and desktops.
The service provides a completely different approach to theme development. Most premium WordPress themes let you change the colour scheme and give you some control of what information is displayed, however CloudPress takes it further and gives you fill control over how your design looks.
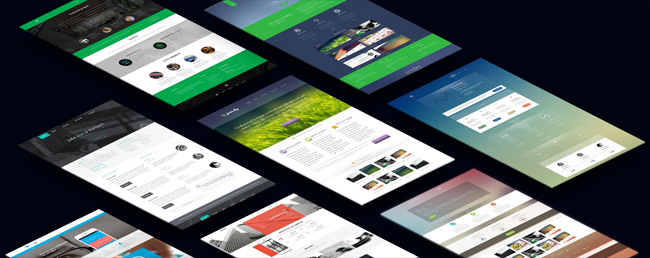
In this short review I want to give a quick overview of how the service works to help you understand what can be achieved using CloudPress.
How to Use CloudPress to Create WordPress Themes
The normal way to install WordPress themes on your website is to upload your theme to the themes directory located within the wp-content directory. Themes can be uploaded and installed there remotely if you install a design from WordPress.org via your WordPress admin panel.
CloudPress works differently.
What you need to do is create the design on CloudPress and then deploy the theme on your website using the CloudPress Sync WordPress plugin. Keping the plugin active ensures that any changes you make on CloudPress can be made on your live website automatically.
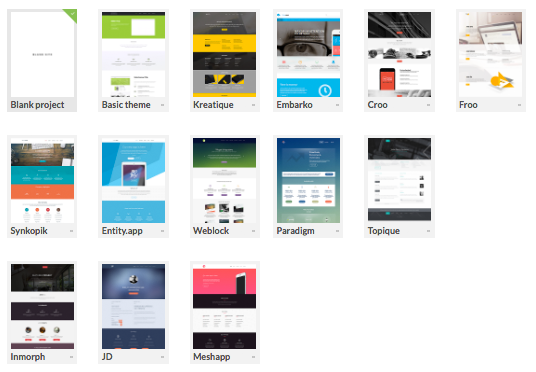
The first thing you need to do on CloudPress is name your project and admin language. You can then select one of thirteen designs as your starting point. Alternatively, you can select a blank page.
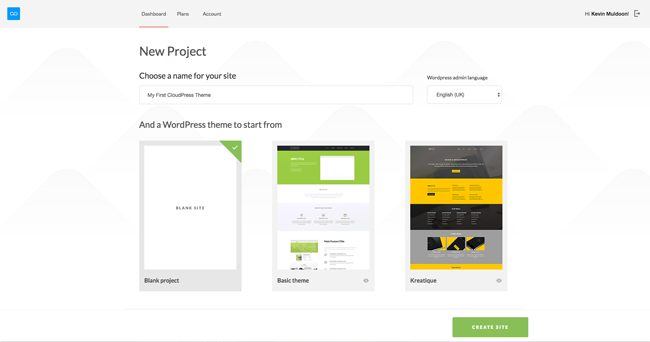
Most of the available designs are geared towards corporate websites, but can be used for any purpose. I would still like to see a wider variety of designs such as blogging themes, eCommerce themes, magazine themes etc.
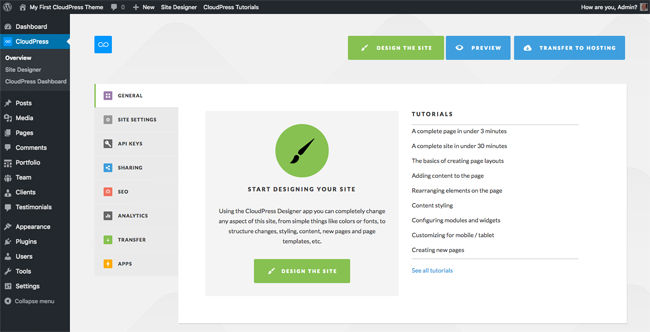
For each project CloudPress creates a WordPress installation for you. The idea is that everything related to your website can be managed through this area. This includes the design itself, post types such as portfolio, team, and clients, and website settings such as website name. Plugins and users and posts etc can all be managed here too and when you are ready you transfer everything to your live website.
I am not too sure whether I like this idea or not. I would have preferred to just focus on the design and post types on CloudPress; but I guess there are benefits to using this system. You just need to make sure you don’t mix up this admin area and your own WordPress admin area when you are switching tabs in your browser.
In the overview page you can see links to many useful video tutorials to help give you an understanding of the service. You will find several basic setting fields in this page too such as website name, Google Maps API key, Google Analytics ID, and the download link for the CloudPress Sync WordPress plugin.
I selected the blank page as a starting point and was asked what column structure I wanted to use. I was then presented with the CloudPress designer interface.
The interface displays everything in a grid. When you switch from desktop to tablet to mobile at the top you will see the grid pixel width drop from around 1,400 pixels to around 1,000 pixels and then down to 750 pixels.
At the top-right of the page you will see links back to the admin area and to your CloudPress account area. There are also undo, redo, save, and close buttons.
Each section is divided into blocks (sections) can be dragged into them. You will find a settings tab for each block. For example, for your header, footer, etc. CSS code can be viewed in a bar at the very bottom of the page.
If you have used a drag and drop page builder WordPress plugin you will feel right at home with CloudPress. Every element on the page can be modifed by simply clicking on the part you want to customise.
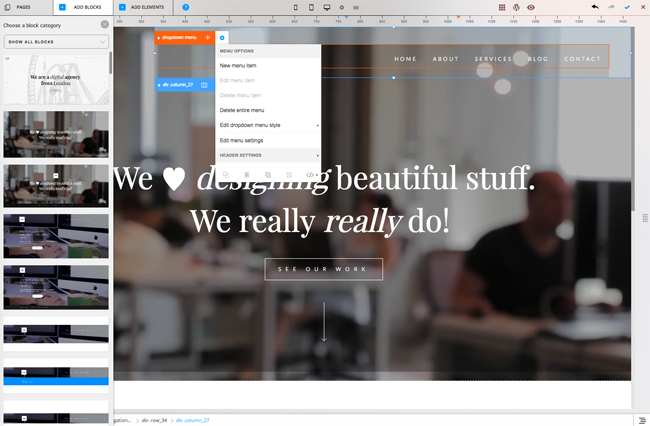
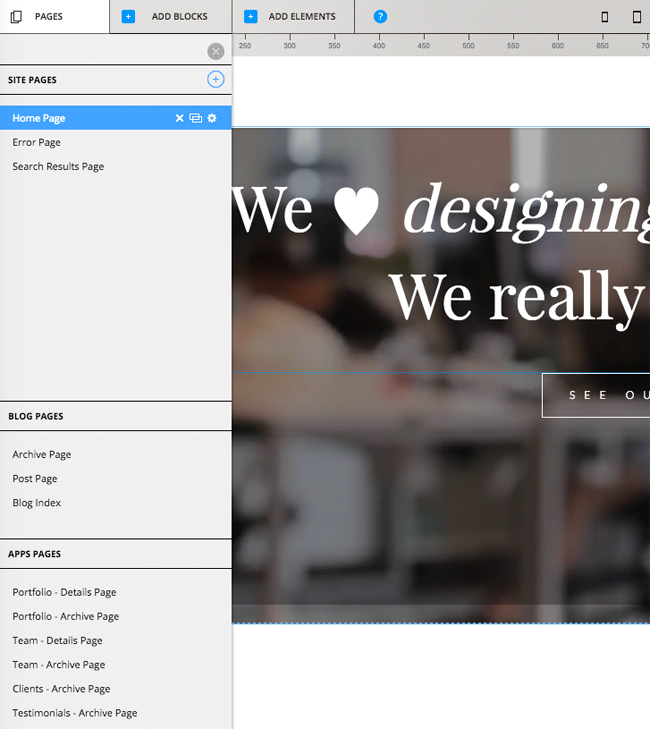
At the top-left of each page are menu items for pages, blocks, and elements. The help icon next to these menu items loads a support box with video tutorials and a ticket support form.
Clicking on the pages link allows you to change the area of your website you are working on. This lets you jump to key areas such as your blog index or archive.
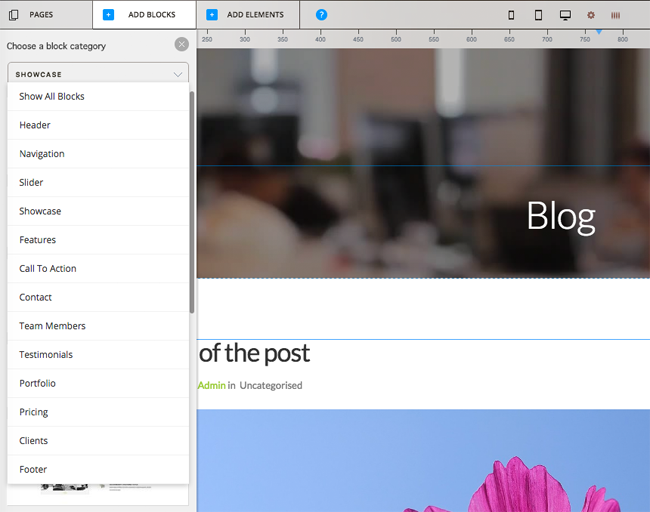
I love the block system CloudPress uses. They have over one hundred predefined designs for lots of different areas of your page. They call these areas blocks.
If you select the header block, for example, you will see many different header designs. All you need to do is select the one you want and drag it onto the page. You can create your own custom page in seconds by just choosing a block and corresponding design.
Over fifty elements and components can be added to your page. This includes elements such as video, sliders, sections, headings, grid, post carousels, and widgets.
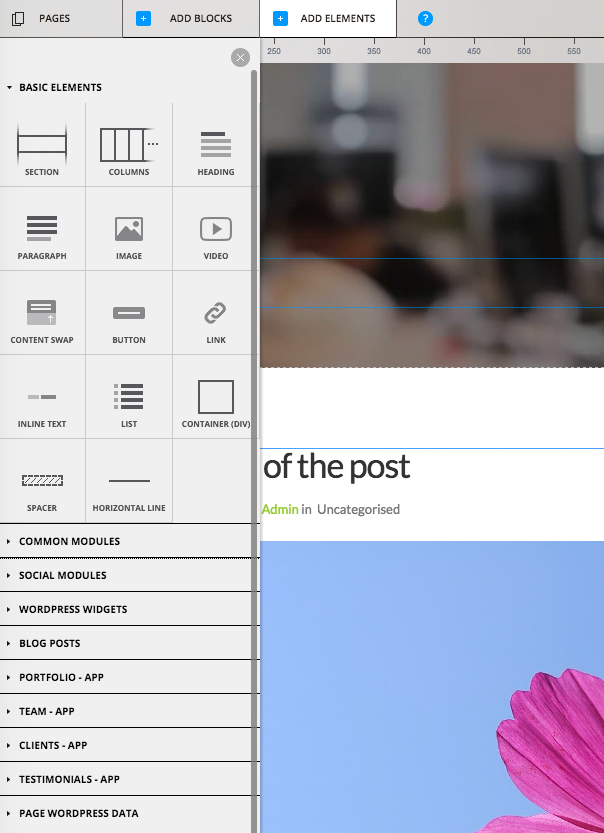
One of the greatest things about the CloudPress interface is speed. Every change you make happens intantly on the canvas area. The only time you encounter any slowdown is when you choose to switch to a different page to edit.
The Cost of CloudPress
You can try out CloudPress free of charge for ten days. You will get access to all features to help you see what CloudPress can do, however you will need to upgrade to a premium plan in order to activate the design on your WordPress website.
Four different pricing plans are available for CloudPress. All plans grant access to thirteen CloudPress themes and any more that are added later.
The single licence retails at a one off payment of $59.99. It offers one year of email support, staging, and updates.
Bizarrely, the other three plans are not sold on a one-off fee basis. Instead, you need to opt into a monthly or yearly plan. Opting for the yearly plan can save you 33% on the starter plan and 25% on the professional and unlimited plans.
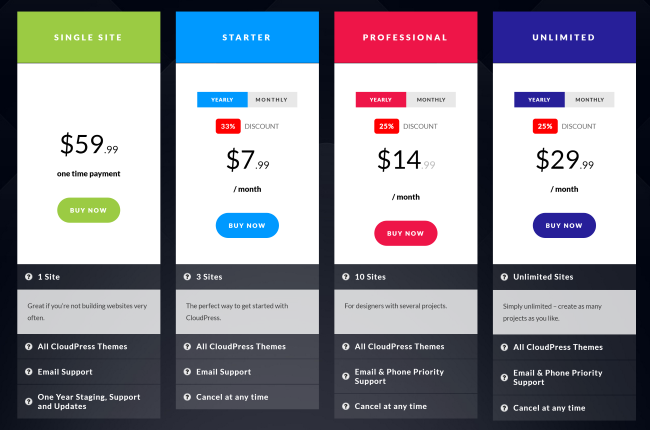
The starter plan costs $11.99 per month if you pay monthly and an equivalent of $7.99 per month if you pay yearly. It provides support and updates for up to three websites.
The professional plan costs $19.99 per month if you pay monthly and $14.99 per month if you pay yearly. This plan increases usage to ten websites and adds telephone priority support.
The unlimited plan removes the restriction on how many websites you can use CloudPress on. It retails at $39.99 per month or $29.99 per month if you choose to pay yearly.
Monthly and yearly plans can be cancelled at any time.
Final Thoughts
CloudPress is an interesting service that has many great features. I highly recommend signing up for the ten day trial to get an idea of how it all works.
I think CloudPress is more for those who want complete control over their website design but do not have the skills to change anything. Developers may also find the service useful for creating mutiple client websites quickly.
Stay tuned as I will be telling you all about a CloudPress discount this week that drops the price of the service considerably.
Good luck.
Kevin

