Offermative is a feature-rich WooCommerce plugin that was designed to help online shops increase conversions. It simplifies and automates an advanced sales funnel, offering customers discounts, special offers, upsells, cross-sells, product recommendations and more.
The plugin is highly customisable, allowing you to create offers for customers based on many unique conditions. This personal approach to giving discounts to select customers can greatly increase your monthly revenue.
Offermative is developed by official WooCommerce plugin developer partner StoreApps. Based in Mumbai, India, the team has worked with WooCommerce for years, developing successful WooCommerce solutions such as the stock and inventory management plugin Smart Manager and the eCommerce analytics solution Putler. With Offermative, their goal was to create a solution that would increase revenue from a shop’s existing traffic and customer base.
In this article, I would like to show how you can use Offermative to increase conversions on your WooCommerce-powered shop.
Getting Started with Offermative
There is no doubt that Offermative will be a paid product in the future, but for the time being the WooCommerce plugin is 100% free to download and use. Simply visit the official Offermative website and click the download button.
Once you have uploaded the plugin to your WordPress website, a setup wizard will pop up at the right-hand side of the WordPress admin area. The wizard is easy to follow, but it would undoubtedly be better if the setup wizard was displayed on a dedicated page instead of being squashed at the side of the page.
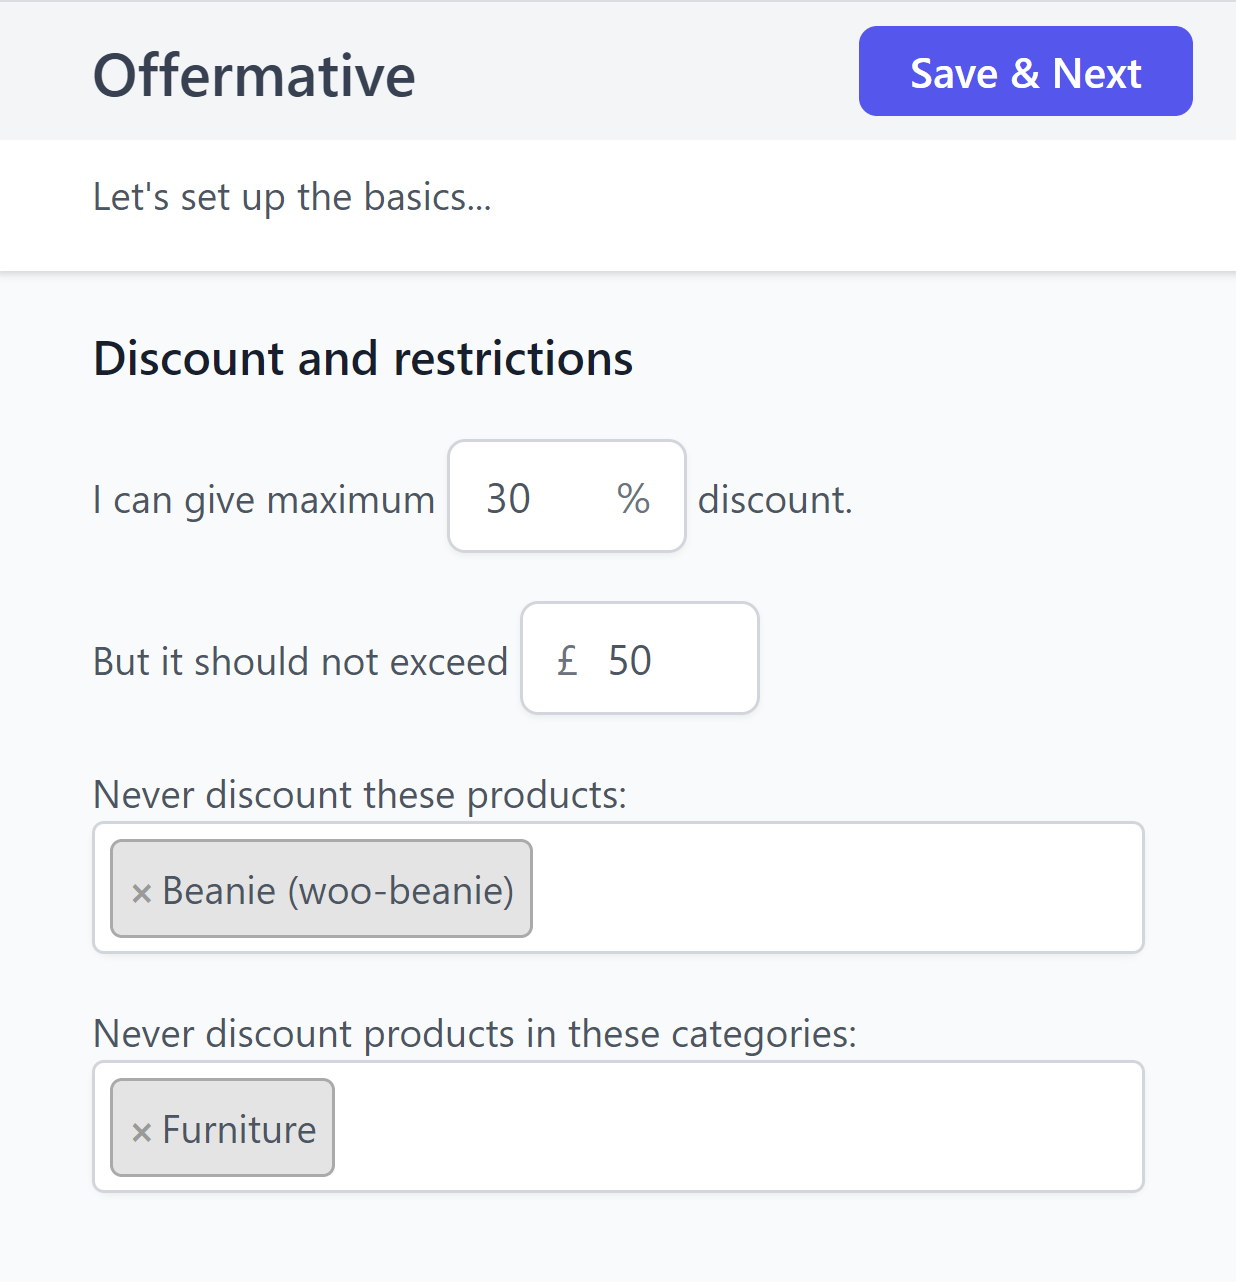
The first section of the setup wizard is related to discounts. You can define the maximum percentage of discount to give to customers and a total maximum discount that should not be exceeded. Products and product categories can also be excluded from discounts.
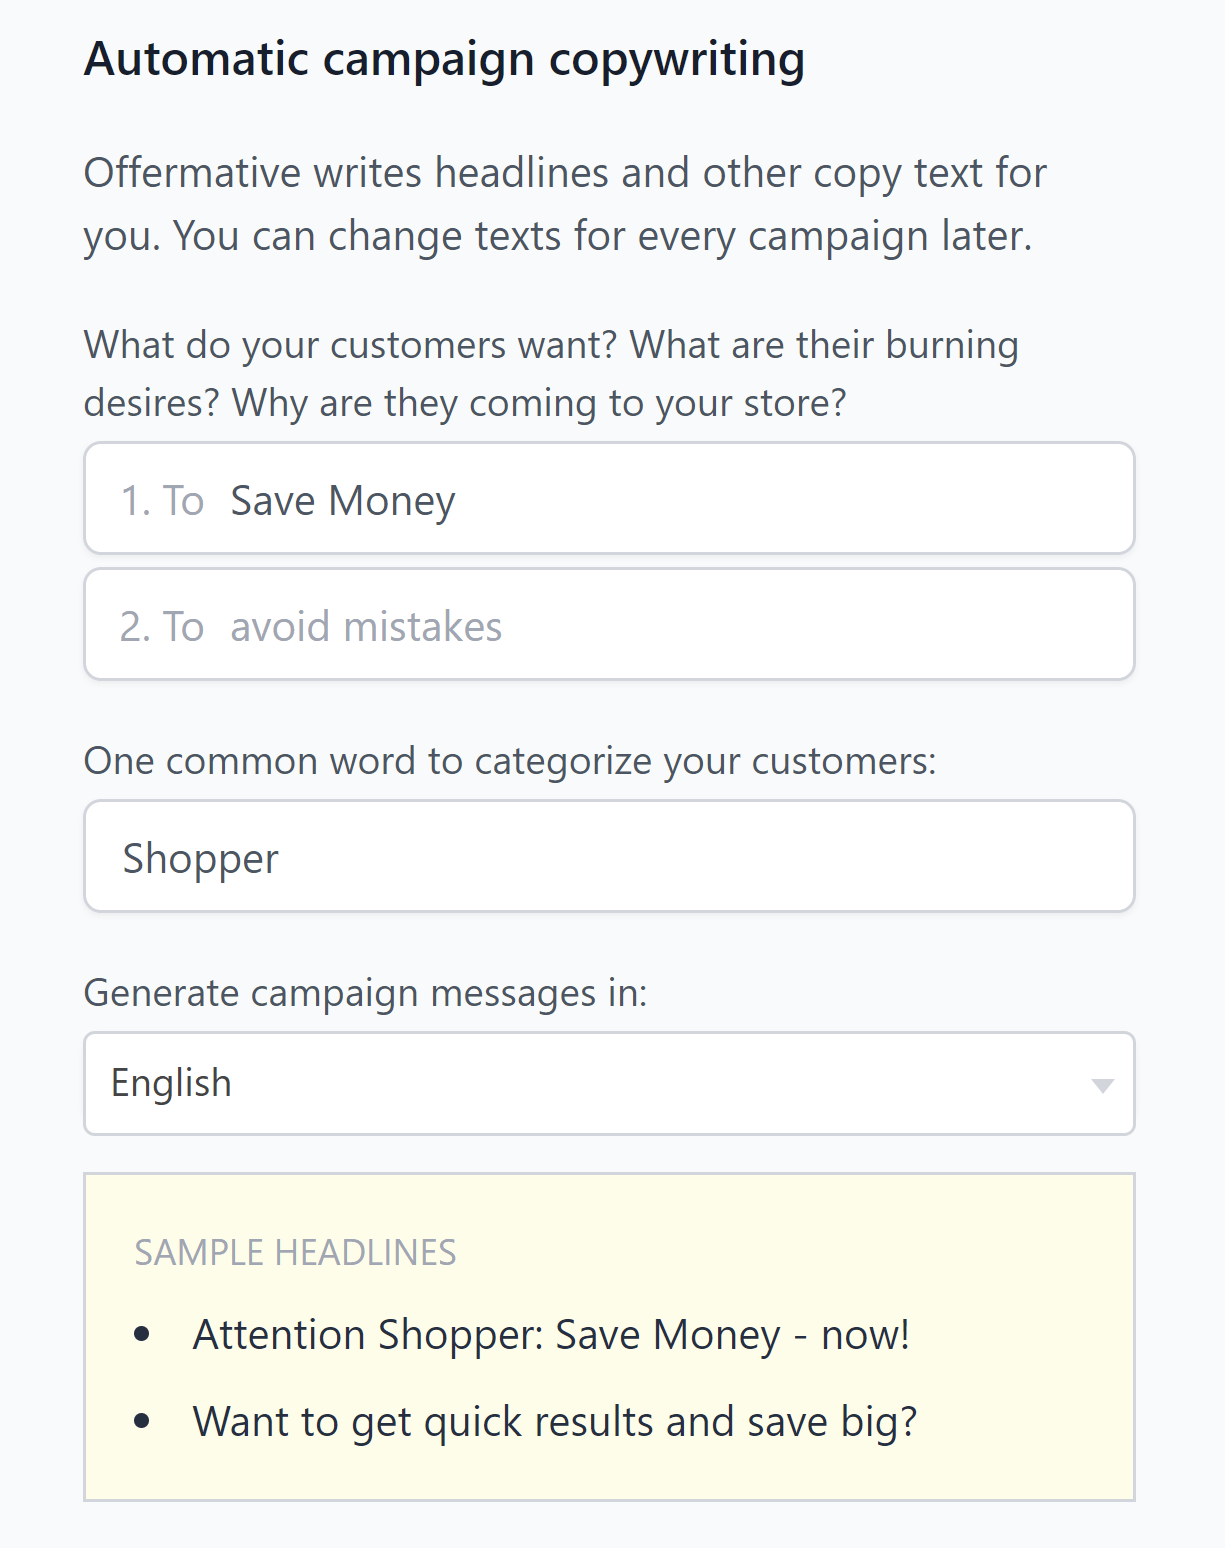
In the next section, you can specify the goal of your customers and how you want to refer to them. Offermative will use this information to automatically create marketing headlines and sales material for you.
In order to use Offermative, you need to create an account with them. This can be completed in the next step of the setup wizard.
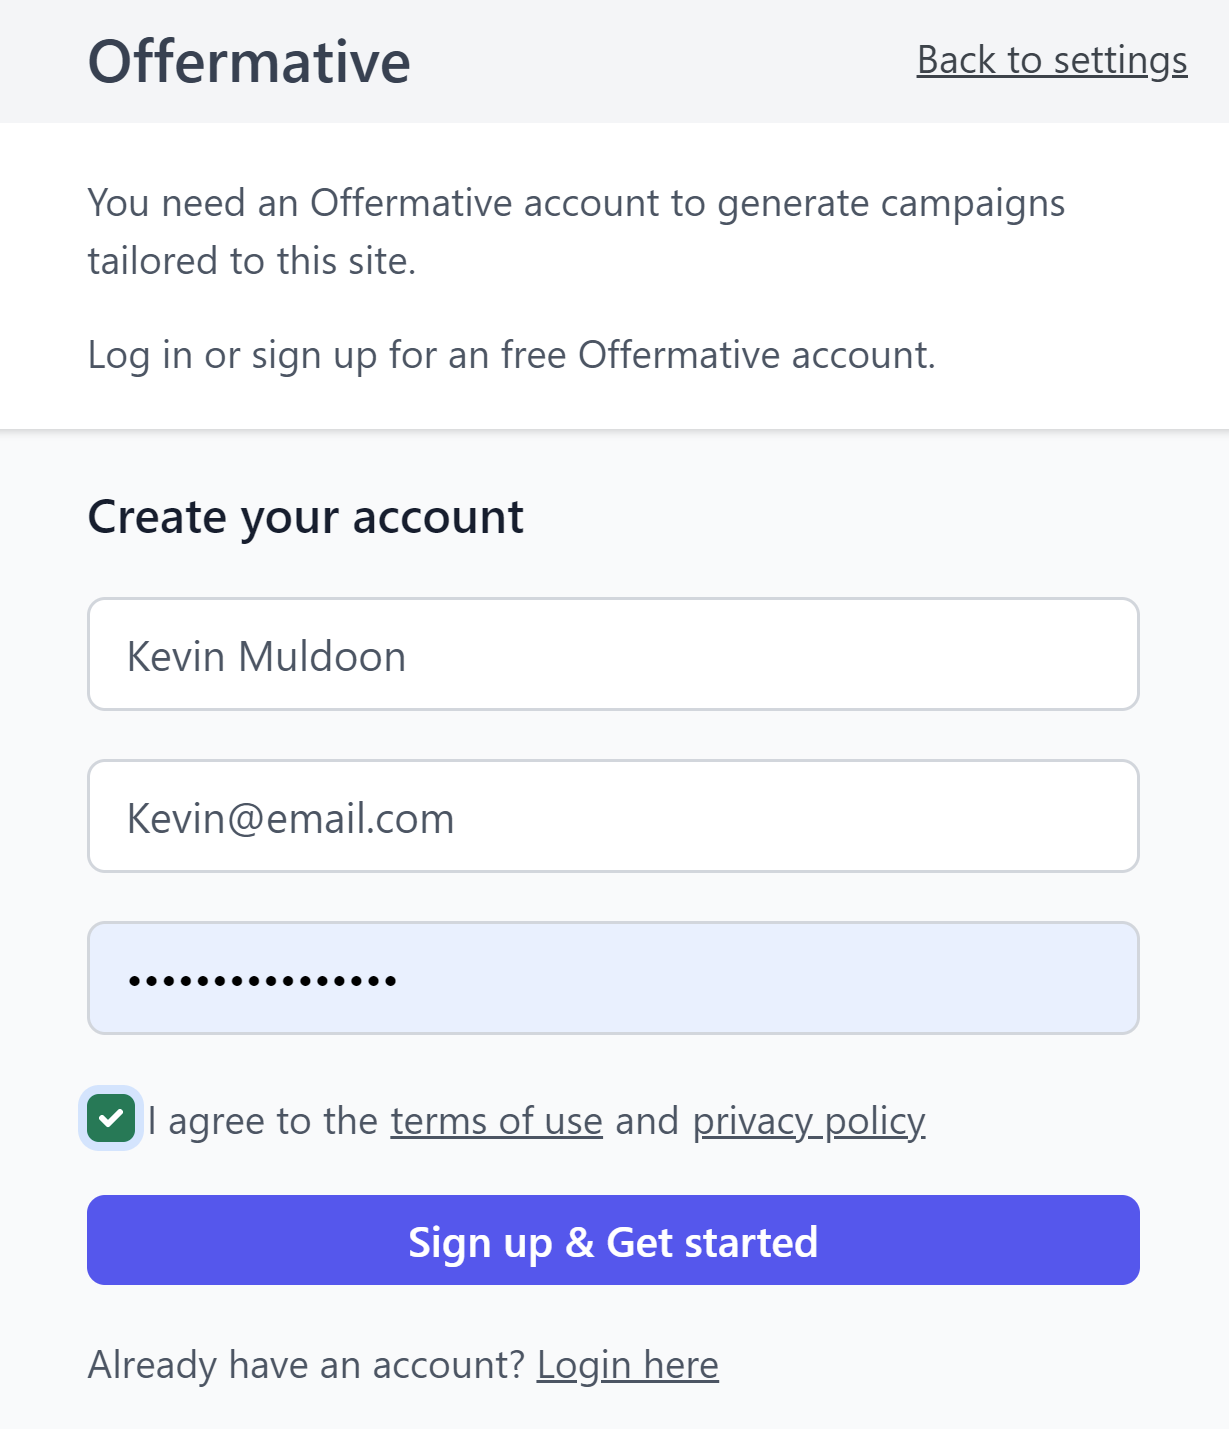
Once you have created your Offermative account, you can start using the plugin.
Why You Need to Create an Offermative Account
The official Offermative website advises that an account is required so that campaigns can be tailored to each website. As there is no way to manage campaigns or settings on the official Offermative website, I feel that this is an unnecessary step.
I reached out to Offermative for clarification of this issue and they advised that:
- Third-party servers are used to generate campaigns based on offer settings, but offer content is not stored on these servers
- Content is stored locally in WordPress
- Registration is required as Offermative track the campaign conversion stats on their servers, but no customer data is recorded
I do appreciate that generating campaigns externally makes Offermative’s footprint in the WordPress database significantly smaller, though I believe many shop owners will prefer all settings and conversion data to be stored locally, not remotely.
The Offermative Campaign Page
The main Offermative campaign page can be found within the WooCommerce marketing admin menu. After completing the setup wizard, you will see an option to generate offer campaigns. You will also see a book icon that leads to a contact form and a configuration icon that loads the setup wizard up again.

Once you are running multiple campaigns, the campaign page becomes more useful as it gives you an overview of how all campaigns are performing.
The main part of the page lists recent orders together with campaigns and the revenue they have generated, whilst the top of the page shows views, orders, items sold, conversion rate and total revenue.
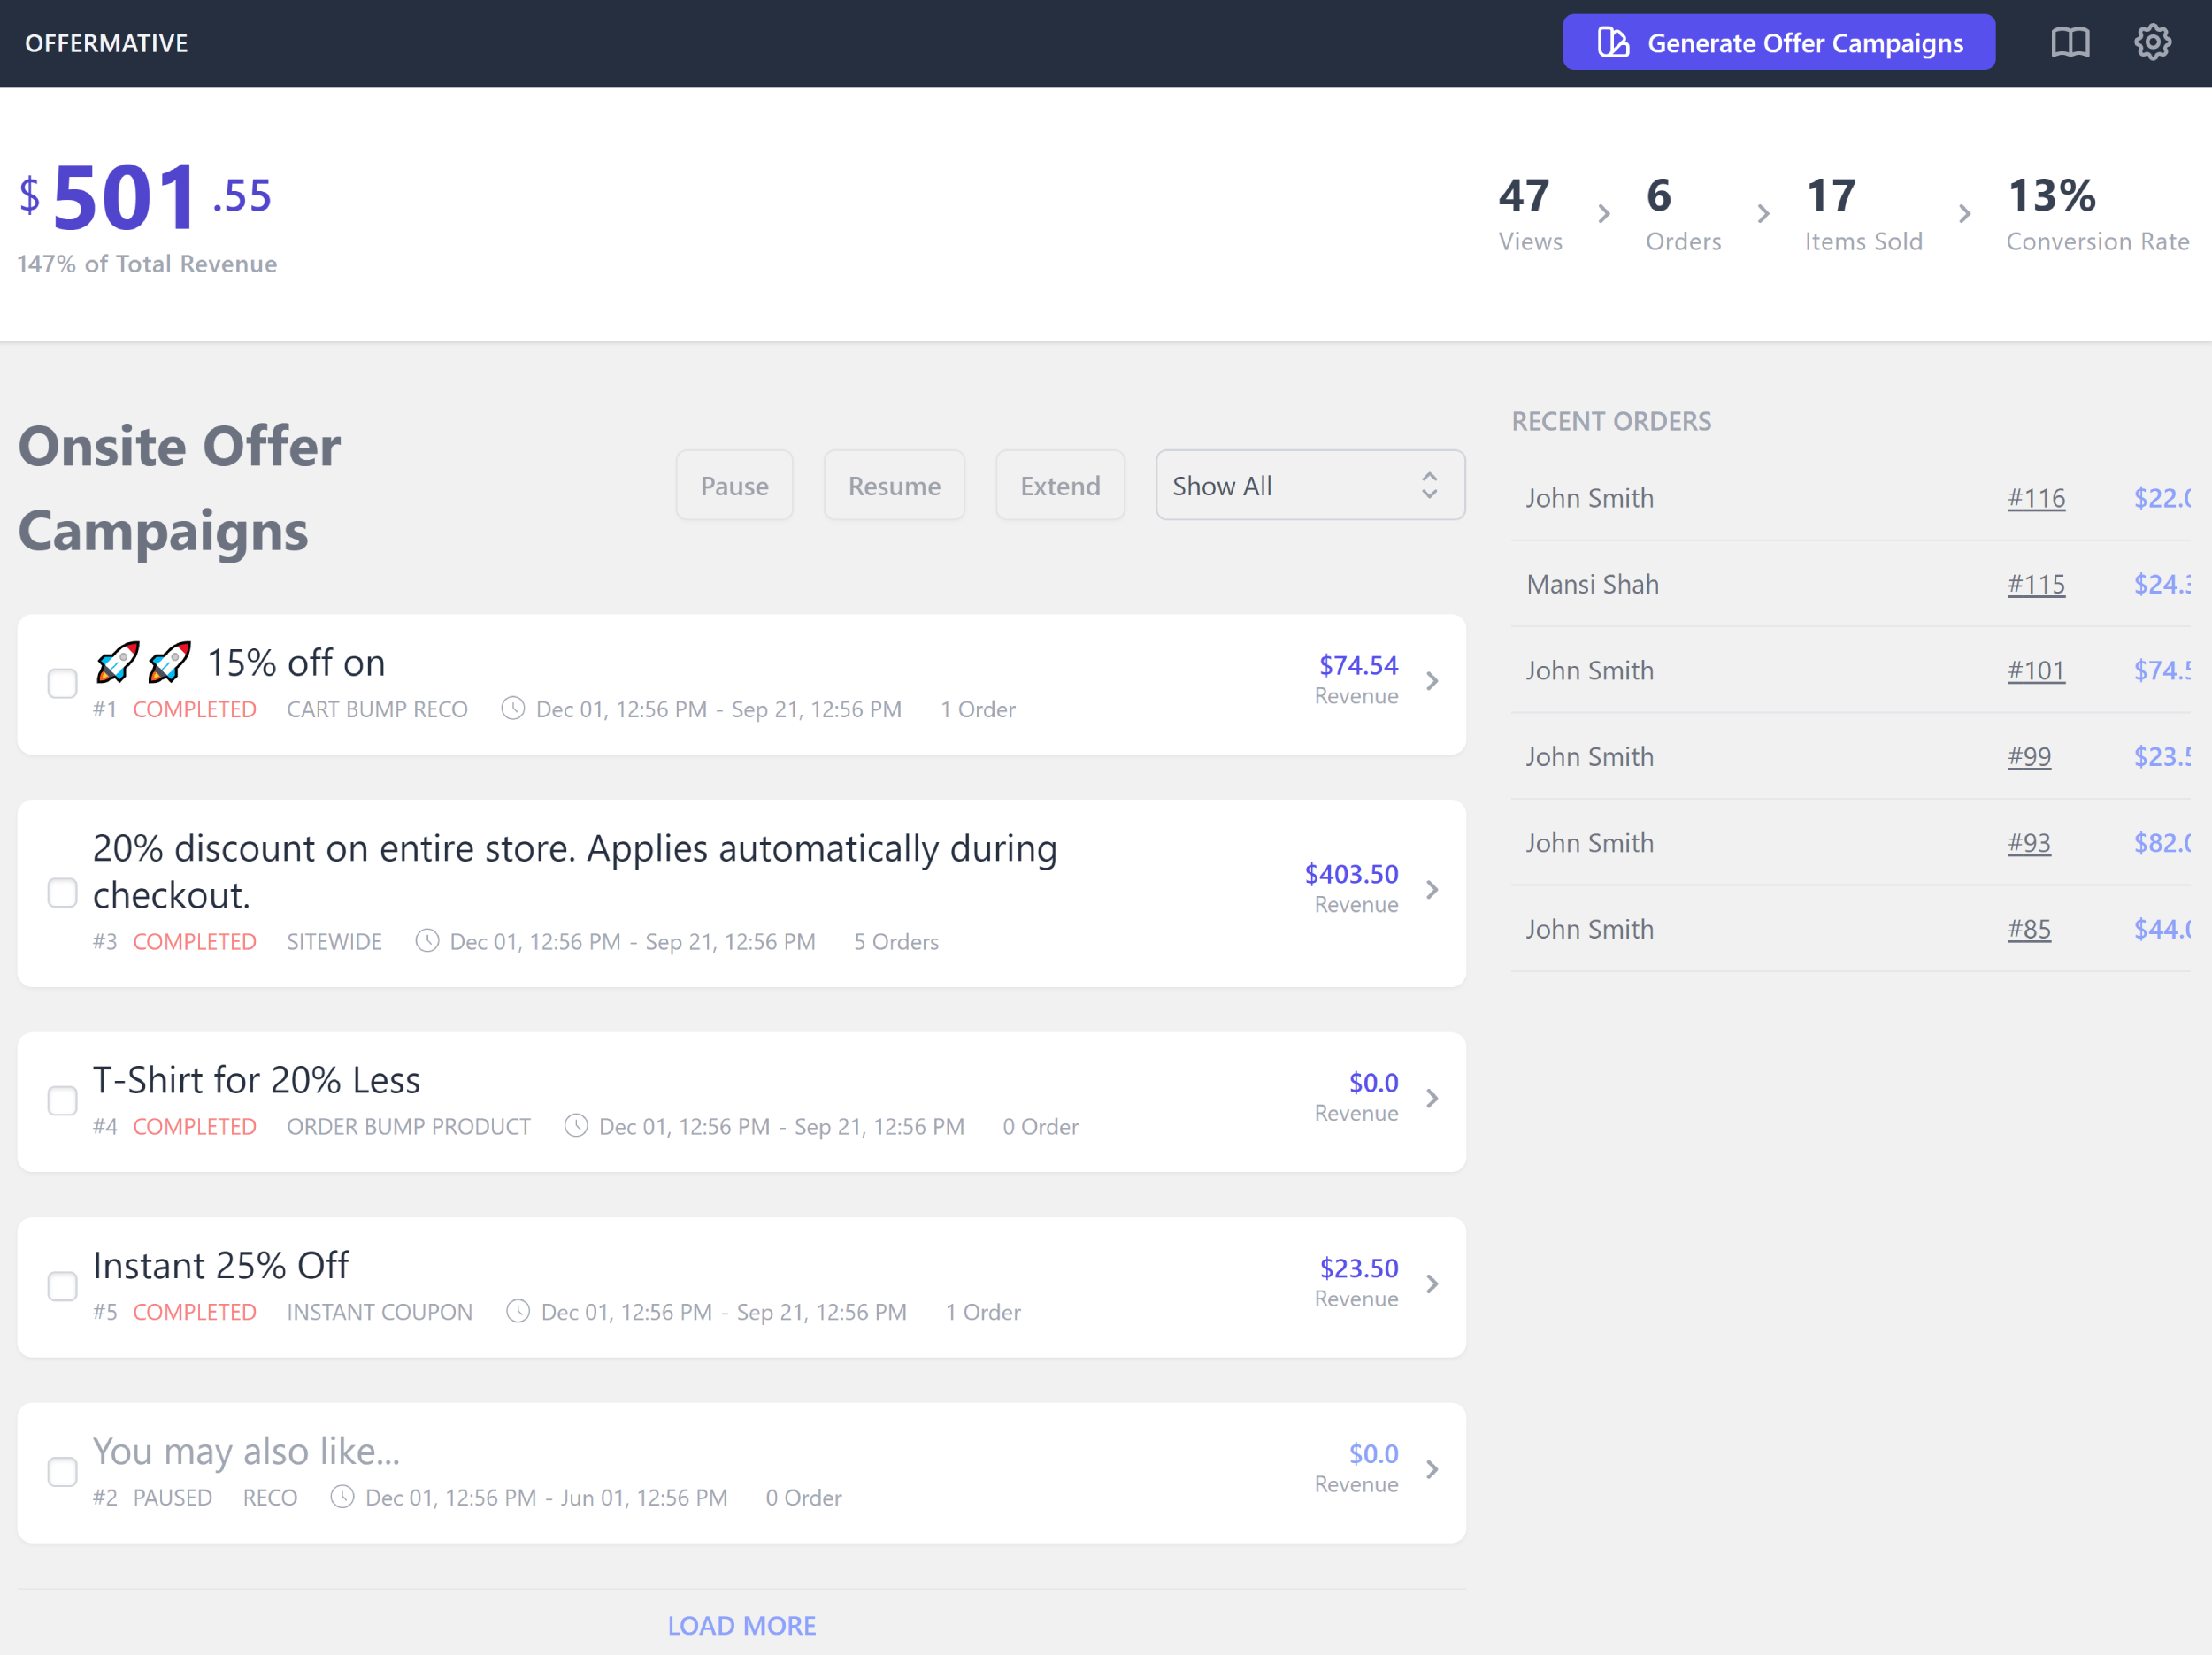
The campaigns page highlights that Offermative is not a complicated WordPress plugin. Once you have created your discounts and offers etc, your focus can switch to monitoring campaigns and making small adjustments to them.
Creating Your First Offermative Campaign
When you click to generate a new offer campaign, a settings box will pop up on the right-hand side of the page. Like the setup wizard, it feels a little squashed and it would be better if this information was requested on a dedicated page.
In the first section, you can choose which type of offers you want to generate. If you select “Let Offermative decide”, all offer types will be selected. Alternatively, you can select specific types of offers such as fixed amount discount, cart bump, upsell and cross-sell.
The second section asks if you want to restrict offers to specific products or product categories. The final section explains what’s going to happen on the next page.
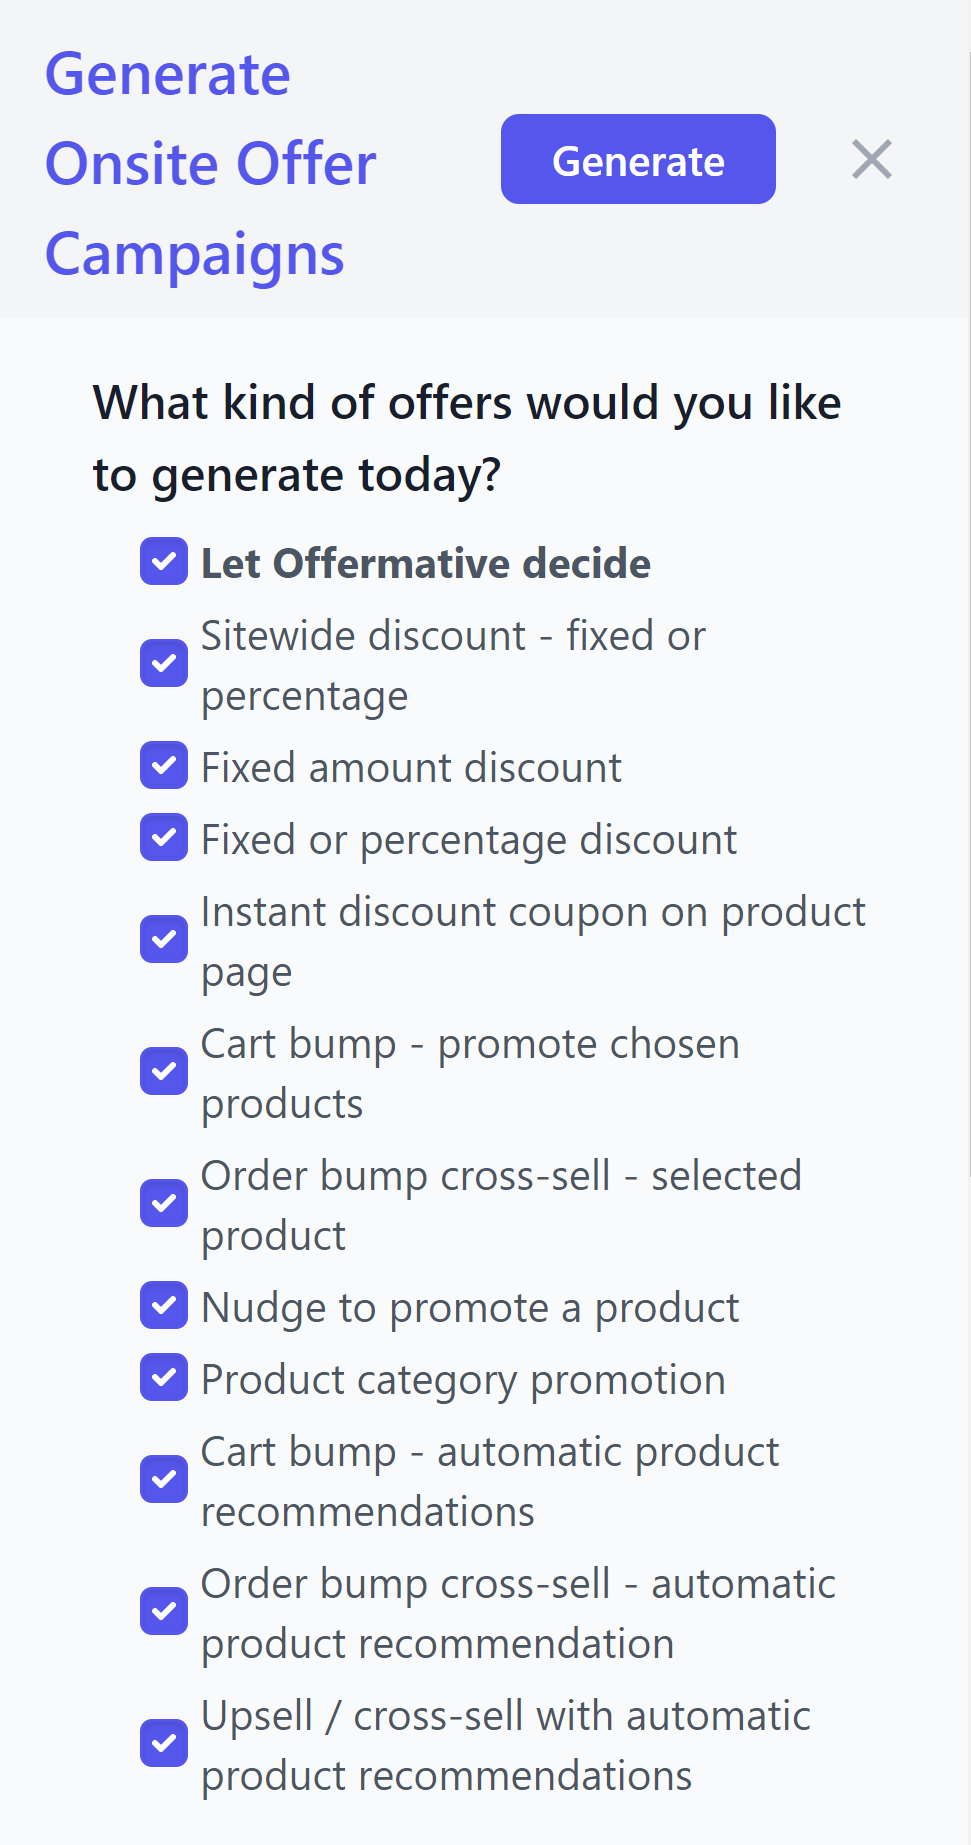
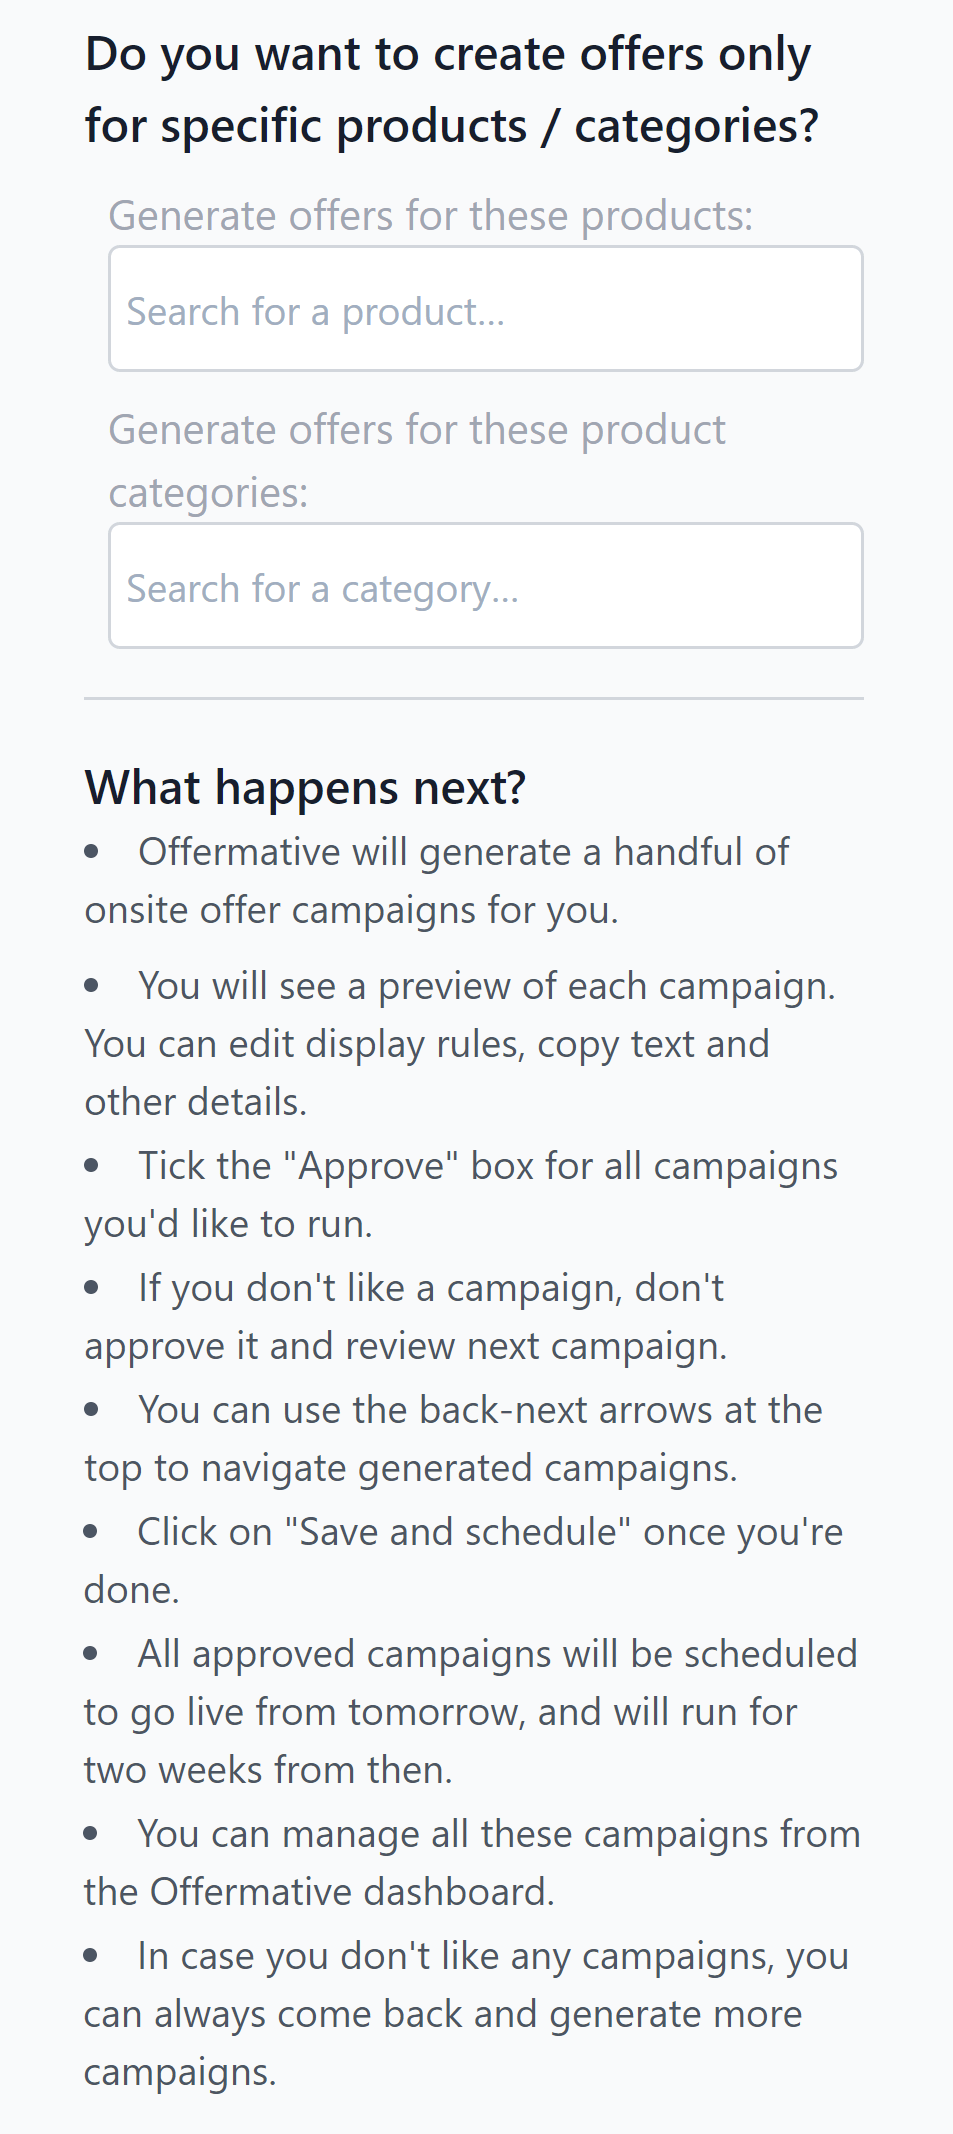
When you create a new campaign, Offermative will automatically give it a name based on the initial discount settings, though you are free to change the name of your campaign at any time.
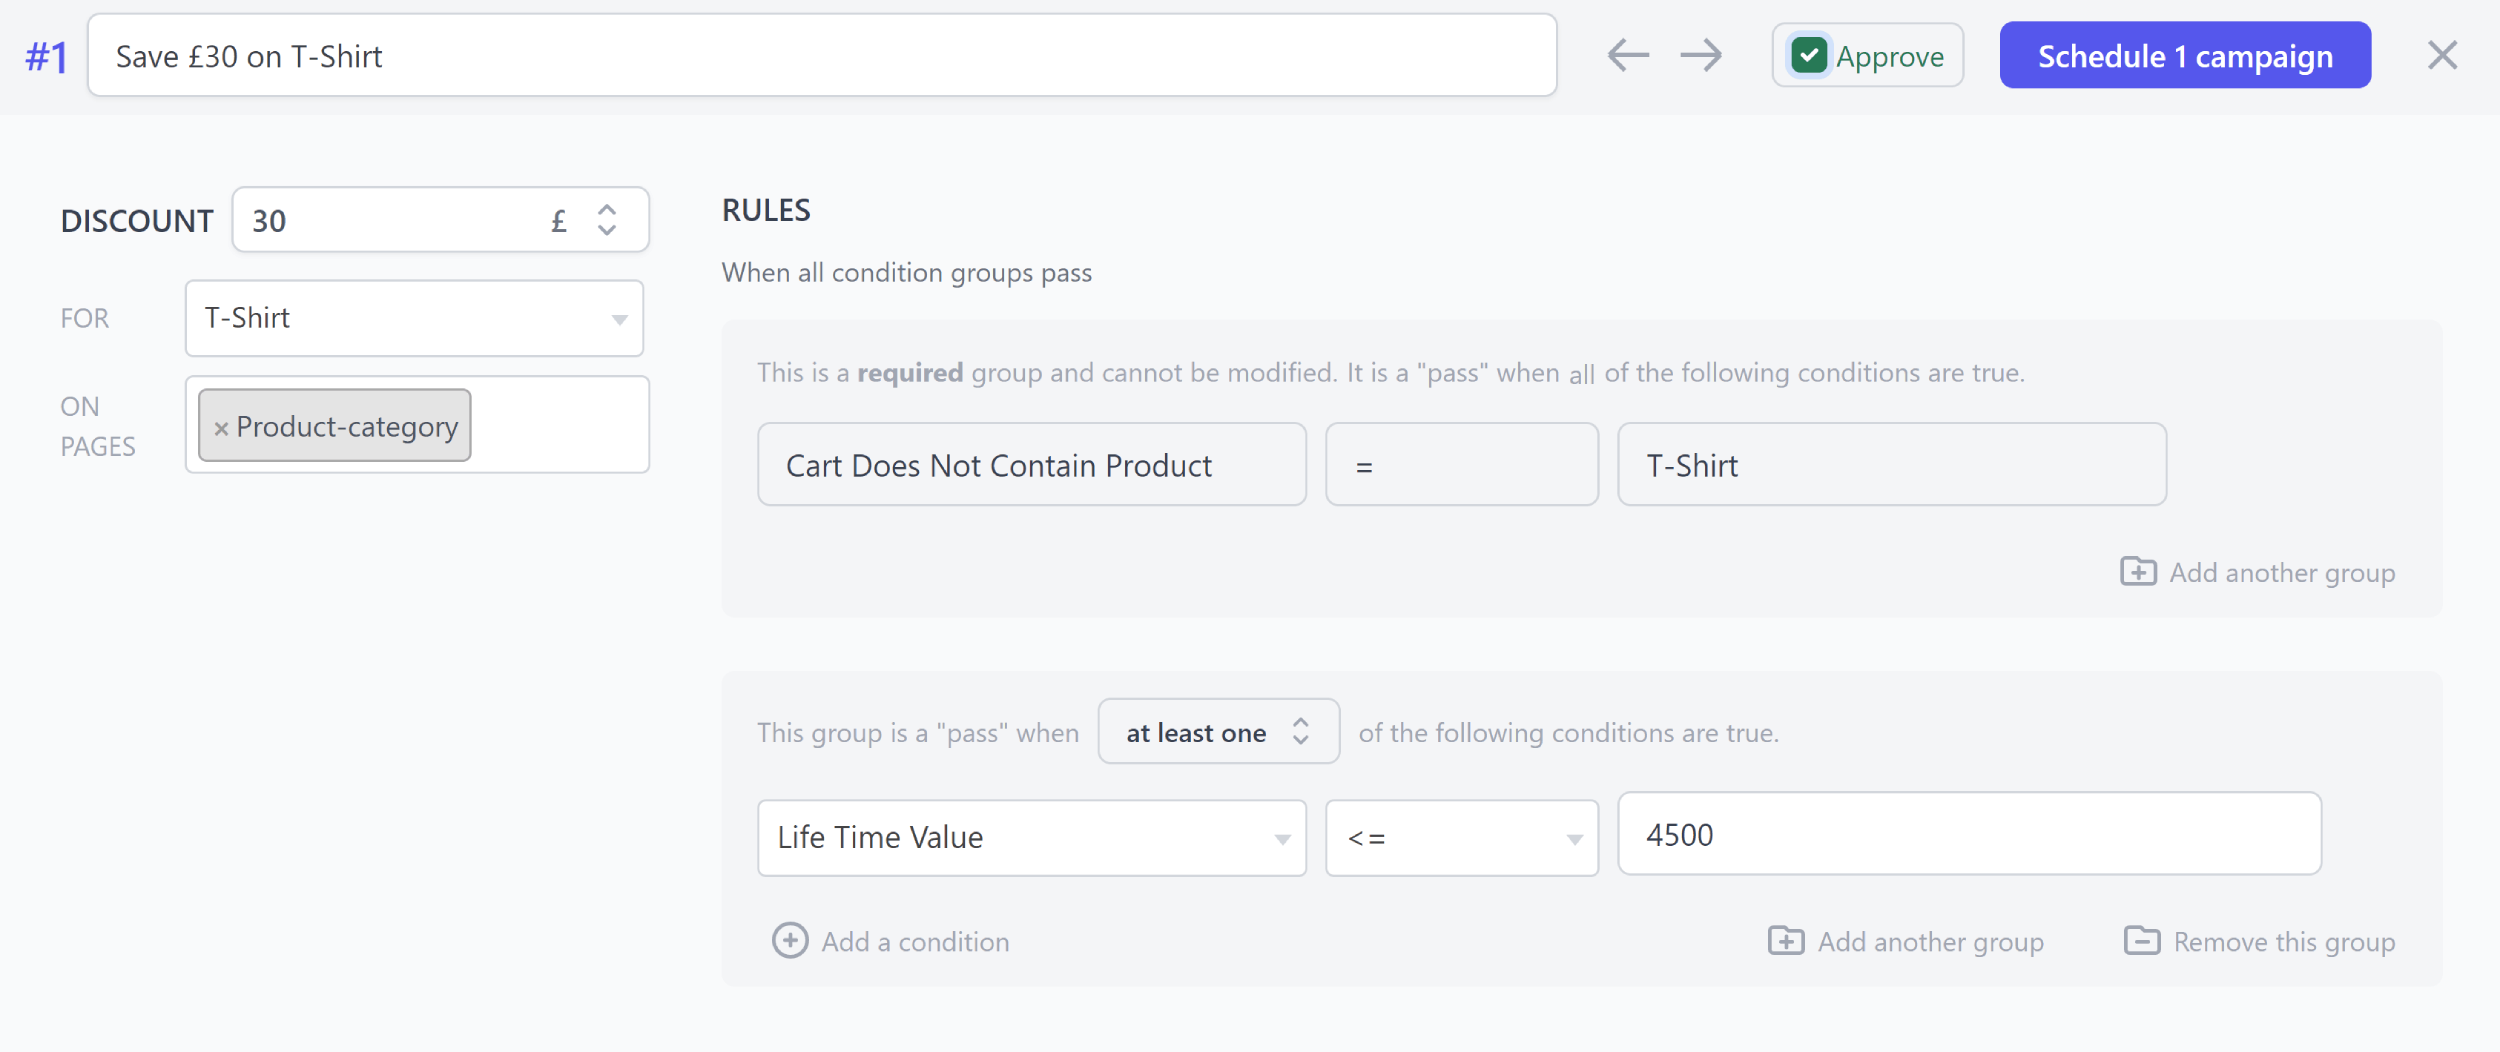
Discounts can be specified as an exact value or as a percentage of the product price. You can also specify which areas of your website discounts should be displayed.
In addition to product categories, you can choose to display discounts on your home page, blog, shop, shopping cart, checkout, account page, posts, pages, blog post categories, products and thank you pages.
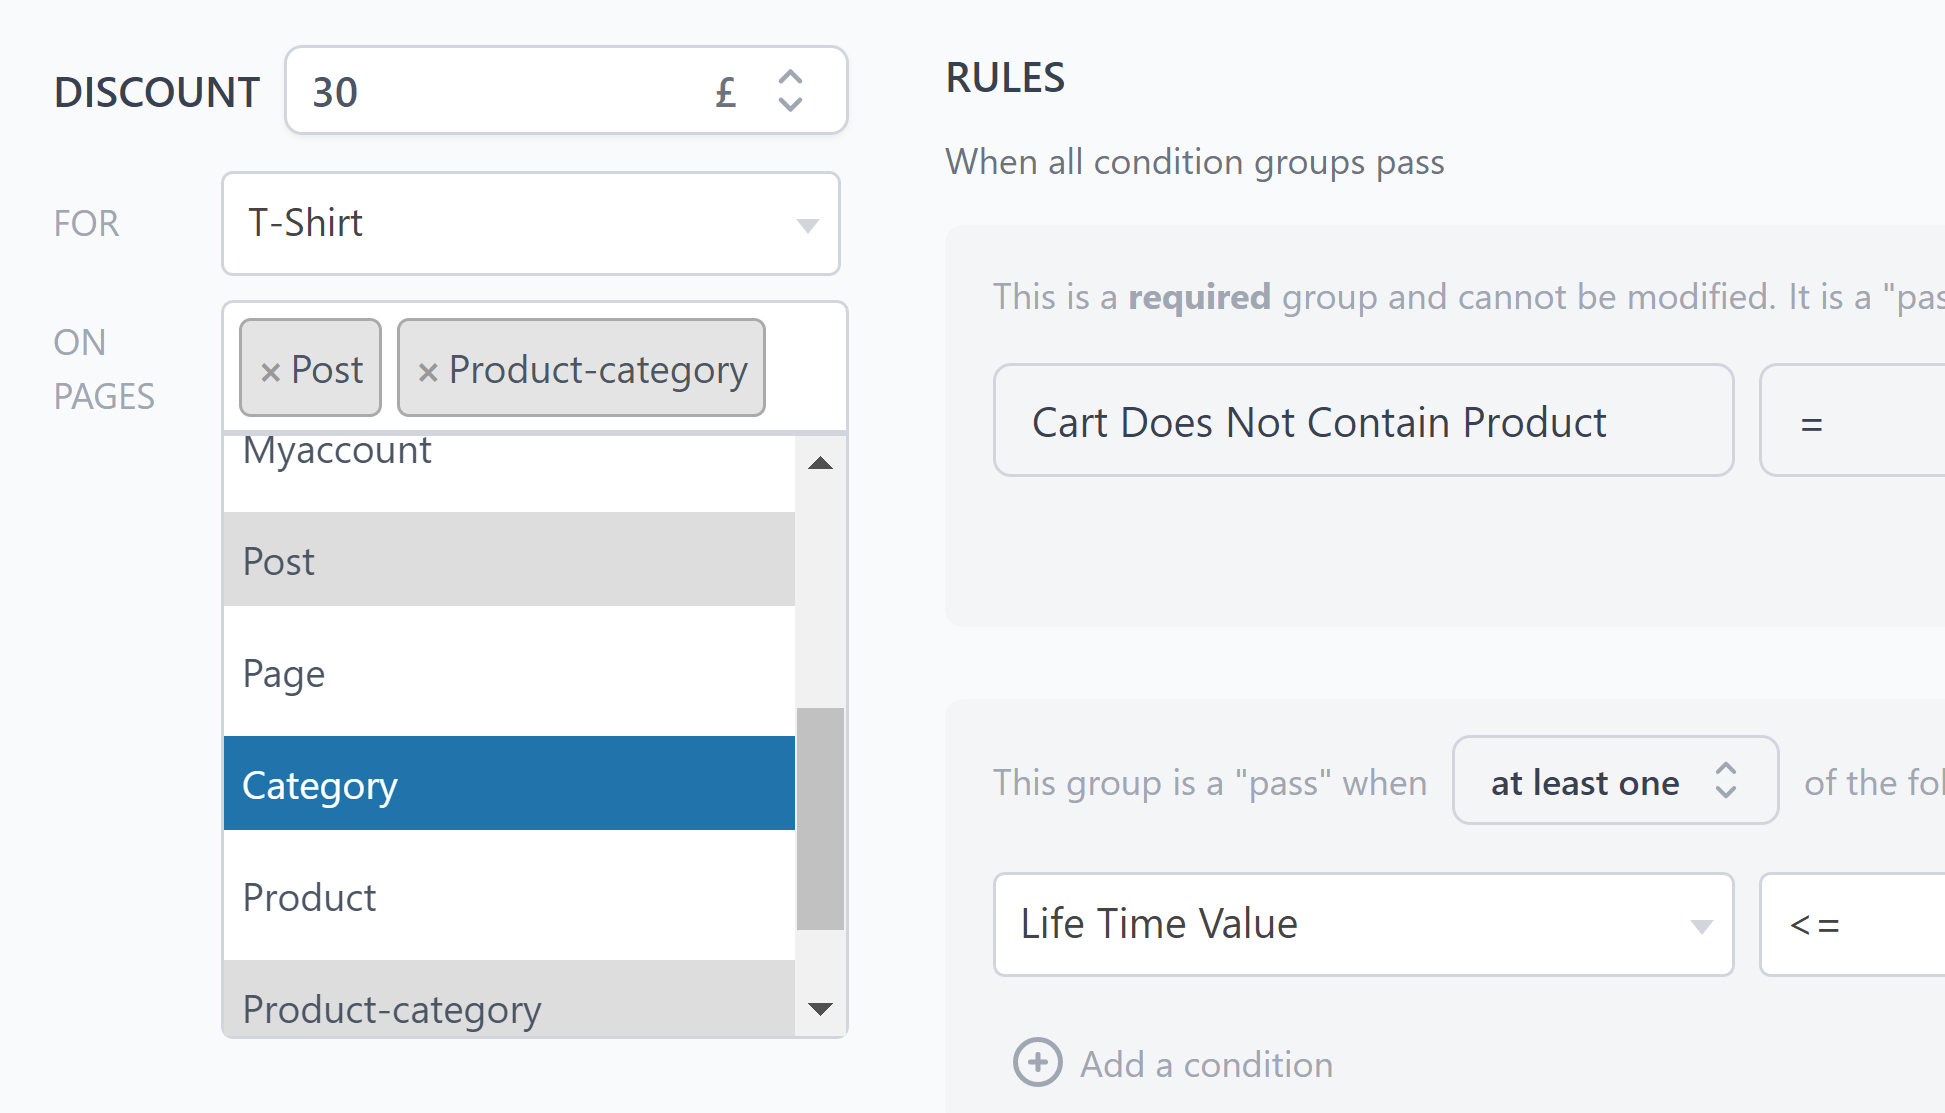
In addition to selecting where discounts are displayed, you can also restrict when an offer is displayed by defining an unlimited number of conditions. Conditions can be grouped together and a group can only be set to “Pass” if all conditions are met or if at least one condition is met.
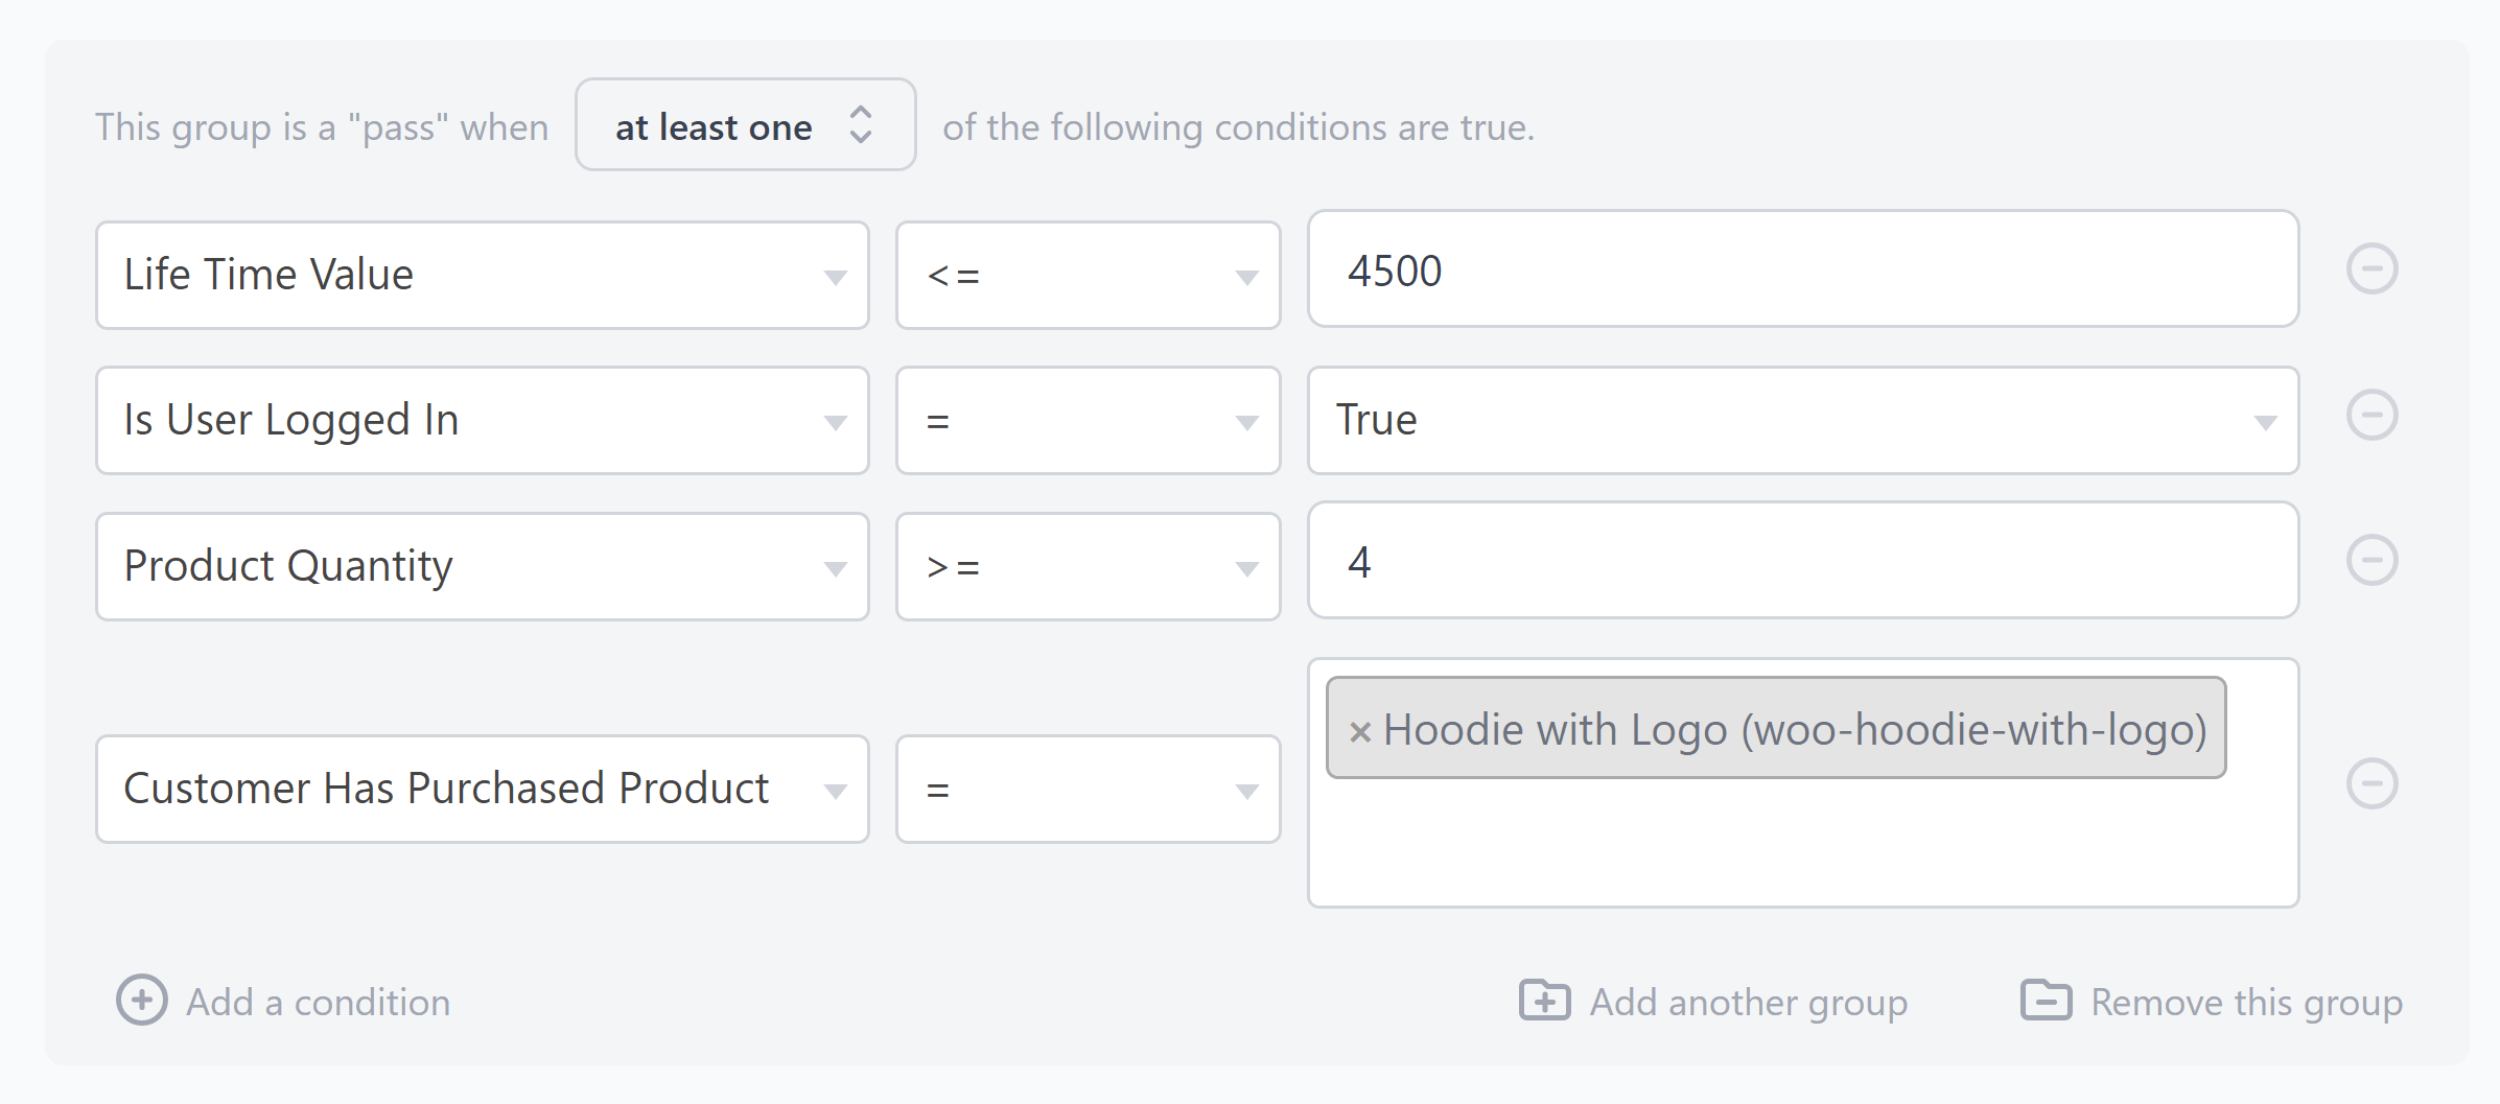
Conditions and page display options are really what sets Offermative apart from alternative solutions. Offers can be narrowed down to extremely unique situations so that they are highly targeted.
A total of 18 conditions are available:
- Category
- Product
- Device
- Cart Total
- Is User Logged In
- User Since
- Lifetime Value
- Product Quantity
- Is First Order
- Category Total in Cart
- Cart Contains Product
- Cart Does Not Contain Product
- Cart Contains Product From Category
- Cart Does Not Contain Product From Category
- Customer Has Purchased Product
- Customer Has Not Purchased Product
- Customer Has Purchased From Category
- Customer Has Not Purchased From Category
As you can see, conditions can be applied so that offers are only displayed in unique situations. For example, you could offer a major discount for big buying new mobile customers by restricting an offer to a tablet or mobile user who’s making their first-ever order with a shopping cart that is over $1,000.
The only condition I feel is missing is time. I’d love to see an option for starting and ending offers at a specific date and time. This would be particularly useful for seasonal offers and other limited offers.
Once you have set up your conditions, it’s time to focus on how the offer is promoted.
Offers can be displayed using an action bar at the top of the page, a messenger style box at the bottom of pages or a pop-up window. Each method is split-test automatically so that you can see which method is more effective.
When you change the marketing text, the offer message can be previewed for desktops and mobile devices on the right-hand side of the page. You can change two headlines, the main body of text and call to action information. Shortcodes allow you to personalise each of these offers so that the don’t appear too generic.
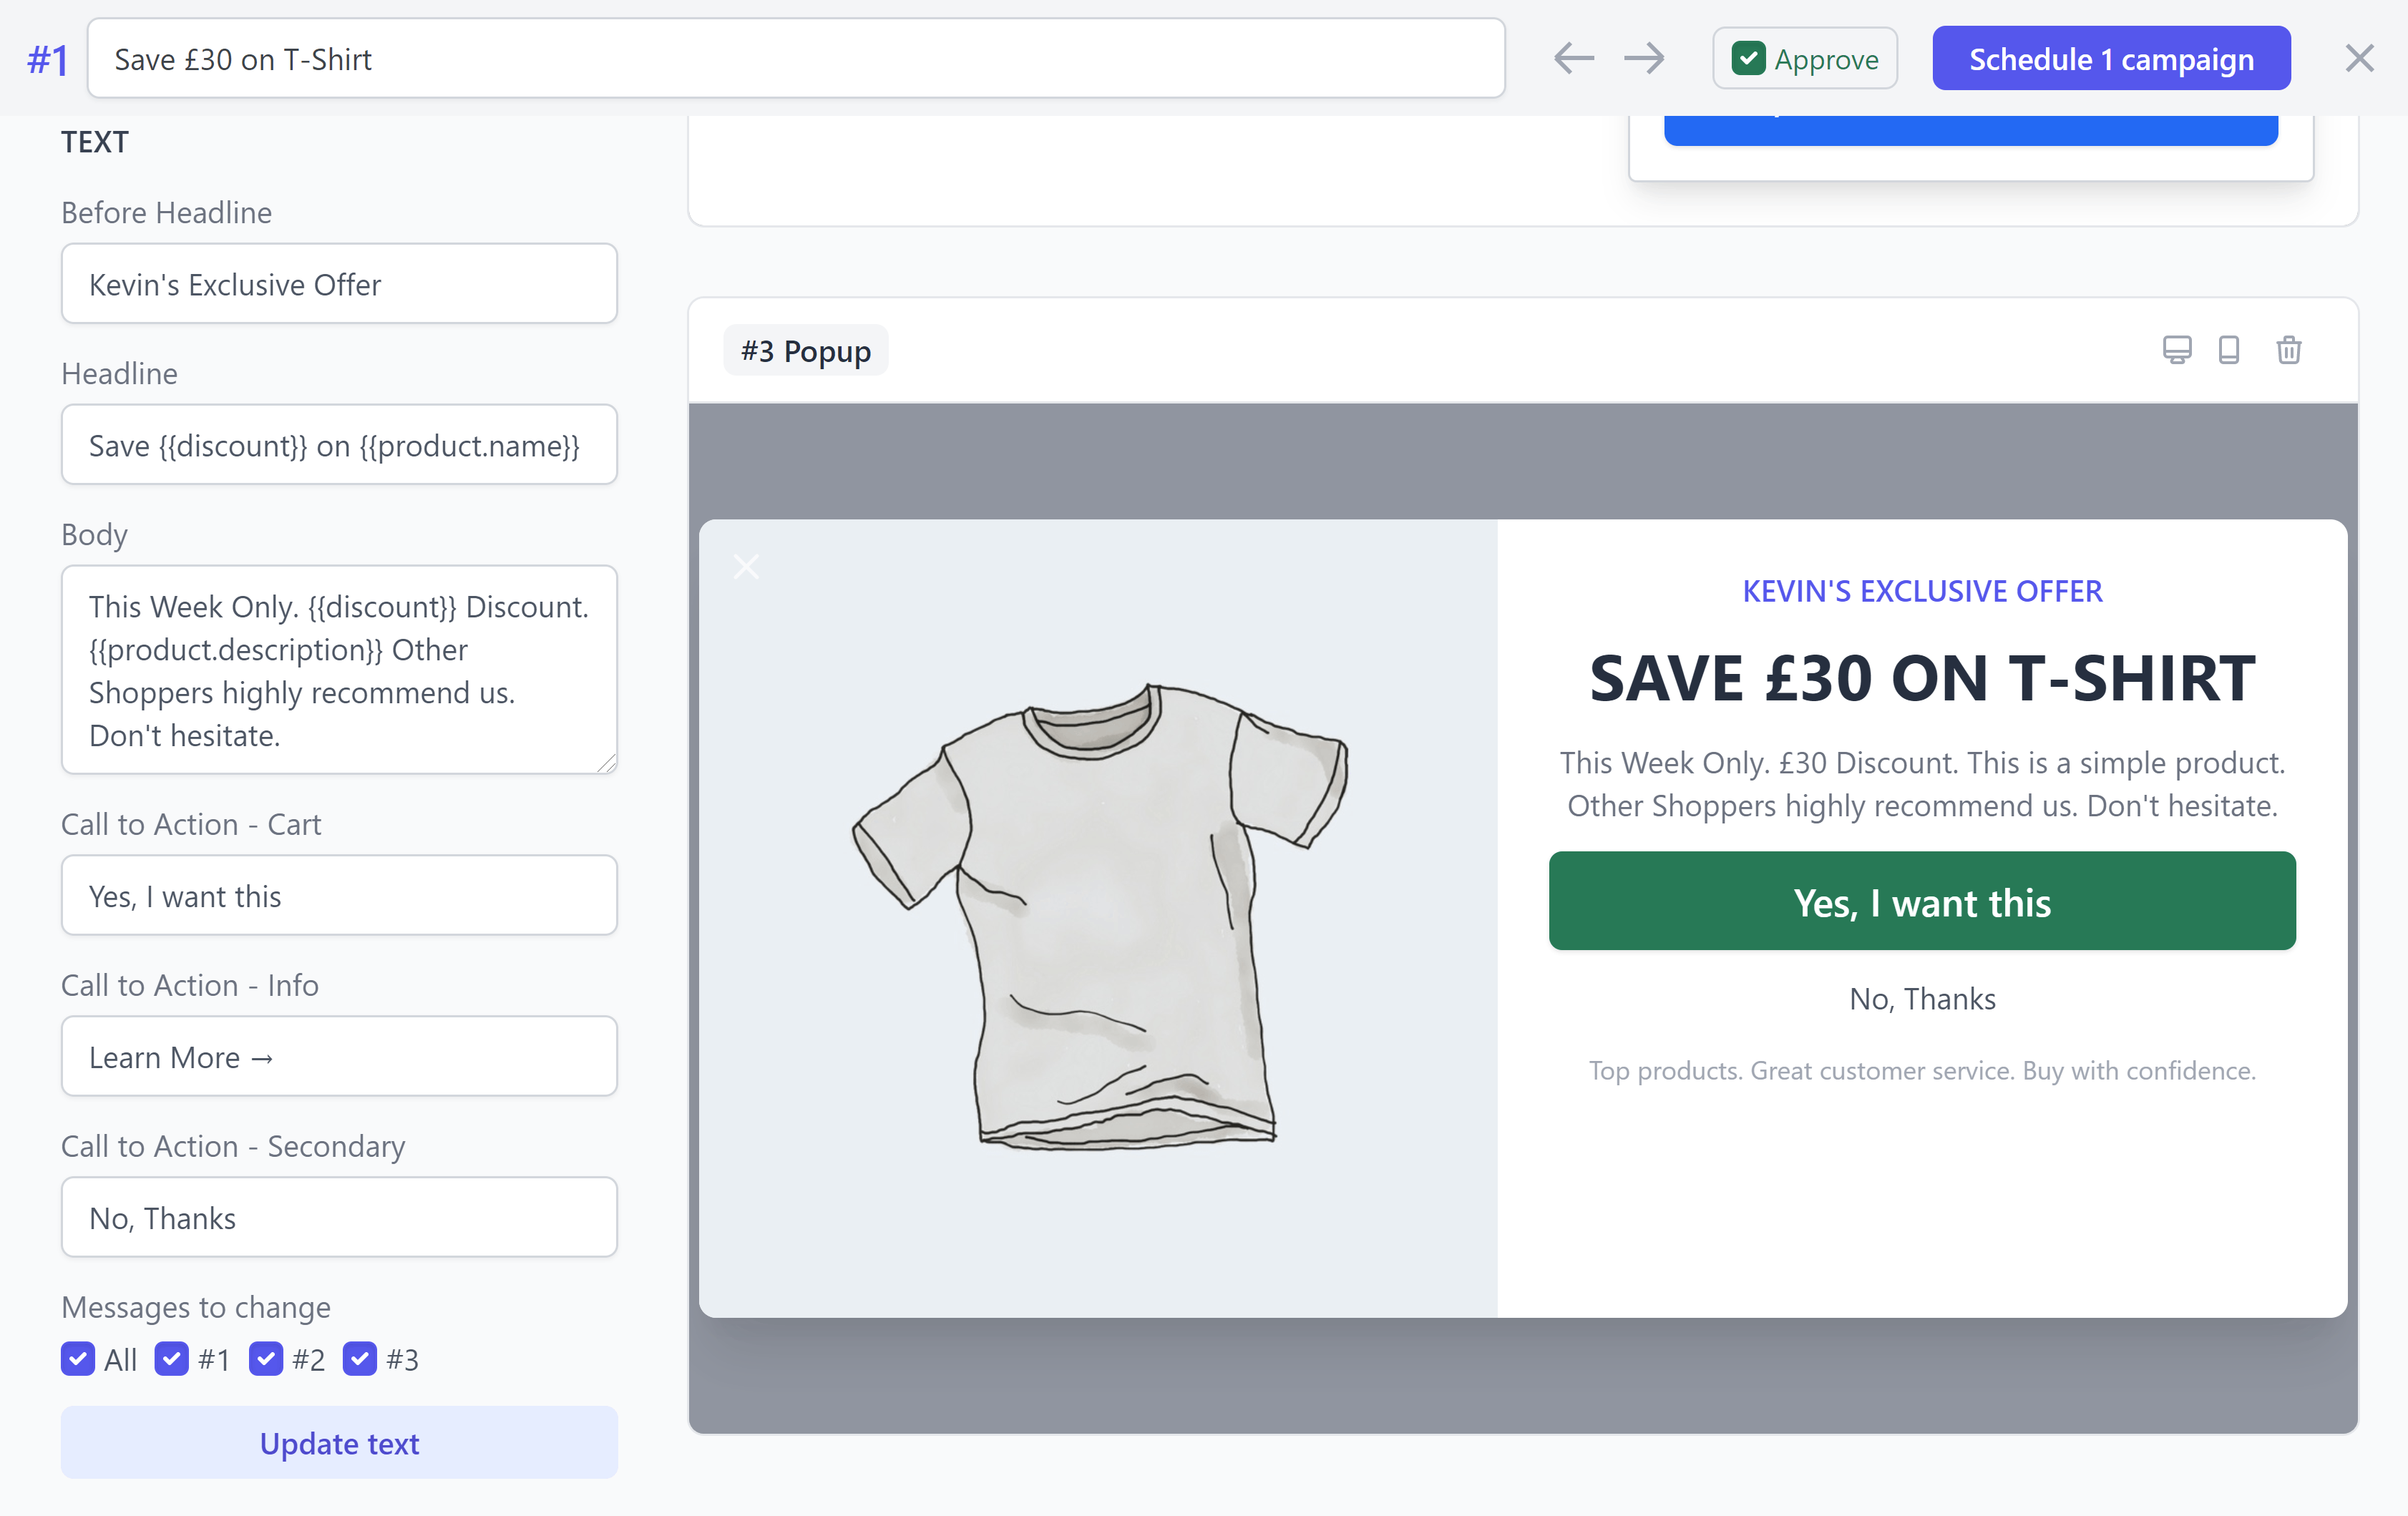
The level of control that Offermative offers is truly incredible. By restricting offers to specific pages or to a customer’s status, you can greatly increase the odds of an offer converting.
I’d love to see the developers expand the marketing side of offers, introducing more ways to display offers and integrate them into your website and shop. Design controls would be welcomed too as at the moment, there is no way to change colours and other styling settings.
Offermative is Free to Use
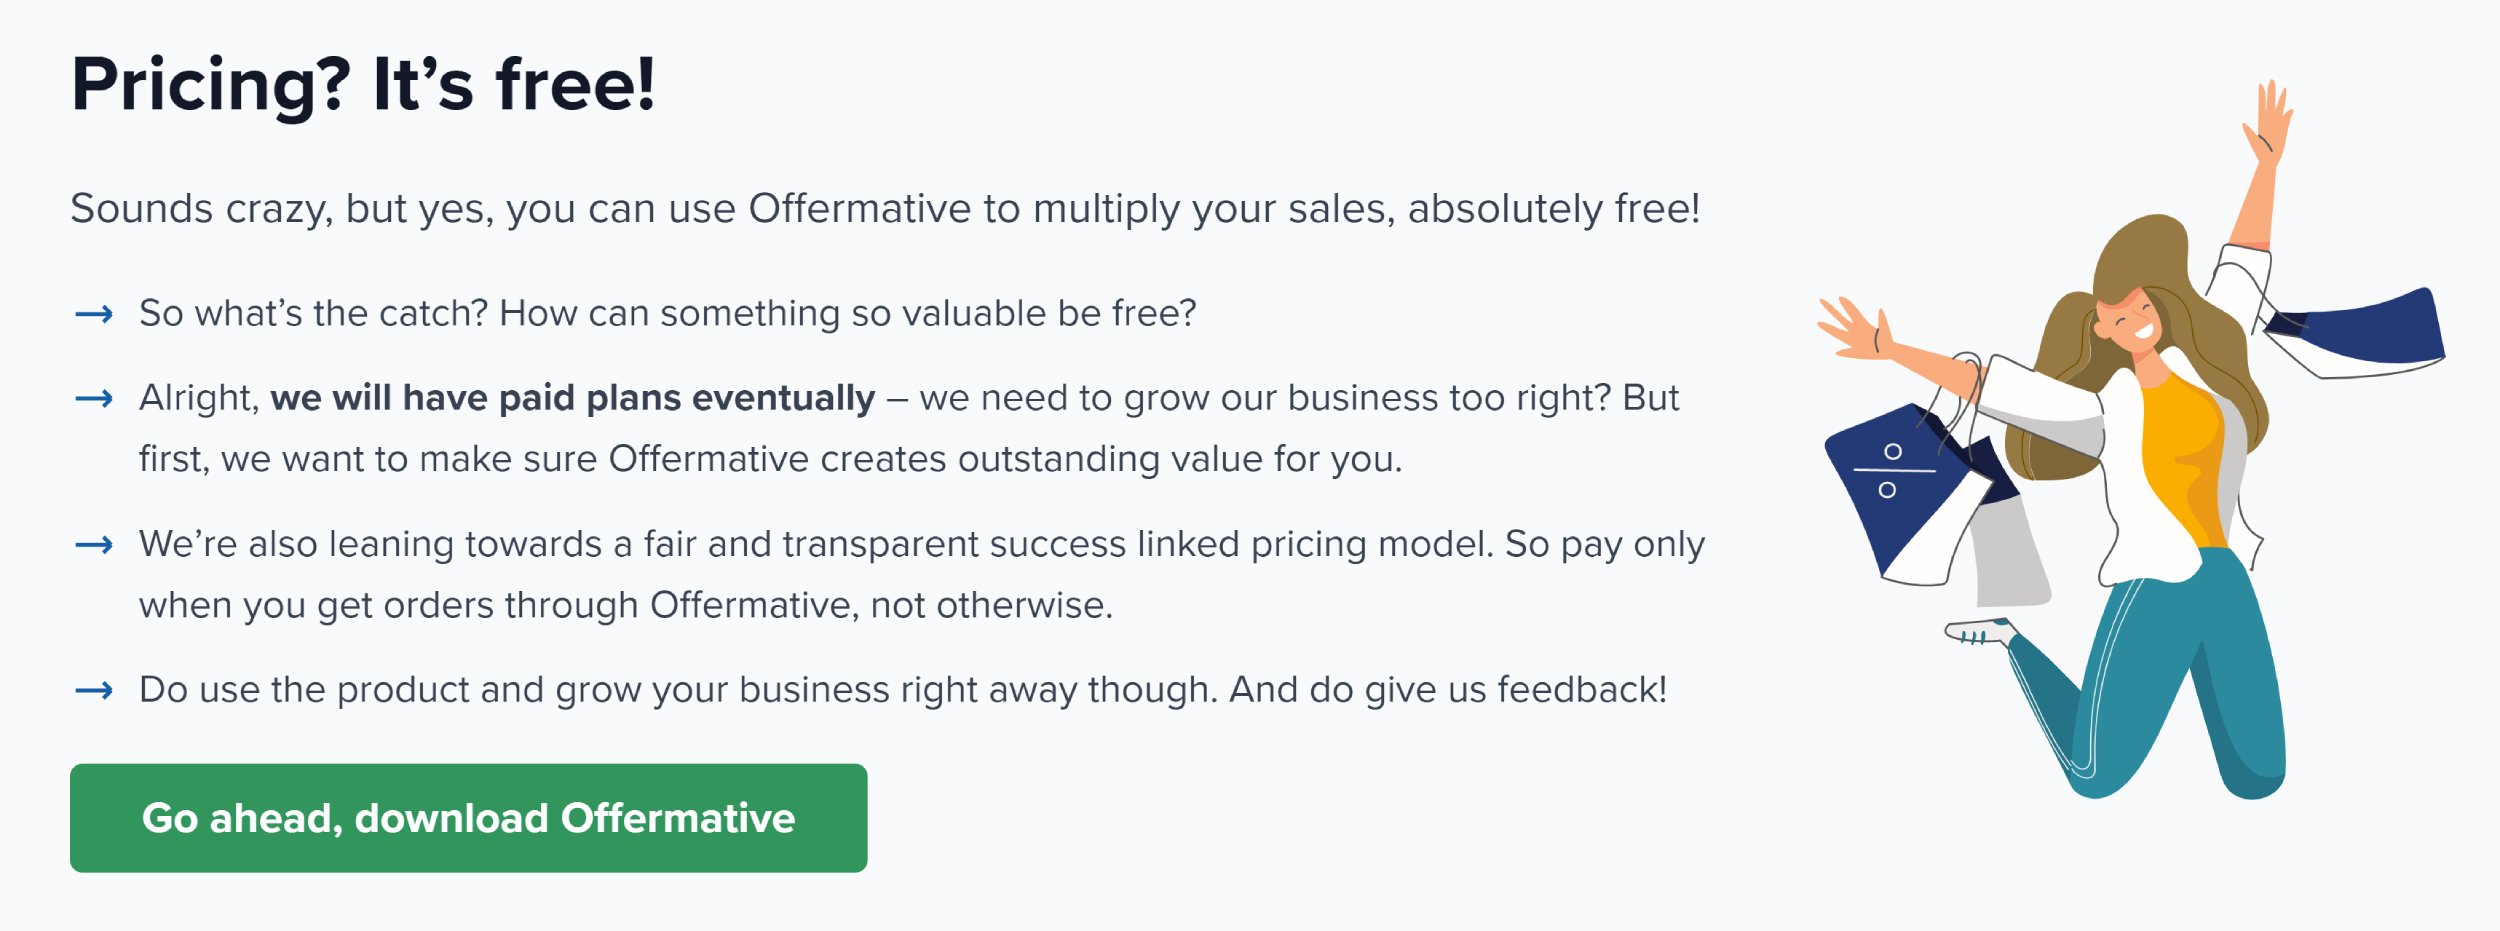
Offermative will be a paid solution in the future, though for the time being the plugin is 100% free to download and use.
The developers have not indicated how much it will cost to use Offermative in the future, but the Offermative pricing page states that you will only pay when orders are actually made through Offermative discounts and offers. This could entice many shop owners to use Offmative as they would only be charged for additional owners that the plugin helped generate.
Final Thoughts
StoreApps has a good track record in the WooCommerce world and it looks like Offermative is going to be a hugely popular solution for them.
It can be used for discounts, product recommendations, product upsells, cross-sells and more. Free gifts can be offered to customers too and you can increase or decrease the discount offered based upon the value of a customer.
The great thing about Offermative is that the whole process is automated. Beyond defining your conditions and changing your marketing text, the plugin takes care of everything for you. This frees up more time to monitor statistics and conversions.
| Offermative Pros | Offermative Cons |
|---|---|
| Powerful sales funnel that supports many conditions for displaying offers | Lacks advanced design and styling controls |
| New campaigns can be created in under a minute | Campaigns are generated on third-party servers together with campaign conversion stats |
| Free to download (At this time) |
I never encountered any errors or problems when using Offermative, but the fact the plugin is free to download is a reminder that it’s still relatively new. I’m keen to see how the plugin develops in the future and which new features are introduced.
To see what the plugin can do, I encourage you to visit the official Offermative website and test the plugin yourself.
Good luck.
Kevin

