- 1. List Builder - Increase Email Subscriptions with a Lightbox Popover
- 2. Scroll Box - Collect More Interested Leads
- 3. Smart Bar - Customizable Email Collection Bar
- 4. Leads - Get More Leads and Send a Them a Custom PDF
- 5. Share - Let Users Easily Share Your Content
- 6. Image Sharer - Get More Image Shares on Social Media
- 7. Highlighter - Increase Your Content Sharing on Facebook and Twitter
- 8. Content Analytics - Find out Which Content Is More Attractive to Your Users
- 9. Heat Maps - See Where Your Users Are Clicking
- 10. Contact Form - Encourage Visitor Feedback with a Custom Contact Form
Wordpress blogs are a growing market and Wordpress plugins aren’t far behind. Google results paint the same picture, as “wordpress plugins” has 38 million results. But what people like you and me are most interested in is growing that blog – 50 million results for that type of search. Thankfully, the market is full of different types of plugins (or little Wordpress helpers) to increase your traffic and your leads.
SumoMe is a a product dear to my heart, as it’s associated with one of my favorite blogs online – OkDork. The person behind it, Noah Kagan, worked at Facebook and Mint and finally decided he wanted to create something for himself. So he built AppSumo, which works like a Groupon for entrepreneur deals (apps, courses, bundles at great prices). His latest product is a collection of simple to use Wordpress plugins to grow your blog. The interesting part in how they’re downloaded is that they have their own app store. Yes, an app store within a plugin for Wordpress. Noah doesn’t like to do things the regular way and I respect him even more for that.
Once you install the main app, you open it and head into the Sumo Store where you have access to the 10 plugins you can install. Most are free, but some offer a trial or paid addons on top of the basic functionality.
1. List Builder – Increase Email Subscriptions with a Lightbox Popover
The beauty of this plugin starts with its price. I can’t overemphasize this enough: it’s free. Remember when Yahoo and Hotmail had paid plans for higher storage for your email? And then Gmail came along with free gigabytes of email? This is exactly how this feels: there are other Wordpress popup plugins out there, but this one makes it a great choice to start with. It’s customizable in both design and behavior.

Even though the other 7 styles are $6 each, the basic free template allows for HTML code, so it’s easy to play with. You can have the popup redirect the user to a URL once he’s subscribed, you can embed an email subscription form from another service and even integrate it with email marketing systems like MailChimp, AWeber and Infusionsoft (there are currently 9 supported systems).

One of the most important features is the display mode. Do you want the popup to appear 5 seconds after the visitor has entered a specific page? You can do that. Do you want to hide the popup from certain pages? Can do. Last, but not least, there’s the Smart Display Mode. This makes the popup appear at the right time – different for each user. Be it when they’re about to exit a page or when they’re most interested in a specific piece of content on your blog.
All the emails are saved internally in a .CSV file that you can then import into your favorite email app. Or you can connect it directly to the email marketing system, so all the subscribers automatically appear in your custom list. You’re now one step closer to email automation!
2. Scroll Box – Collect More Interested Leads
If you prefer a more subtle way of collecting emails from interested leads, then Scroll Box might be just what you’re looking for. The way this plugin works is that it only triggers when the user has scrolled to a certain percent of the page. It’s definitely not perfect, as it’s just a way to gauge interest and intention. If you set the plugin to only show (slide in from the bottom or the side) when the visitor has read 70% of the article, you could say he’s interested in it. But then again, he might just quickly scroll through the article, looking for a specific piece of information.

There are no templates included with this plugin, but the customization is top notch – size, color for both the background and the button. The behavior tab allows you to control when the scroll box actually shows. You can even set it to not bother the same visitor more that a certain amount of times. It’s, as they say, “a polite way to get more email signups”.
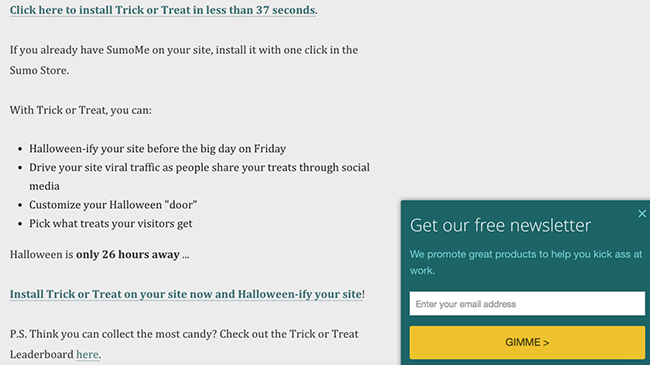
All the plugins come with stats and it’s true for this one as well. You get to see how many times the box has been shown, how many subscribers it has brought you and the final conversion rate. Really easy to understand and pretty much nothing to configure. Just like with List Builder, you can have it save the emails in a .CSV file or directly import them in your email marketing system of choice.
3. Smart Bar – Customizable Email Collection Bar
You might have seen this around as the HelloBar or the ViperBar. The functionality is similar – you use the bar on top of your Wordpress blog to collect email addresses. But the features don’t end here: there are 4 different modes for your Smart Bar.

Email Collect is the basic one that you might have seen and used before. The second mode is called Call To Action Button. So instead of inputting an email address, the user only has to click the button to get to the desired content.
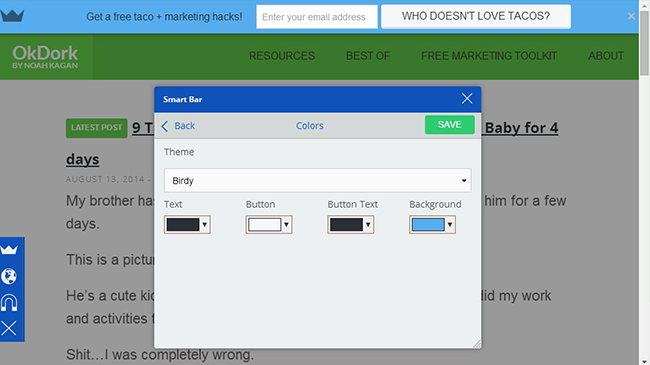
The last two modes help you get more fans and followers – Twitter Follow and Facebook Like Buttons. You setup your usernames and you’re off! The great thing is that the visitor is not sent elsewhere – the follow and like actions happen in a popup, so he’s still technically on your website. One downside is that all these modes work separately. You can’t have someone join your email newsletter and also like your page, on the same bar.
Regarding the Smart Bar behavior, you can have it always on top, scroll with the page or show on scroll up. Because it’s meant to be a great experience for users, there’s a small X in the top right, letting them know they can close the bar, if they see fit.
4. Leads – Get More Leads and Send a Them a Custom PDF
This is where you start seeing great products come to life. Leads has two elements that work together: a call to action button that you can visually place anywhere on your Wordpress blog and a bonus given to the user.

The bonus can be in the form of a custom URL, an email collection form, a generic PDF or a checklist PDF. The last two are especially interesting, since they’re generated by the plugin itself. No need to go into Photoshop or Canva – just use Leads. The PDF design itself isn’t amazing, but it’s generated very fast and it’s stored on SumoMe’s servers. This is one of the reasons that Leads is a paid plugin – $100 a year. There is a 7 day trial, in case you’re curious how it works and you want to give it a try.
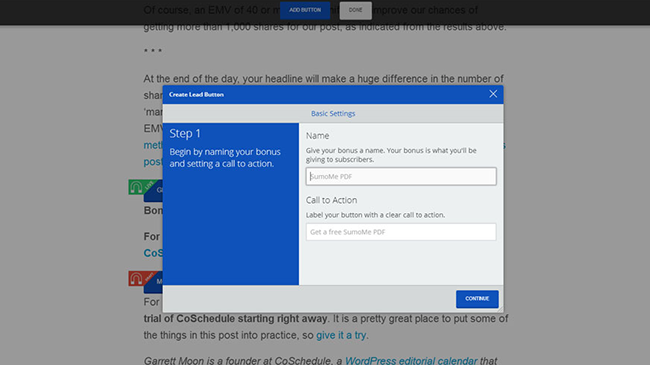
Right now the price seems a bit high, but depending on how you use the plugin, it might prove worthwhile. Imagine a situation where you write a how-to article and you gather all the steps in Leads and let it generate a PDF. Then ask users for their email address, in order to download the checklist. Win-win situation!
5. Share – Let Users Easily Share Your Content
Share is a basic social media plugin, but the back-end provides more details. You get to see what shares worked the best (facebook, twitter, pinterest etc.), when they happened and what content proved most popular.

Some notable features:
- You get to place your share buttons in a visual manner, by simply picking sections on your blog (as shown below)
- The share button order can be manually assigned or chosen by the plugin to maximize shares
- The available services include: Facebook, Twitter, Pinterest, Tumblr, Buffer and Pocket
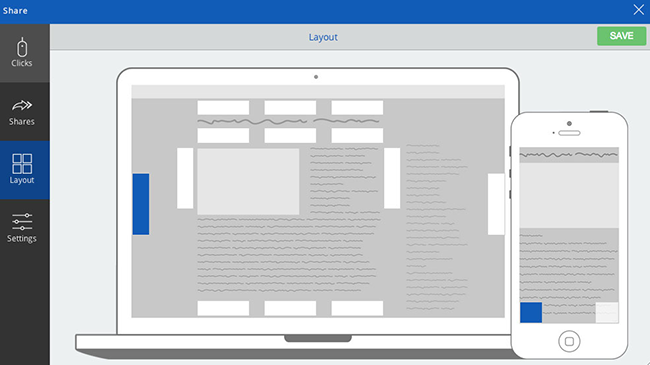
What I also enjoy about this particular plugin is the visual interface, where all your shares are broken down by day and by service. It’s very useful when you’re low on time and just want to have a quick look at how your content was shared online.
6. Image Sharer – Get More Image Shares on Social Media
Content is king, so why shouldn’t your images get more attention on social media? Image Sharer does just that, by adding share buttons on each image on your blog. That’s right: ON the image itself. When a user hovers over the image, the buttons show up and you’d better be ready for your content to go viral!

It’s hard work to manually add tags or configure specific scripts or plugins to allow for image sharing. This just works like a charm – imagine the power of having this installed on that article with the embedded infographic you worked so hard to create.
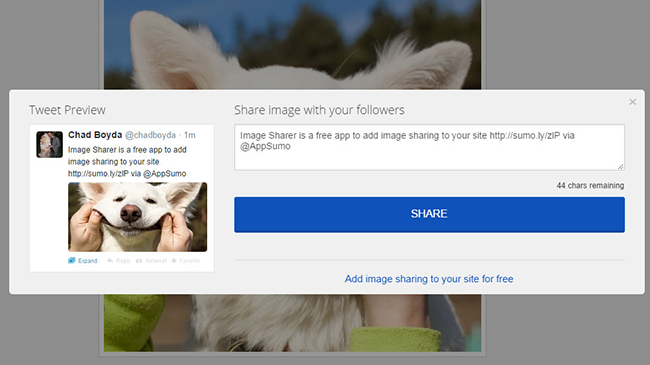
The options aren’t as robust as for other plugins. You get to choose where the buttons are positioned on the images, whether or not you want to use the sumo.ly URL shortener and a few other basic options. This is something that permeates throughout all the plugins: simplicity, focus and power. This is not a plugin for someone who enjoys setting up scripts or modifying source codes. It’s for the average marketer or small business owner, with little time to invest in such things.
7. Highlighter – Increase Your Content Sharing on Facebook and Twitter
Put Image Sharer and Highlighter together and you’ve got an amazing sharing duo. While the first one focuses on images, the second is for text only. Simply highlight text and you get a box asking you where you want to share that piece of text – facebook or twitter.

The great thing about this plugin is that the highlighted text remains marked for all visitors to see. That way, popular sections of content will always be visible and continue to be shared, thanks to Highlighter.
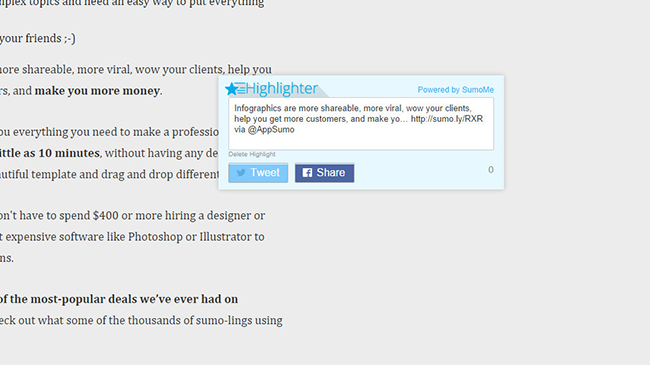
Don’t expect options here – all you have is a checkbox for URL shortening and a field to write your twitter username. Very barebones in terms of customization, but we might see new features or themes in the future.
8. Content Analytics – Find out Which Content Is More Attractive to Your Users
Knowing when users exit your website is great. But finding out how much of your content is actually consumed – that’s something valuable. Content Analytics works as a scroll heat map, allowing you to understand if a part of your article becomes boring or unclear to the reader. It helps you position the right call to action button, before the user decides to leave the page.

The plugin doesn’t just work as a heat map – it’s smarter than that. It identifies only your post/article section and overlays the heat map on top of that. This is helpful because you might think someone read your entire article just because scrolling stats told you so. When in fact that user might’ve just been scrolling to comment on the post, without reading all of it.

Content Analytics records the users’ behaviors and gives you percentages regarding content consumption. It gives you the option of having multiple campaigns active, monitoring specific categories or articles on your blog.
9. Heat Maps – See Where Your Users Are Clicking
Rounding off the Analytics package is the Heat Maps plugin. This helps you understand what your users are clicking on, in real time. You get unlimited heat map campaigns and there’s no traffic limit. Similar products cost tens and even hundreds of dollars a month, so having this for free is nothing short of amazing.

Heat Maps (like all other SumoMe plugins) is a breeze to install, requiring only a few clicks. The initial setup is very straightforward: navigate to the page where you want to start recording clicks and select the Heat Maps icon in the SumoMe sidebar. You’ll get asked if you want to start recording clicks from visitors. You select yes and you’re on your way!

Having such a tool available gives you insight into how your users behave on your website. Were they expecting that text to be clickable? Was one call to action button more powerful than another? You can now find out. Make sure you go into the options menu and select “No, don’t track clicks from users logged in to SumoMe”, so that your clicks don’t interfere with visitor statistics.
10. Contact Form – Encourage Visitor Feedback with a Custom Contact Form
This is another plugin that offers paid extras. The basic design template is free, the other 5 are $6 each. You can customize it using any colors you want, to match the visual profile of your website or blog. Furthermore, the success text allows some basic HTML for you to play with.

Placing the Contact Form button is done using the now standard visual editor. One click and you’ve added the button. Another click and it’s been removed. If you want to, you can have the button placed in multiple locations – in the header, the footer and at the end of each article.
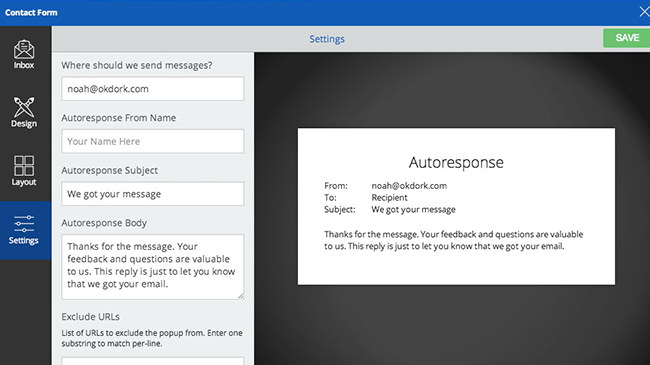
Another great feature is Autoresponse. Each time someone contacts you through this form, two things happen:
- You get their message in your email inbox (the one you’ve set in the options section)
- The user receives an autoresponse, letting him know his message was successfully sent
This is definitely one plugin I plan to use more in the feature, making myself more available to my users.
All images copyright @ SumoMe.
10 incredibly useful tools, provided free of charge. And the best part? The list of tools and plugins keeps growing. Noah Kagan and his team made it their mission to reach 1 billion users with SumoMe in a year and it’s their only metric they’re focusing on for this product.
Let me hear you in the comments section – are you using SumoMe yet?

