I have been keen on integrating videos from my YouTube channel with this blog. One of the video WordPress plugins I came across that allows me to do this is Video Blogster Pro.
It was not exactly what I was searching for, however I was intrigued by what it can do. The plugin helps you automatically create content from the following video services: YouTube, DailyMotion, Hulu, SoundCloud, and Vimeo.
I created some blogs in the past that were automatically updated using WP Robot so do have some experience in this area. Video Blogster Pro attracted my attention because it can import your video into a new post with the same title, description, author, category, views, ratings, tags, comments, and more.
Before Envato got freaked out by me using the contact forms on CodeCanyon, I contacted the developer of the plugin for a test copy of the plugin and he kindly sent me a demo copy so that I could review it for all of you guys.
I hope you enjoy the review.
Video Blogster Pro
Video Blogster Pro works in the same way as other auto blogging solutions. You need to define your source and decide what information you want displayed on your page.
Most relevant data can be retrieved from YouTube and displayed in a blog post or page.

Video comments can also be imported to your website. This is a good way of making your website more active and encouraging discussion.
Configuring Video Blogster Pro
I found Video Blogster Pro to be very simple to use.
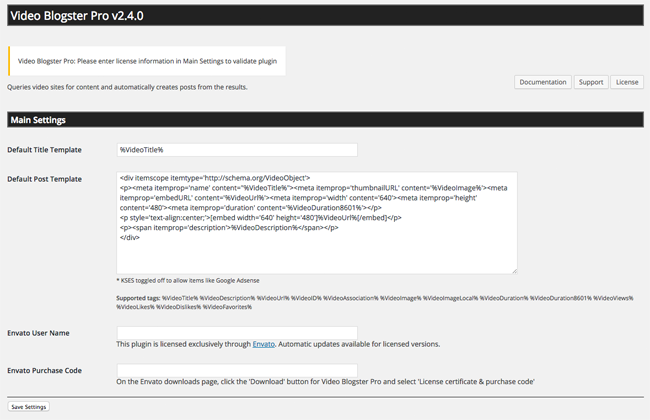
In the main settings area you can modify your blog post template. Most people will be content with the default structure that is used, however there is a long list of tags displayed underneath that show you what content you can add to your post.
You can also add HTML to your post. This allows you to insert additional content, such as a Google Adsense banner.
In this area you can also enter your Envato username and purchase code to validate your purchase. Doing this will allow you to automatically update the plugin through your WordPress admin area.
Thankfully, you can still use the plugin if you do not enter your purchase code. Though this does mean the validation reminder will be displayed on all of the settings pages.
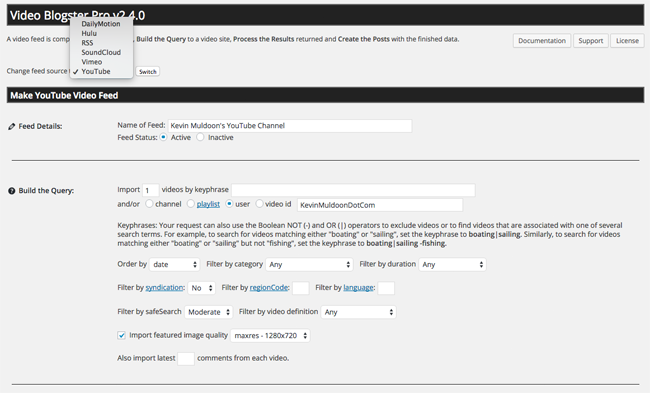
An unlimited number of unique feeds can be created. After choosing your video source, you should name your feed and select whether it is active or not.
The configuration options available will depend on the video source you chose. The screenshots below highlights the options that are displayed when you select YouTube as the source.
In the “Build the Query” section you can define what kind of search is performed for new videos. You can select to import videos from a keyword, channel, playlist, user, or video id.
You can order the query by date, relevance, rating, title, and view count. A number of filters are available too, such as category, duration, and language. You can also define the quality of the featured image that is imported and specify how many comments are retrieved.
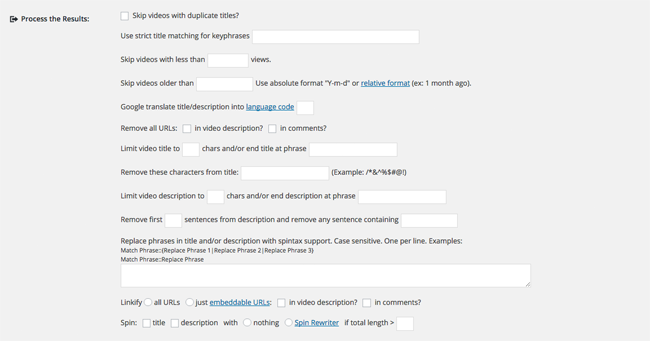
The results of your query can be filtered. There are a lot of great options. You can skip videos that do not have a lot of views and/or skip videos older than a certain date.
URLs can be stripped from the description and from comments. This is useful for making your imported videos look less spammy. Certain characters and words can be removed too. For example, you could remove offensive language.
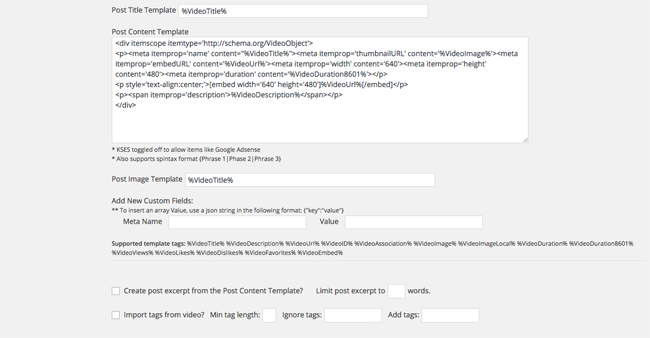
The default post template can be changed on a feed by feed basis. This is very useful as it means you can cater your post template for a particular video source or for a particular type of feed.
Additional tags can be added using custom fields. Tags can also be imported from the video.
Each video can be imported and assigned to a particular user on your website. Whereas other auto blogging solutions limit you to publishing videos as blog posts, Video Blogster Pro lets you publish your video as any blog post type. You can also save the post as any post status (such as draft, pending review etc) and post format (such as gallery, video etc).
Videos can be assigned to any blog post category and be published with today’s date or the date the video was originally published online. The description of the video can also be rewritten using the WordPress plugin WordPress Auto Spinner.

An in-built scheduler lets you query new videos at specific times. For example, every twelve or twenty-four hours.

A log file is available that records important events such as imported videos and debug messages. It’s worth checking if something is not working correctly.

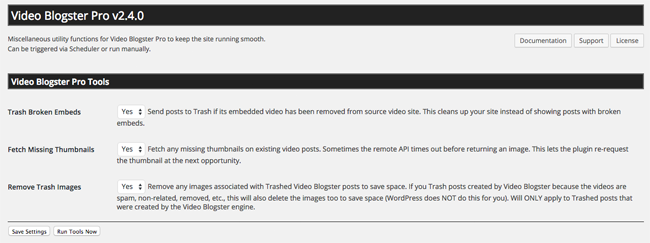
The final settings page is Utility Functions.
Three options are available on this page; all of which are enabled by default.
The first one is trash broken embeds. This lets you automatically delete video pages in which the video has been removed from the video source. Having videos deleted on YouTube was a problem that I had with WP Robot so it is great to see this feature in Video Blogster Pro.
If the plugin finds a blog post without a thumbnail, it can attempt to retrieve the thumbnail again using the fetch missing thumbnails feature.
The last option is to remove trash images. The plugin will check any video pages that had been deleted automatically due to the video being removed. If there are images attached to this trashed post, the plugin will remove them.
Overall I found the plugin very simple to configure and the number of options available in the settings area makes it easy to create the video posts you desire.
Final Thoughts
Video Blogster Pro is available for $22 from CodeCanyon.
I recommend checking it out if you are looking for a way to automatically publish videos online. The plugin could be used to create an automatically generated video website, however you could also use it to import your own videos into your website.
Thanks for reading.
Kevin

