Form plugins are an essential part of every WordPress website. They can be used to create contact forms, order forms, registration forms, login forms, surveys, quizzes, and more.
One of the latest contact form solutions on the market is WS Form Pro. It is a premium form solution that boasts many advanced features such as conditional logic, Google Analytics integration, and an easy to use layout editor.
WS Form Pro also has a versatile action system that can be used to perform tasks as soon as a form is submitted.
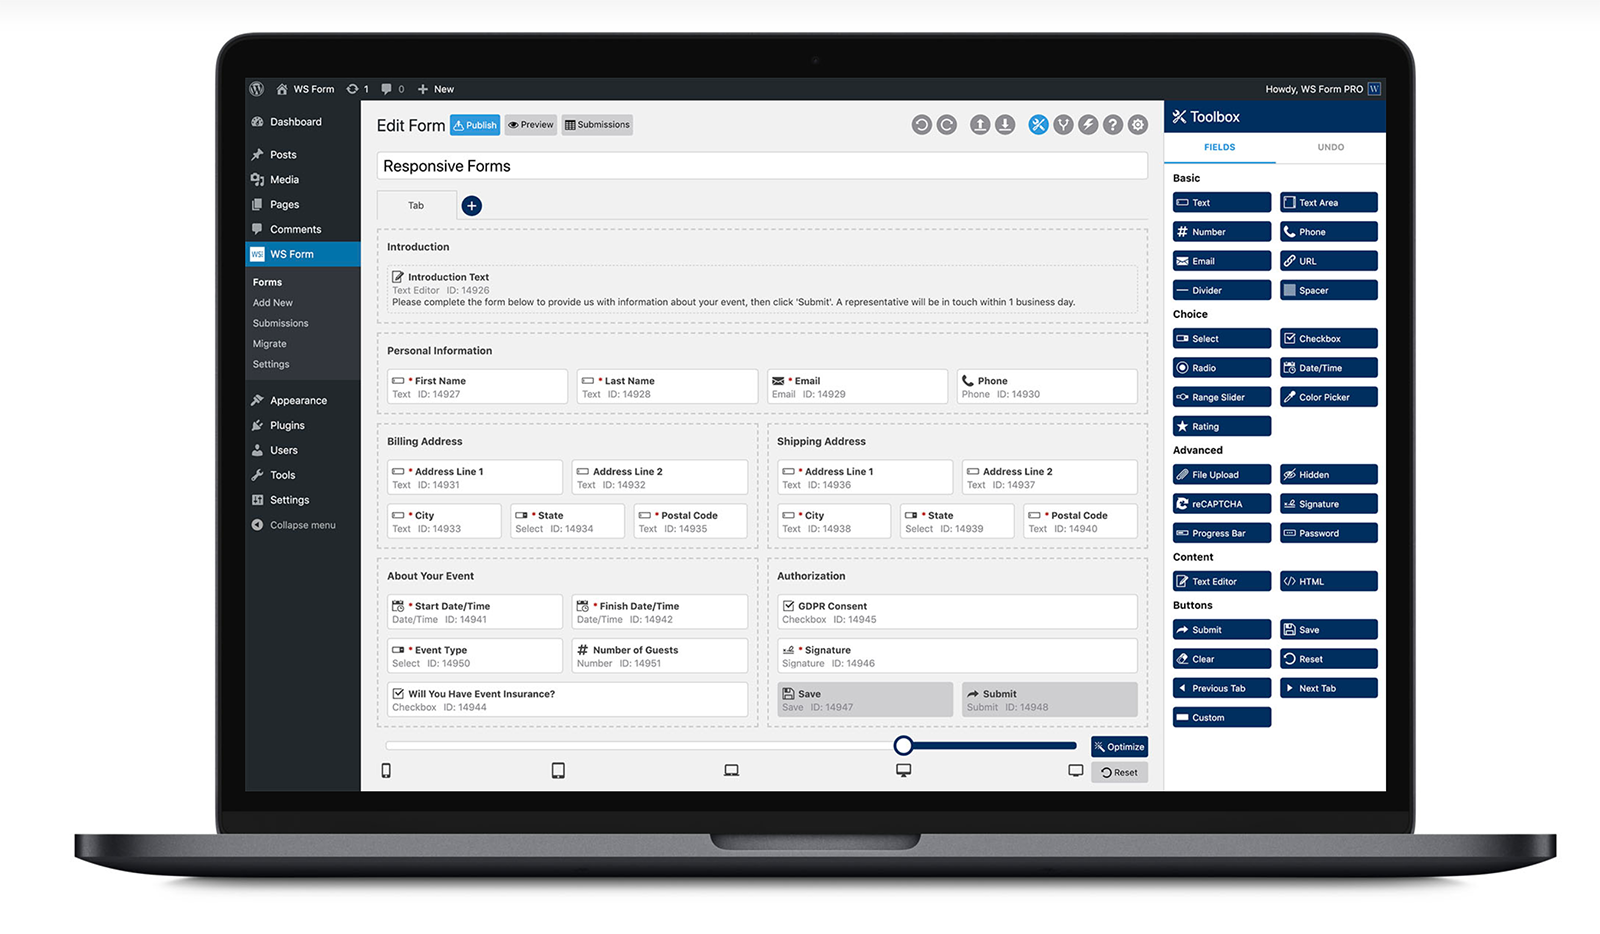
A free version of the plugin is available on WordPress.org, however, in this review I will be focusing exclusively on WS Form Pro. This version has many more advanced features and retails from only $40 per year.
Many thanks to Mark Westguard from Westguard Solutions, who developed WS Form Pro, for setting me up with a demo account so that I could test the plugin thoroughly.
I hope you enjoy the review.
What Can WS Form PRO Do?
WordPress has come a long way from the basic contact form plugins that were available when the platform was first launched. WordPress users now have access to many great free and premium form solutions.
The form plugin market is highly competitive, which means that anyone who does release a new form plugin, has to do something special.
Thankfully, WS Form PRO does just that.
Features such as conditional logic, file uploads, signatures, and Google Analytics integration, are frequently only provided in the more expensive licenses of premium contact forms. Yet all these features are included in the standard $40 per year license for WS Form PRO.
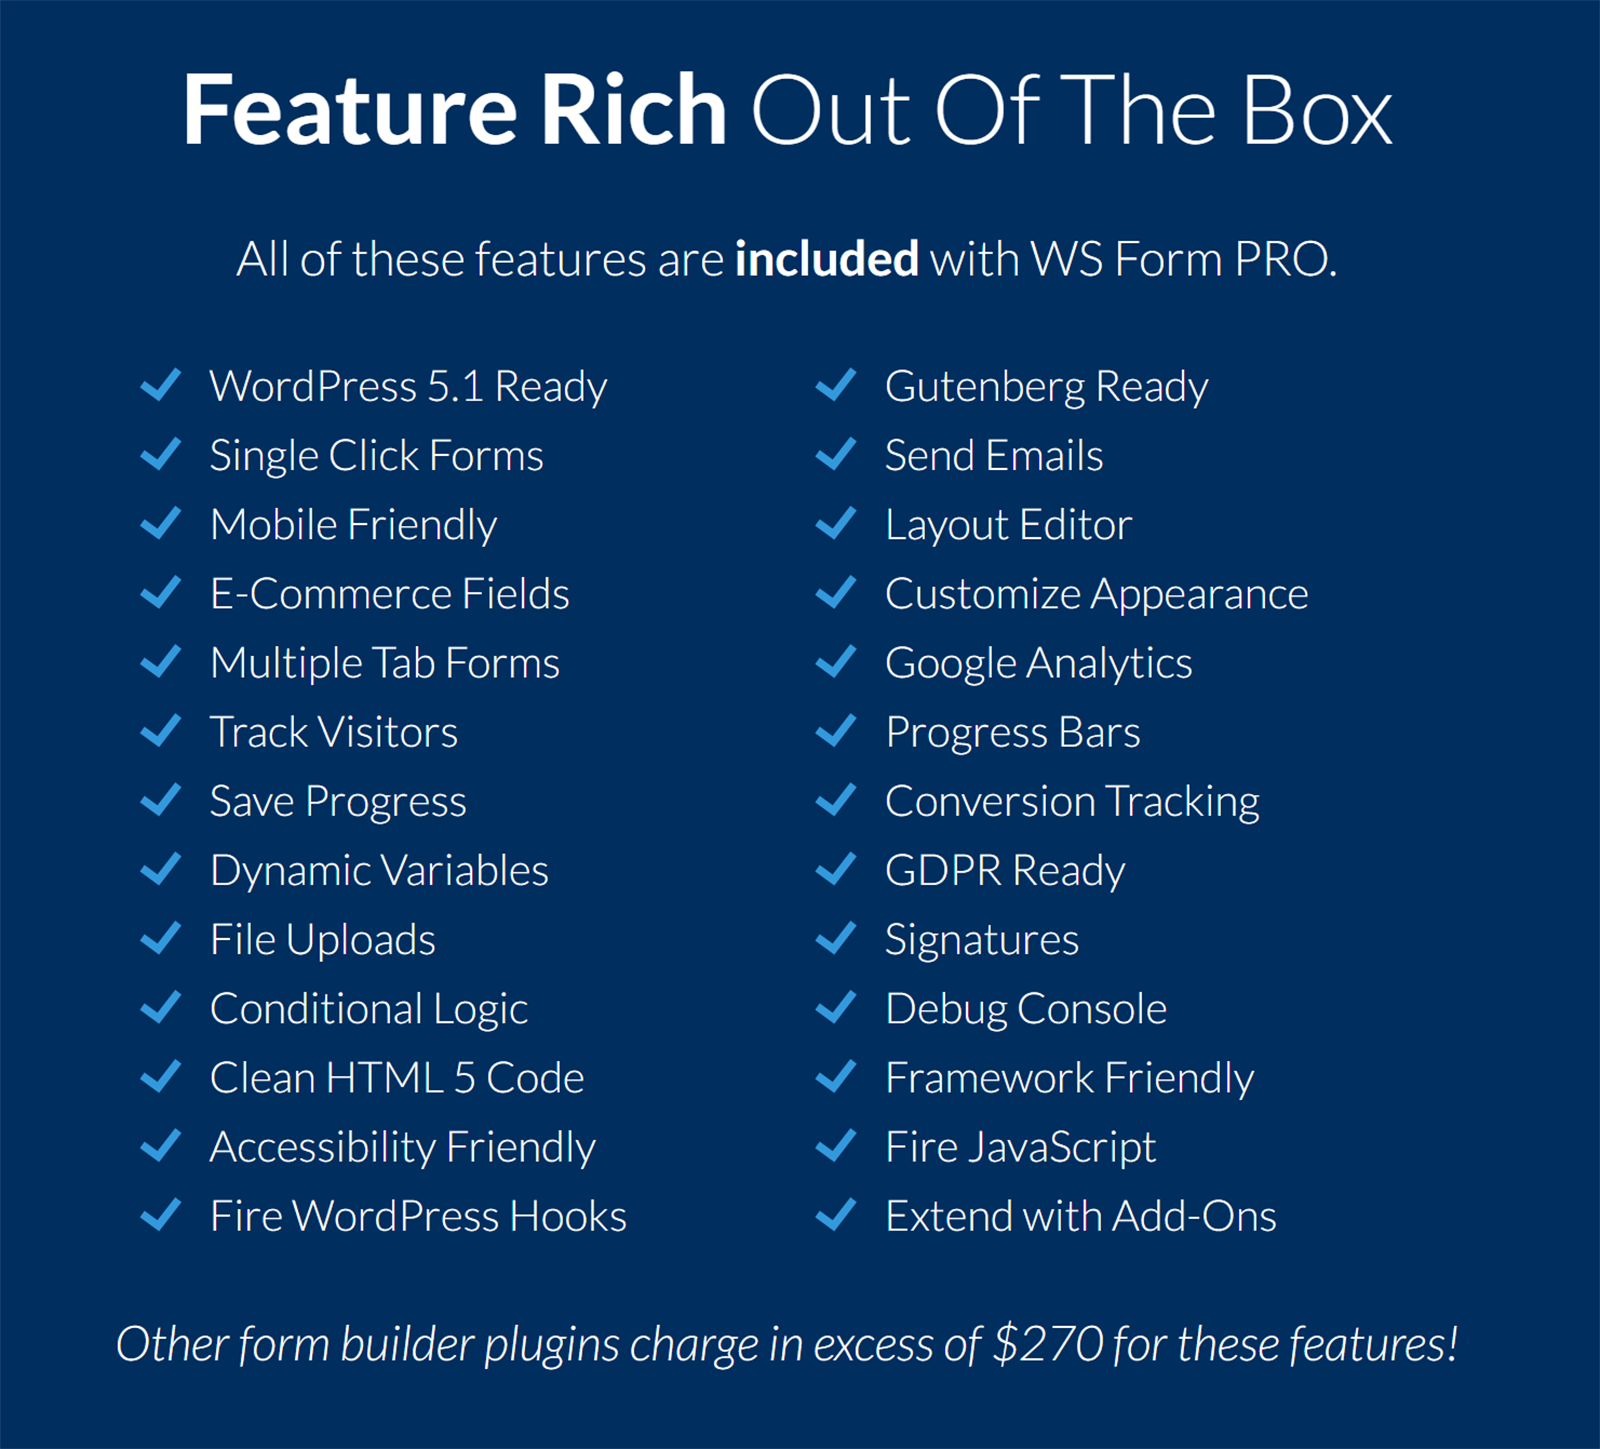
Conditional logic is one of the coolest features of WS Form PRO. It makes your form dynamic by saying “If the user enters this data, do A, B or C”.
It can be used to populate fields automatically, validate messages, process actions, and more.
For example, you could build a form for an eCommerce store that asks whether a customer’s enquiry is related to an order. If the user states that they are contacting you regarding an order, you could display an additional field asking for the order ID and a further field asking if they would like to return the item.
WS Form PRO allows you to easily create beautiful responsive forms using a drag and drop layout editor. There is extensive support for HTML 5 form input types and all fields can be placed into columns and rows.
The plugin works great with Gutenberg too.
Actions let you perform an event whenever a form is saved or submitted. For example, display a message to the user after they submit a form.
The following actions are included in WS Form PRO:
- Send Email
- Save Submissions
- Conversion Tracking
- Show Message
- Redirect to a Page
- Spam Check with Akismet
- Run WordPress Hook
- Run Javascript
- Data Export Request
- Data Erasure Request
Design agencies will appreciate that WS Form PRO is a developer-friendly WordPress plugin.
The plugin offers a dedicated debug console for developers that fillms your form with sample data. The debug console will also display log information for activities such as Javascript events and conditional logic runs.
All forms are outputted using clean HTML 5 code.
Interestingly, if your WordPress theme uses Bootstrap or Foundation frameworks, the forms are formatted without any additional CSS. WS Form PRO will use its own framework if no framework is found.
A total of 16 addons are available that expand functionality further. These retail at $20 per year each, however all of these addons are included in the WS Form PRO Agency license.
There are addons to help you integrate email marketing services and checkouts like PayPal and Stripe. The post-management addon is ideal if you want to allow users to submit content.
Let’s delve deeper and show you exactly how WS Form PRO works.
Getting Started
Once WS Form PRO has been activated, you will be presented with a landing page that asks if you would like to get started.

On the next screen, you are asked about your experience with creating forms.

I selected “I’m Familiar” as my experience level and an introduction video was shown to me. I was curious as to whether your choice here was significant so contacted WS Form Pro developer Mark Westguard for clarification.
He advised that if you select “Keep It Simple” or “I’m Familiar”, WS Form Pro will use Basic Mode. If you select “I’m a Developer”, the plugin is put into Advanced Mode.
You can switch between those modes in the plugin settings area at any time; so it does not matter a great deal if you select the wrong option as it can be easily changed later.
I will explain the advanced mode in more detail later in this review when I show you the plugin settings area.
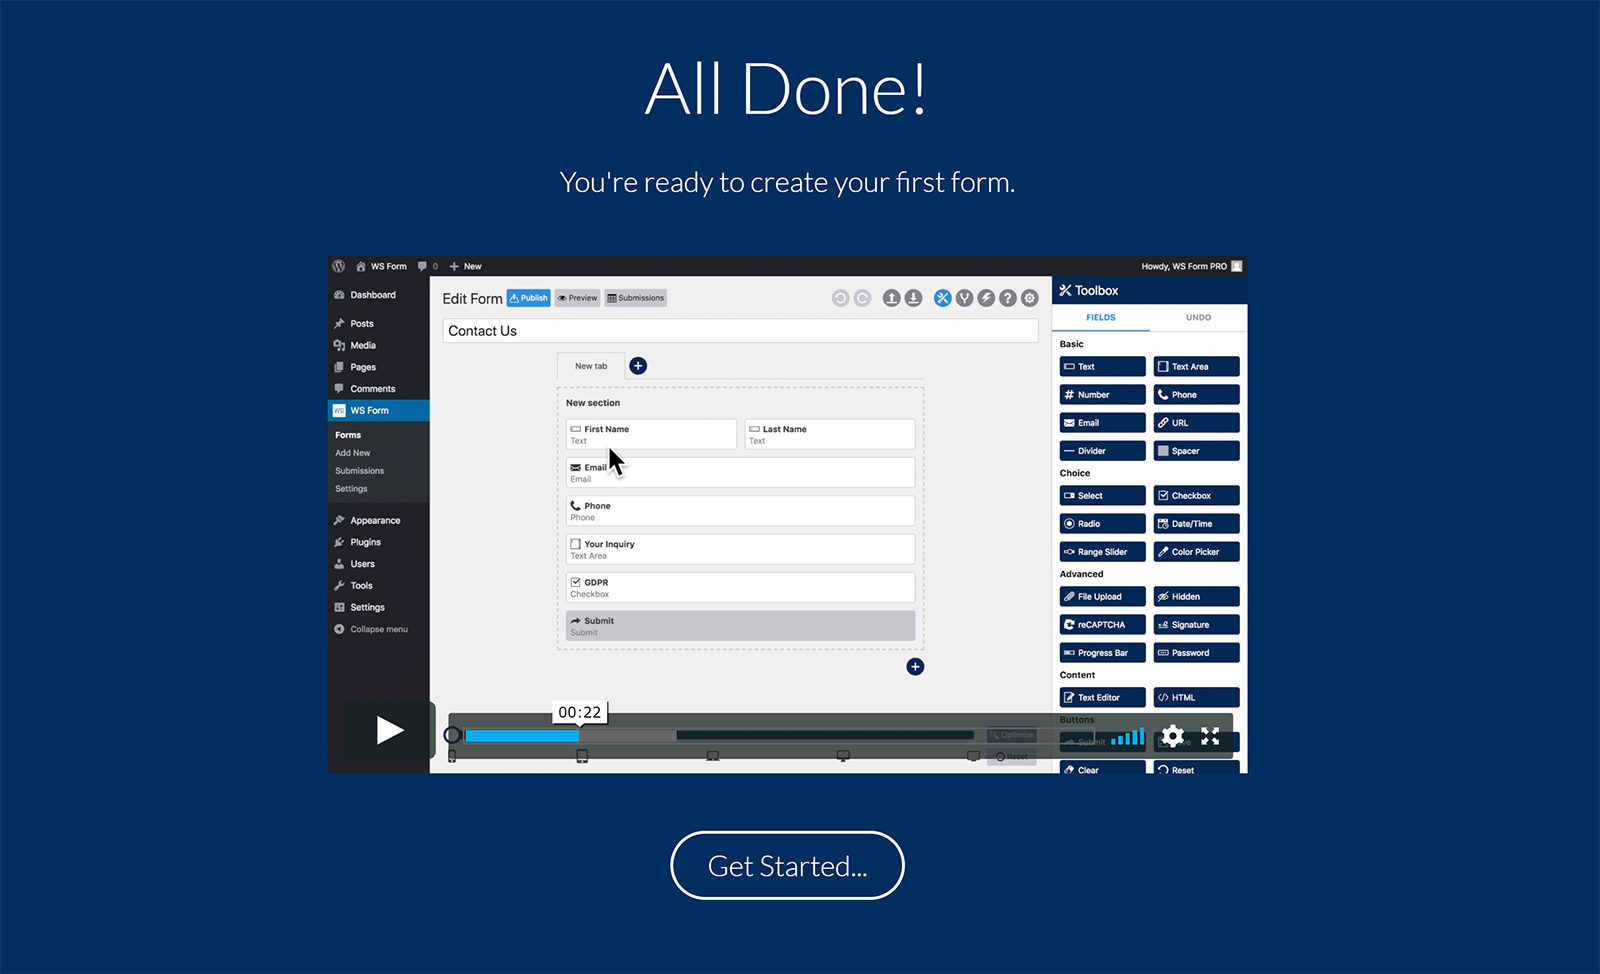
When you click on the “Get Started” button, you will be taken to a page to create a new form. This is where you can create your first form.
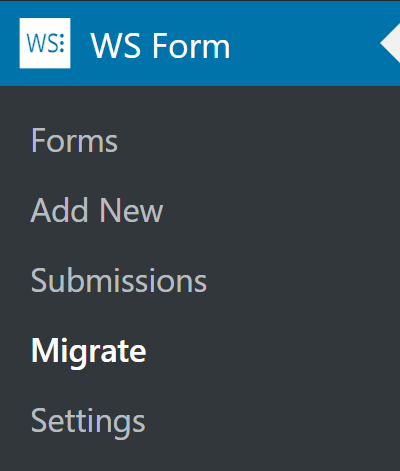
At this point, you may also notice the WS Form PRO menu in your admin menu.
There is a page that lists all your forms, a page to add new forms, a page that lists all your submissions, a page to help you migrate data from your old form plugin, and the plugin settings page.
Let’s move on and look closer at the WS Form PRO layout editor.
Creating a New Form
You can create a new form from a blank canvas, but if you are like me, you will want to use one of the available form templates as a starting point for your form.
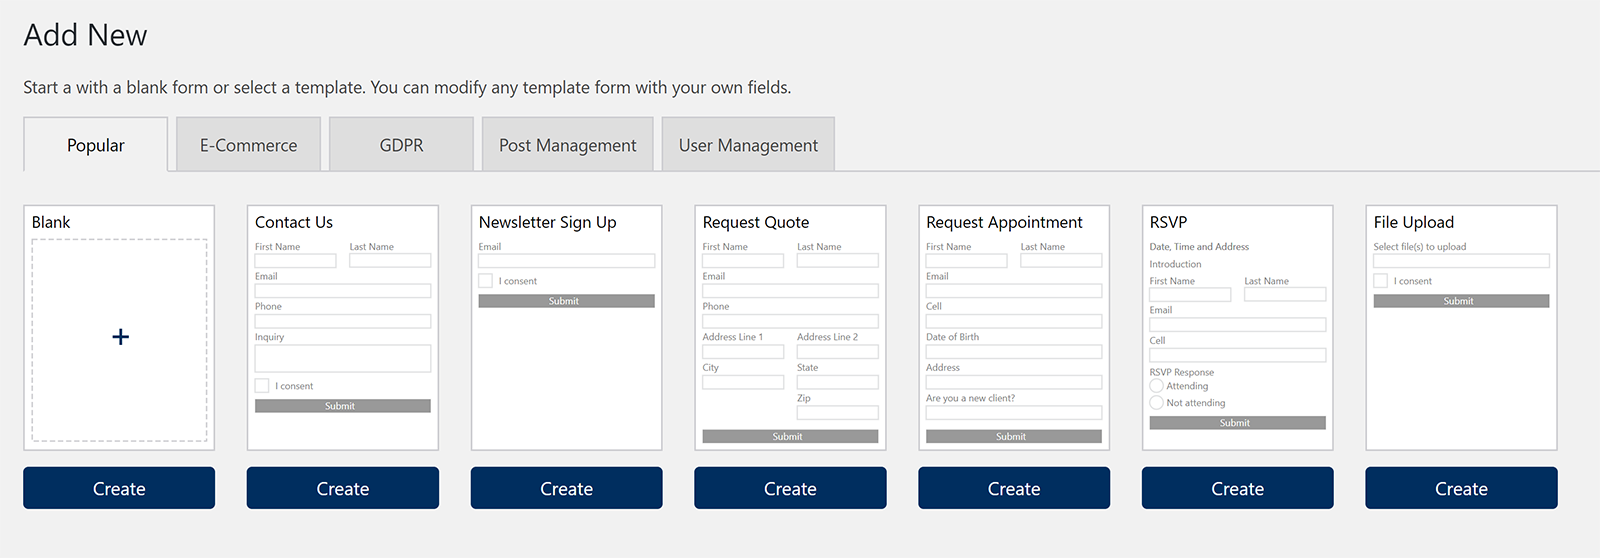
In the popular tab, you can select a standard contact form, newsletter form, file upload, and more. There is also a selection of eCommerce forms and forms for data erasure and data export.
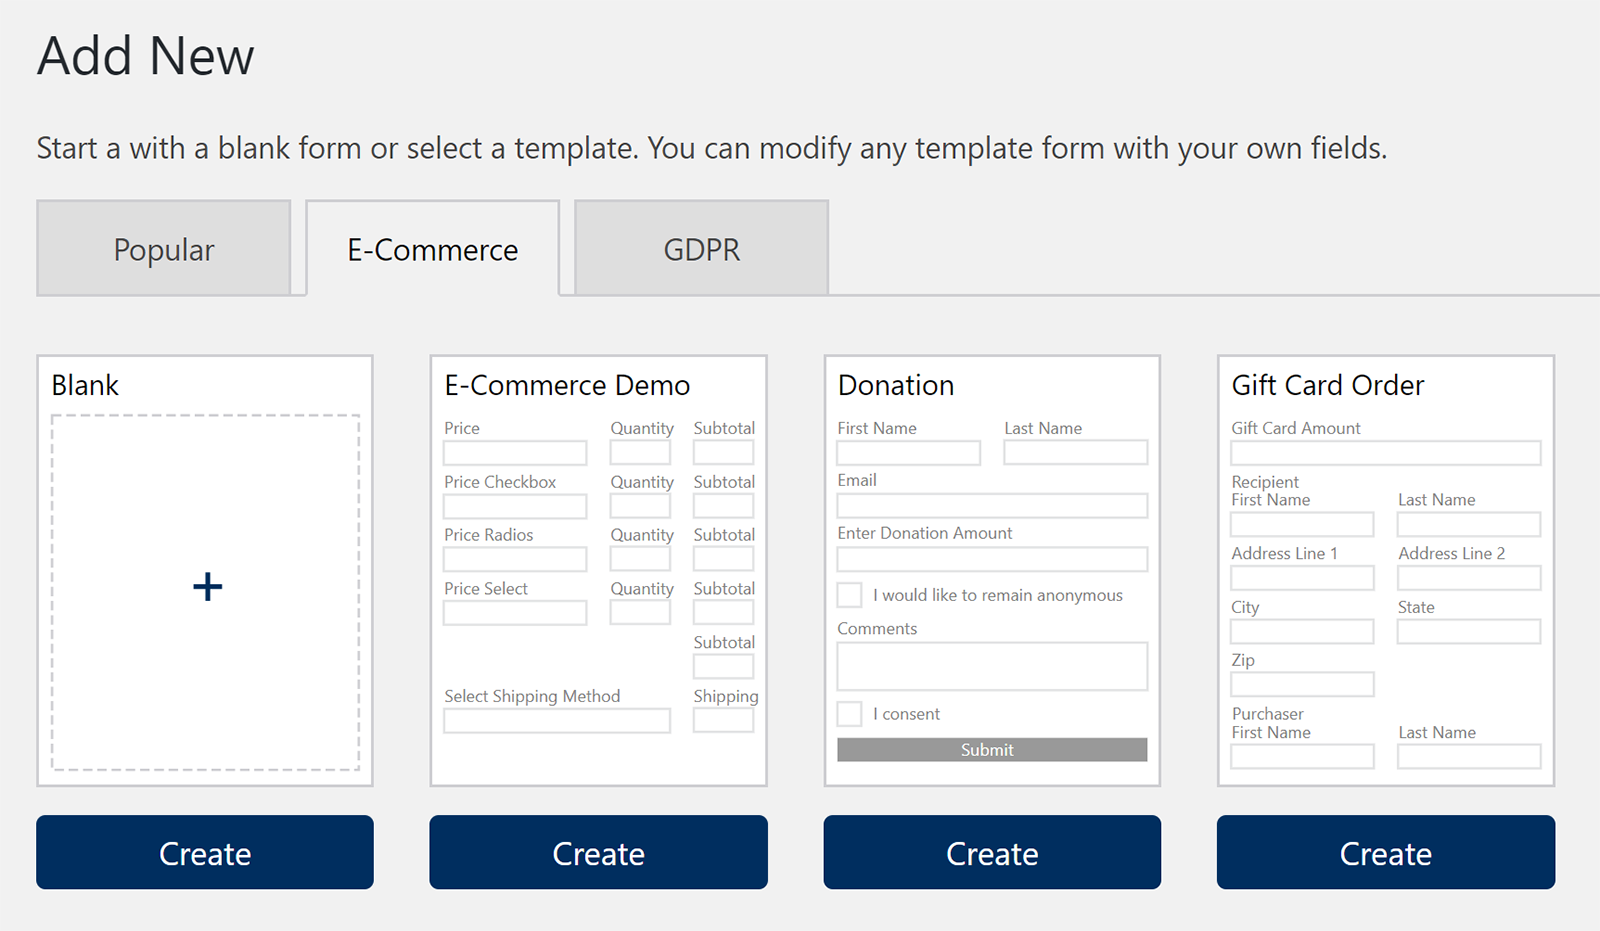
Additional forms are available if you have activated the post management and user management addons.
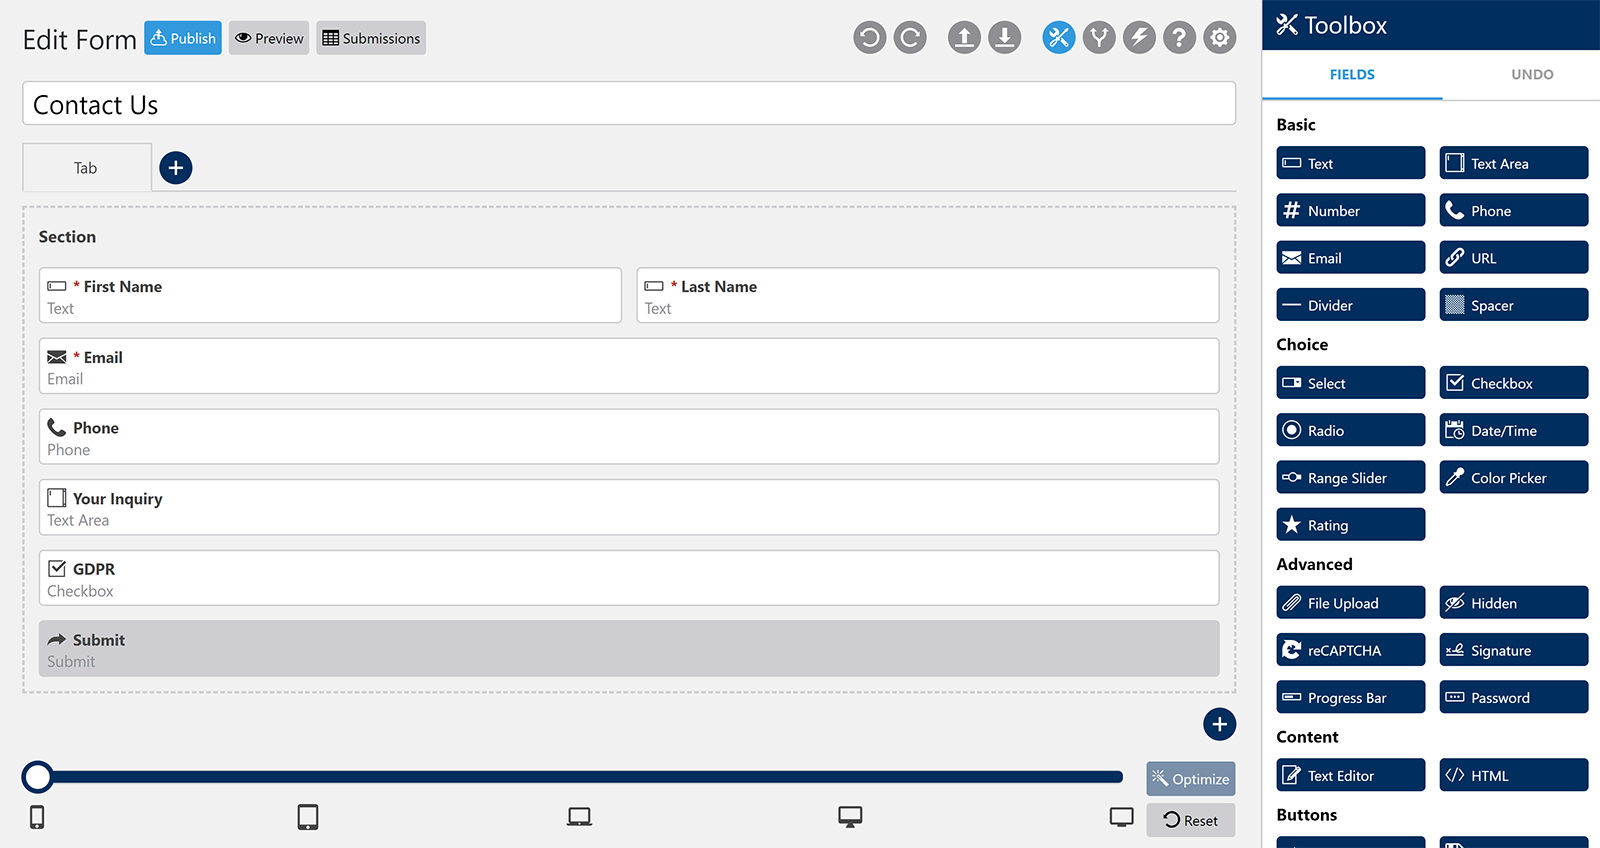
It should not take you long to familiarise yourself with the form layout editor.
At the top of the page are links to publish the form, preview the form, and see all form submissions. To the right-hand side are several icons. The toolbox icon displays all form fields and is selected by default.
There are shortcuts here to undo and redo changes and import and export your form.
To the right of the toolbox icon are icons for conditional logic, actions, support, and settings. When you click on one of these icons, the toolbox icon box at the right-hand side of the page will show the relevant settings for that feature.
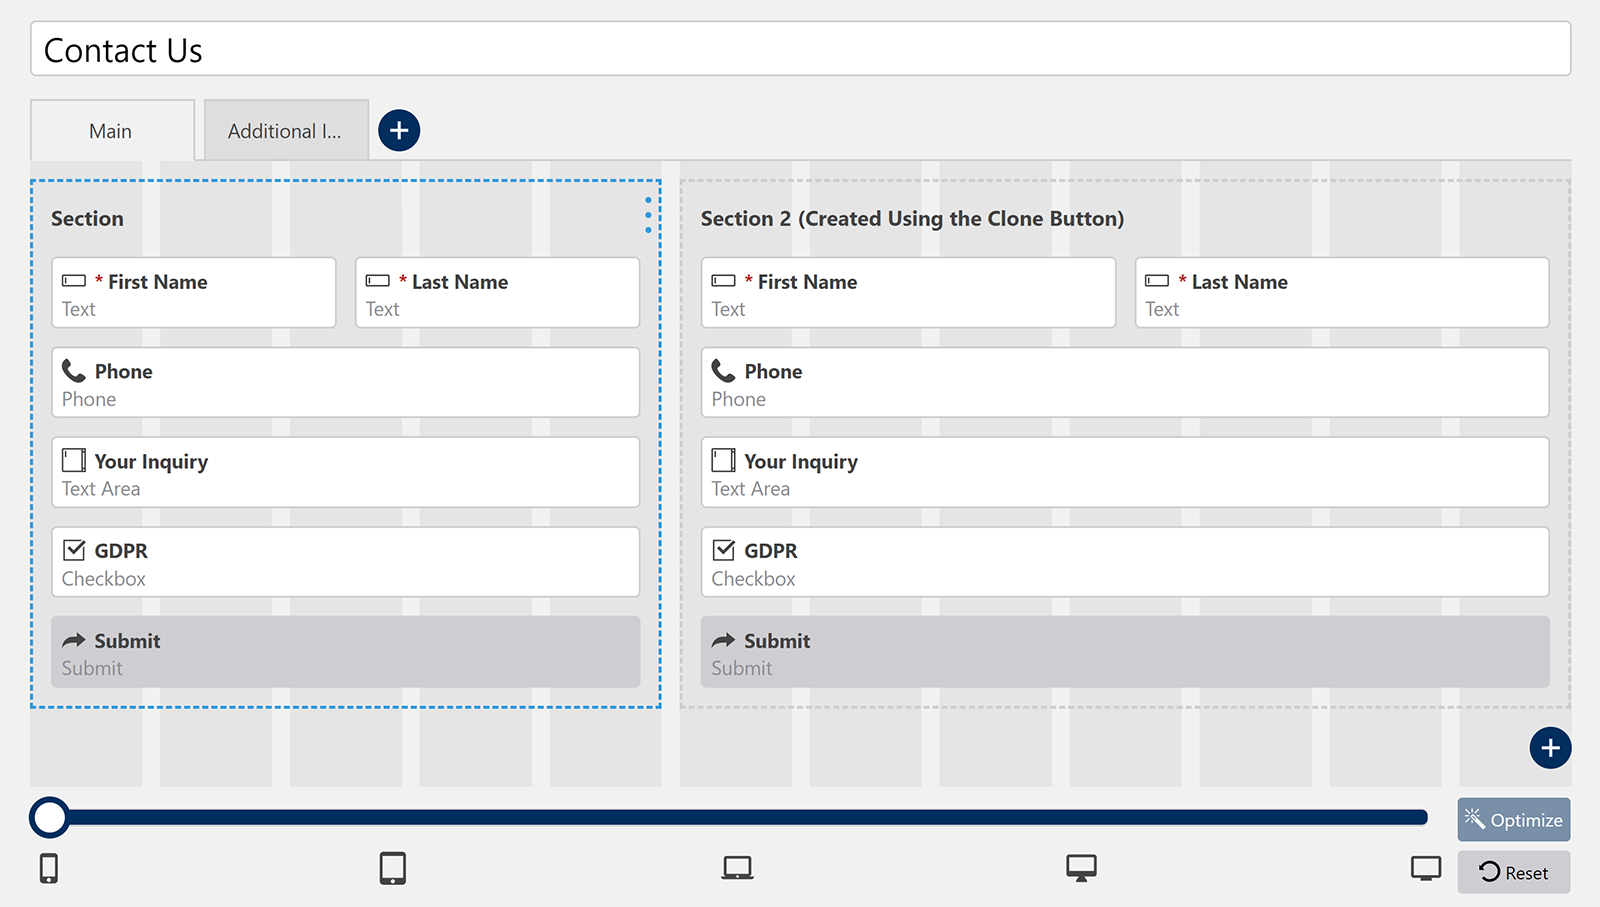
WS Form PRO has perfected the experience of building your perfect form. New tabs can be added easily and existing tabs can be cloned.
The layout editor works just like a WordPress drag and drop page builder. If you want to add a new field, simply drag it over to your form and position it where you want.
I particularly loved how simple it is to divide everything up into columns and rows. All you have to do is select the side of the form to adjust its column size. You can then drag another section into position.
At the bottom of the page is a horizontal scrollbar that allows you to see how the form will look in different devices. This is especially useful when putting sections into columns as your form may display sections in two sections on a desktop computer, but place them on top of each other on a mobile phone.
If you click on the settings icon for a section and go to the advanced tab, you can define the breakpoints for each device. You do this by selecting how many grid columns you want the section to span on devices such as tablets and smartphones.
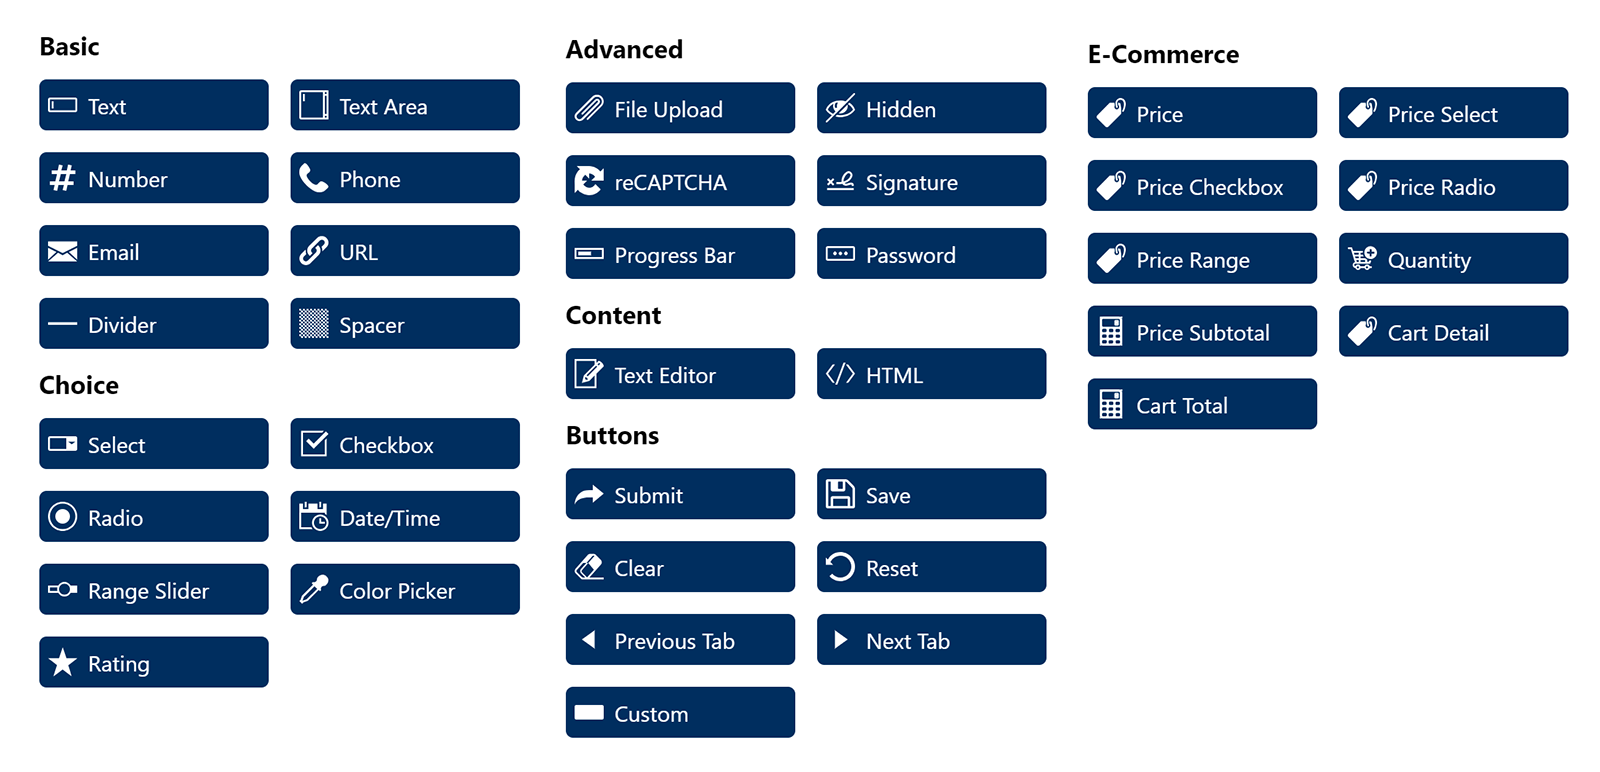
There is an impressive selection of fields.
At the time of writing, there are eight basic fields, seven choice fields, six advanced fields, two content fields, seven button fields, and nine eCommerce fields.
There are fields for preventing spam, displaying the form progress, displaying the current status of a user’s cart, and more.
One of the best ways to see how the available fiends can be used is to play around with the pre-made forms that are available. You can then tweak things to suit your needs.
If you click on the settings icon for a field you will see related options on the right-hand side. You can change every aspect of the field here. This includes the label and label position, default value, description, CSS classes, and whether there are any restrictions on the field such as a minimum or maximum amount of characters.
Clicking on the conditional logic icon allows you to add many “If this, then do this” type processes. This can help make your form more dynamic. Actions are incredibly useful too. Most users will save submissions to their WordPress database and send an email to themselves to advise them of the submission; however, you can also run WordPress hooks and redirect the user to a specific page.
The support icon not only lets you search their detailed knowledgebase, you can also send a support ticket directly to the developers. It is pretty cool that you can do this directly within the layout editor.
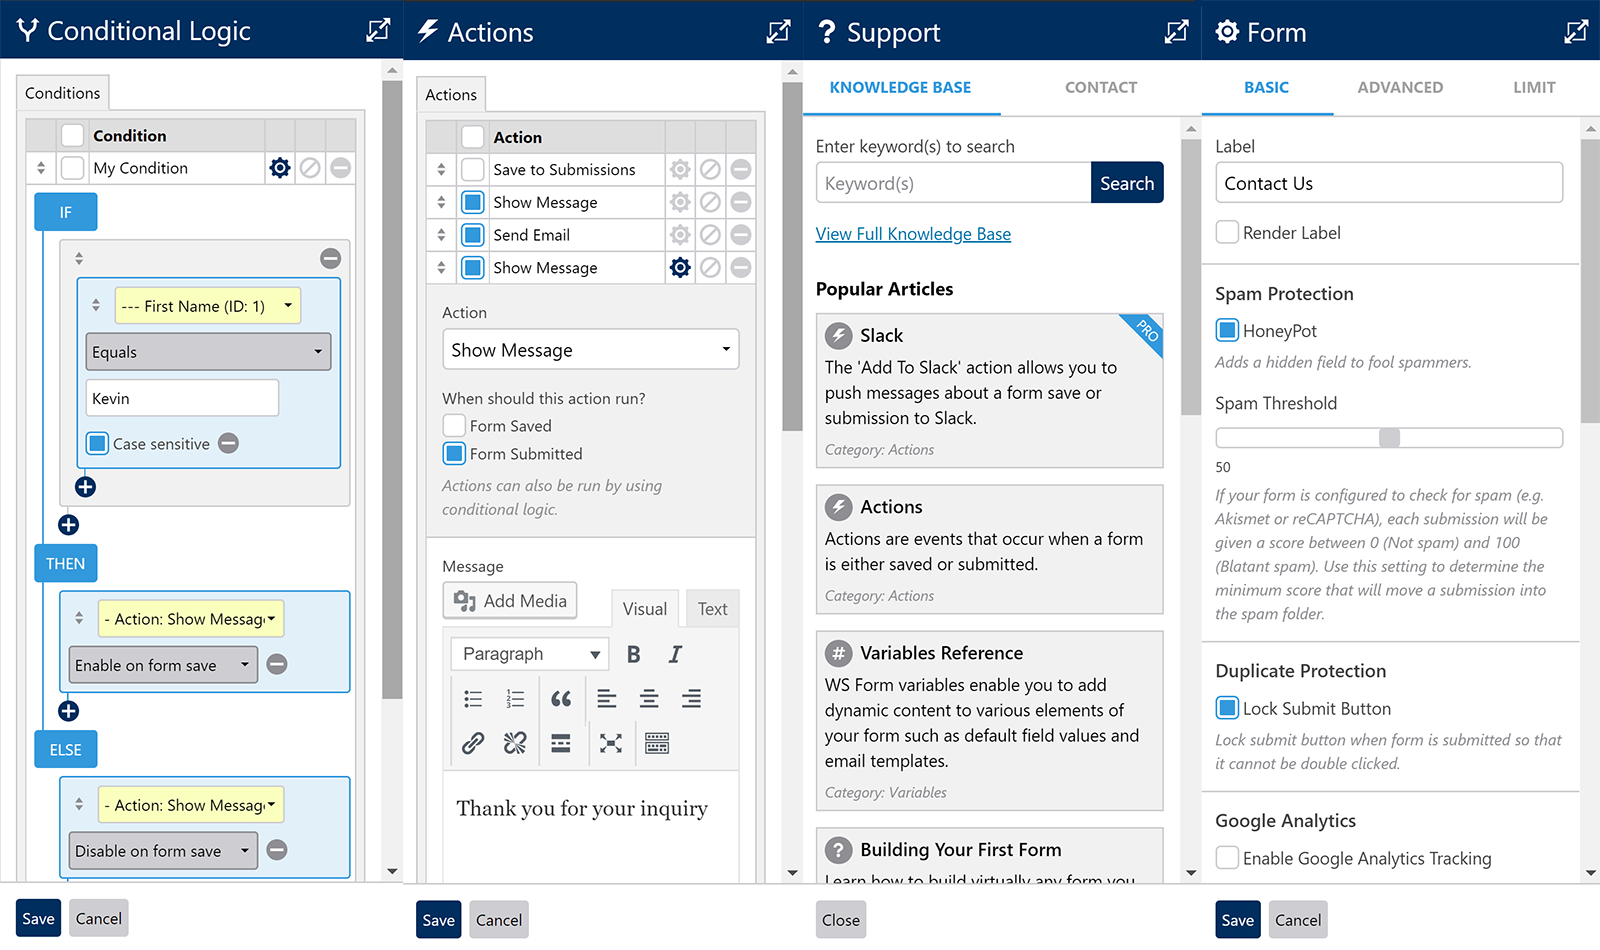
Clicking on the settings icon at the top of the page loads the form settings.
There is a host of options in this area. You can control spam settings, enable Google Analytics tracking, and specify what information is passed to Google. For example, you could select to track the user’s IP address, the referrer, their location, their operating system, etc.
You can also define what happens if a user enters an incorrect value. The form can be limited to a number of submissions too or can only be displayed for a specific period of time. This is particularly useful for quizzes and forms such as job applications that require deadlines.
Inserting completed forms into your website is straight-forward. The forms page lists all of your created forms. You can see the number of submissions, views, saves, and the conversion rate. A shortcode in the form of [ ws_form id=”X” ] is displayed for each form too.
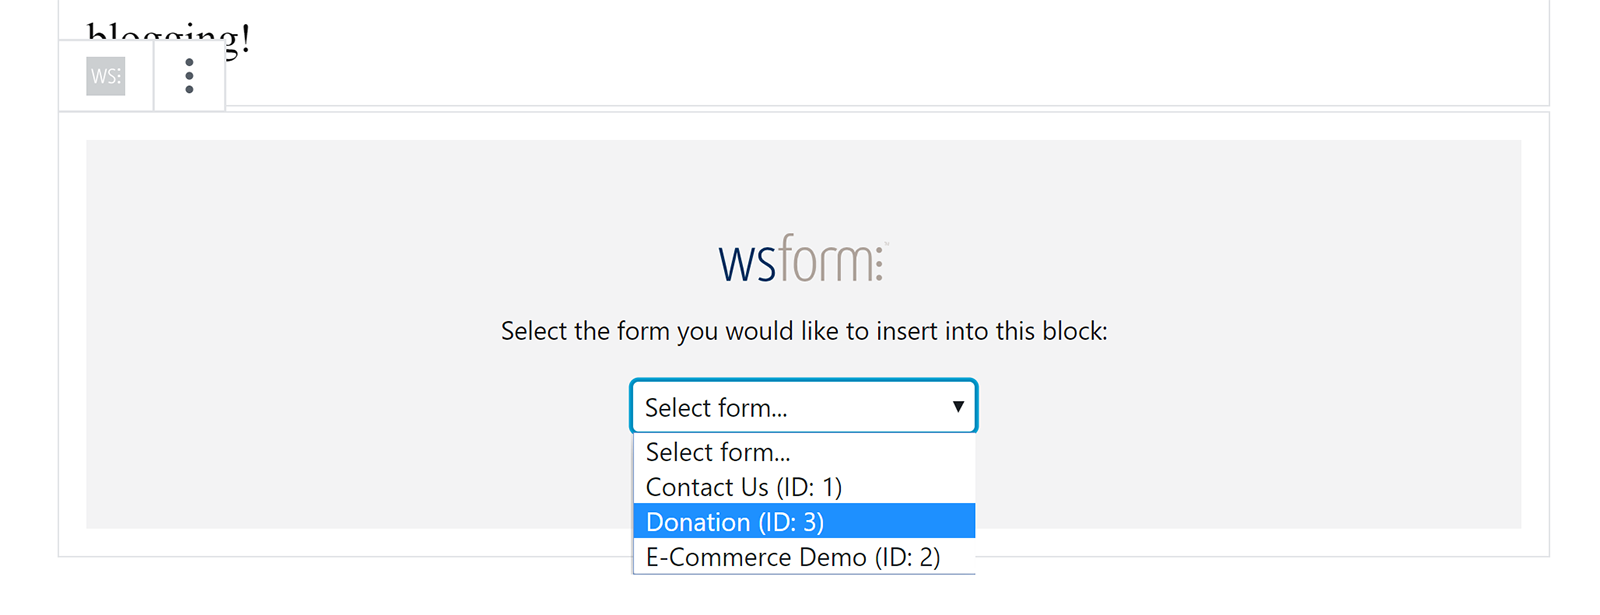
If you prefer, instead of using the form shortcode, you can use the WS Form icon in your WordPress editor to select the form you want to add into a post or page.
An overview of your forms activity can be displayed on your WordPress dashboard. It can show form views, saves and submissions for today, yesterday, last 7 days, last 30 days, and all time.
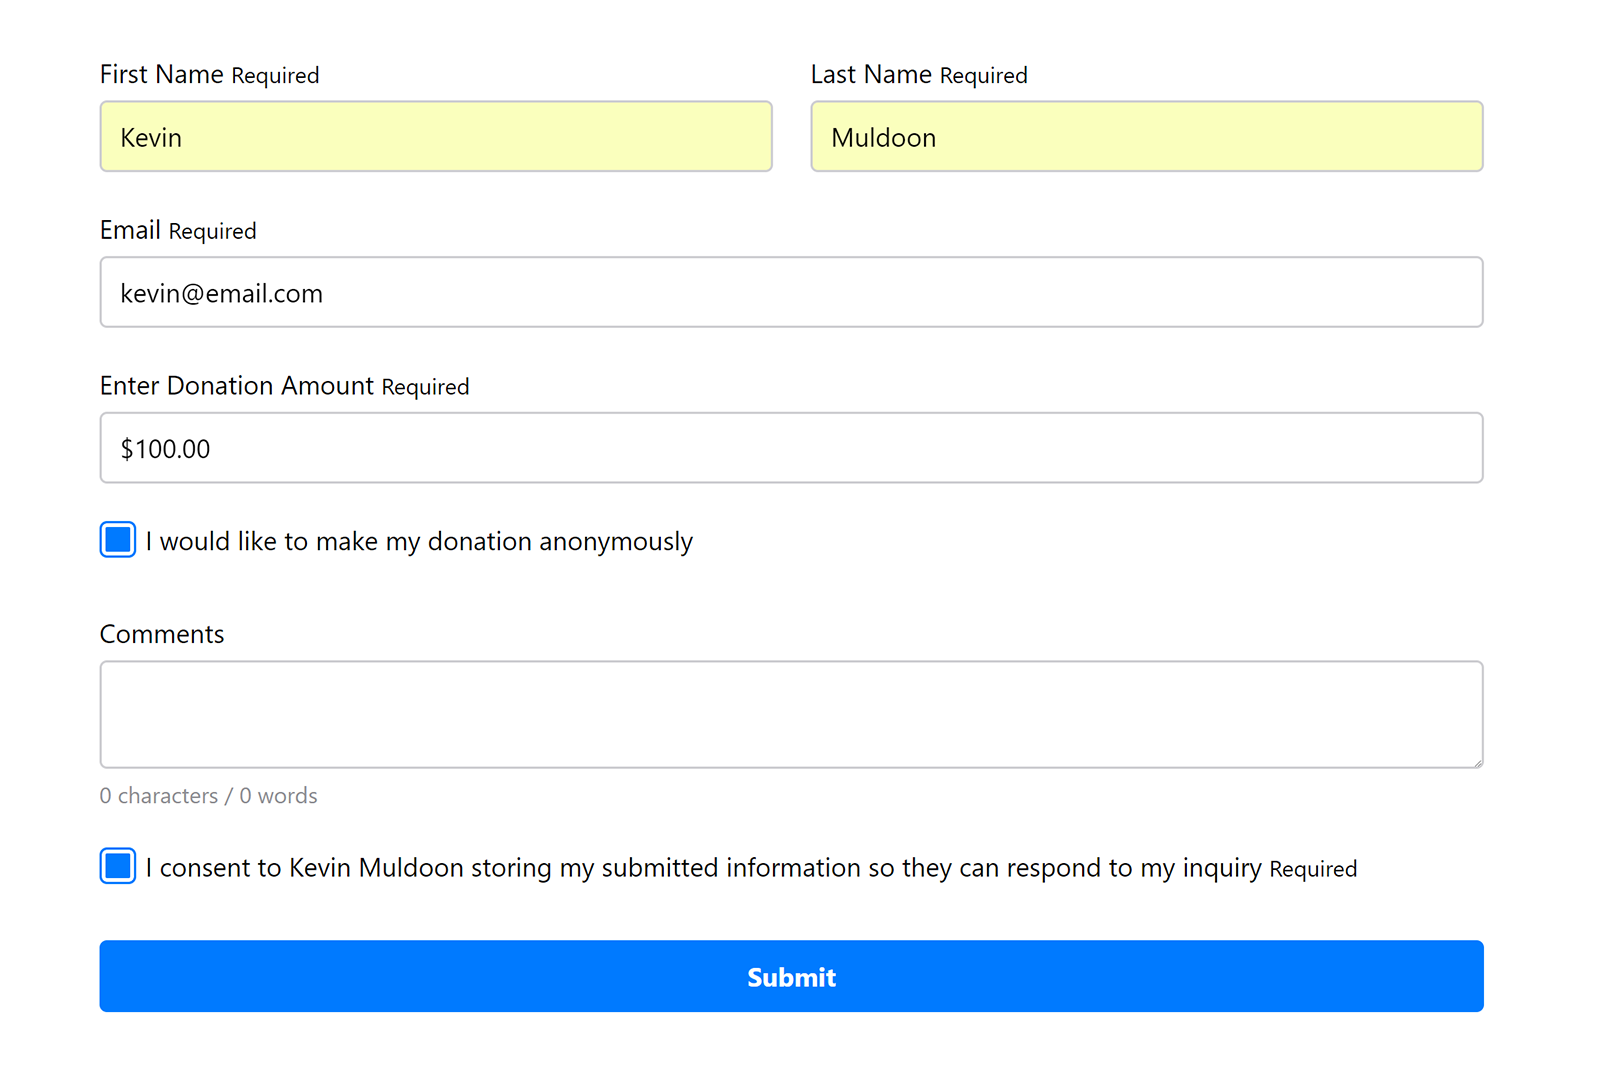
From a design point of view, I believe the forms look great. The default structure and spacing of forms fits in with most websites. I always use minimal designs for my forms so the output is what I was expecting.
Everything from fields to sections can be changed using CSS, however, if you go into the WordPress customiser, you can change colours, typography, borders, transitions, and more. All of your changes can be viewed in real-time.
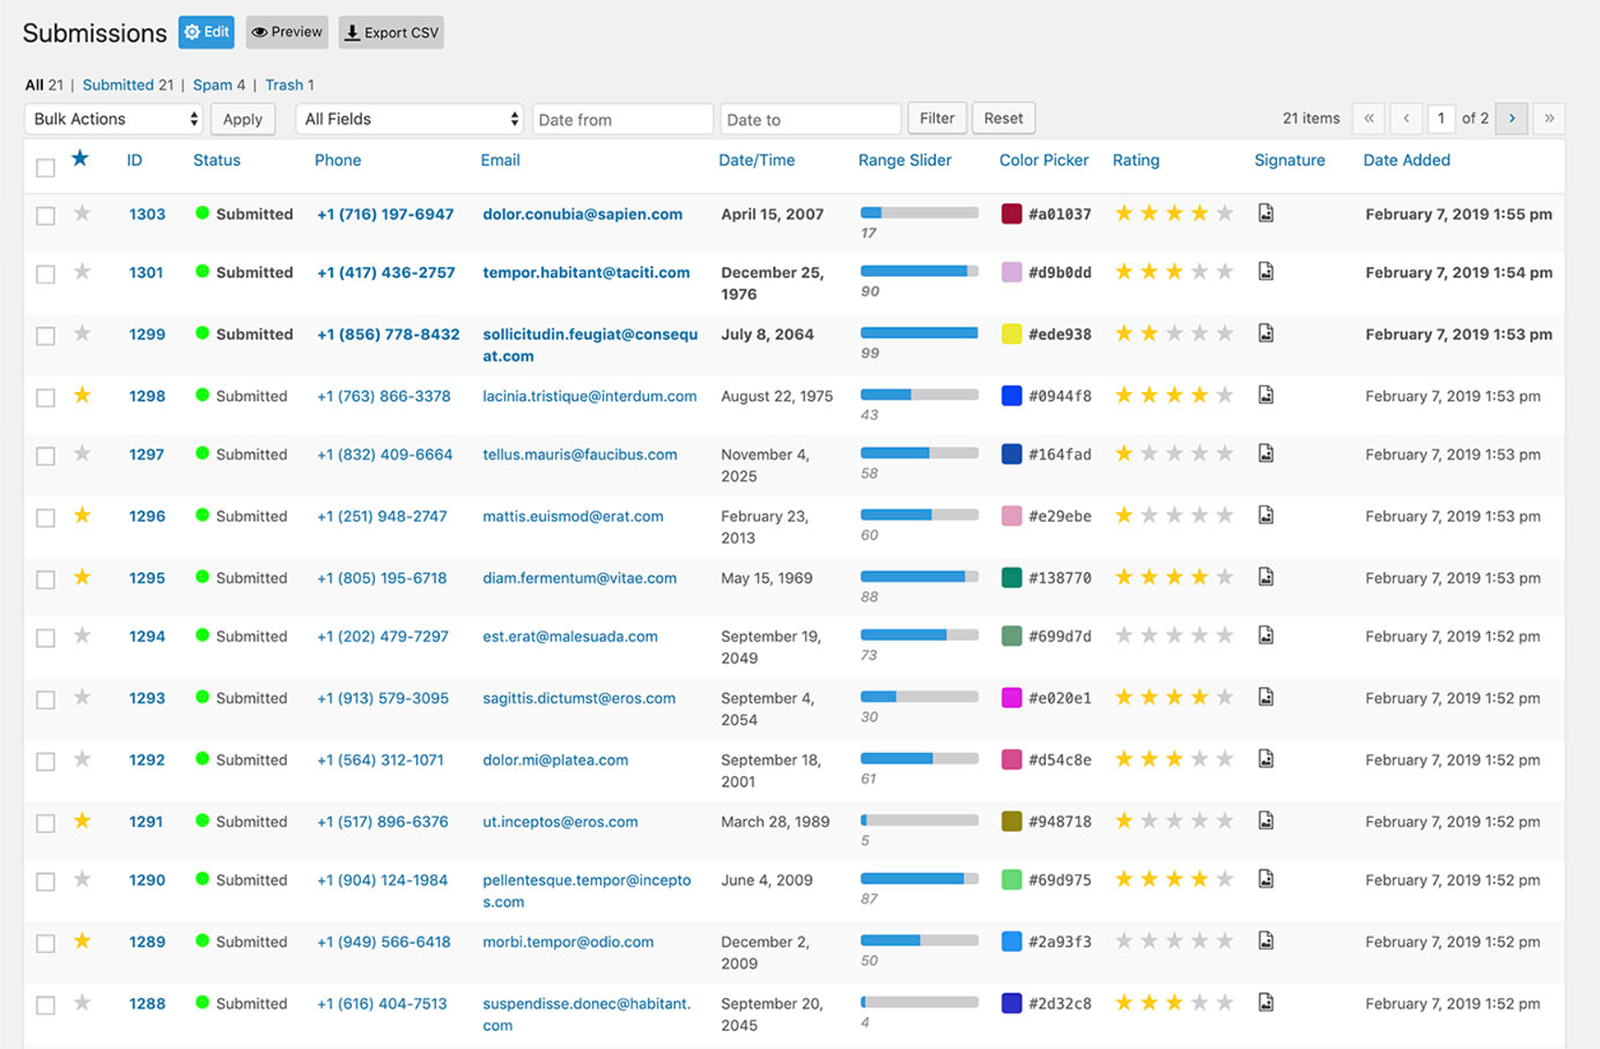
The submissions page shows all the form submissions that have been saved to your database. Submissions are performed as an action, so if you prefer you can choose to only email form submissions and not save them. I would always recommend saving submissions as a fail-safe though since they can be deleted later if necessary.
The submissions listing page gives you a good overview of all submissions; which helps when searching for a specific submission.
All in all, I was really impressed with how WS Form PRO works. The layout editor is a joy to use and there are a ton of advanced options. The addition of styling options in the future would improve functionality further for beginners, but I am sure that developers will be able to improve forms using CSS classes.
Migrating to WS Form PRO
The developers of WS Form PRO sensibly recognise that many of their potential customers are probably using an alternative solution at the moment.
They have therefore provided a migration tool that allows users to import forms from Gravity Forms, WPForms, and Visual Form Builder.
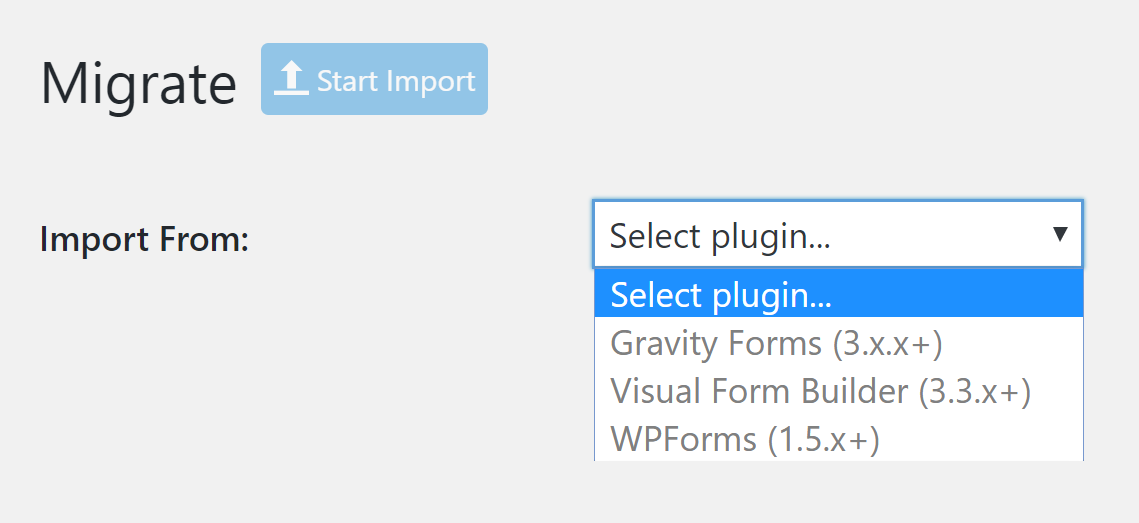
As you can see from the video tutorial below, the import process is straight-forward.
You can import forms and submissions and map fields from your previous plugin to fields from WS Form Pro.
Mark Westguard of WS Form Pro advised me that they are going to add support for transferring data from many other WordPress form plugins in the future.
WS Form PRO Settings
A large number of WS Form PRO settings can be found in the main plugin settings page.
The first tab gives you the option of selecting Basic Mode or Advanced Mode. Mark Westguard explained to me that the basic mode hides a few things to avoid confusing beginners.
When advanced mode is selected, a number of additional options are available.
- The debug console is enabled
- Breakpoint widths are reflected in the layout edit
- CanIUse compatibility icons are enabled
- Field IDs are displayed
If you are a general user like myself, Basic Mode is probably the better option.

The system tab gives you information about the version of WS Form PRO you are using, the WordPress version that is installed, and general server information. In the next tab, you can enter your license key. This is necessary for automatic updates.
In the appearance tab, you can choose the framework that is used to render your forms. Other settings regarding the final output are available here too such as whether HTML comments are included.
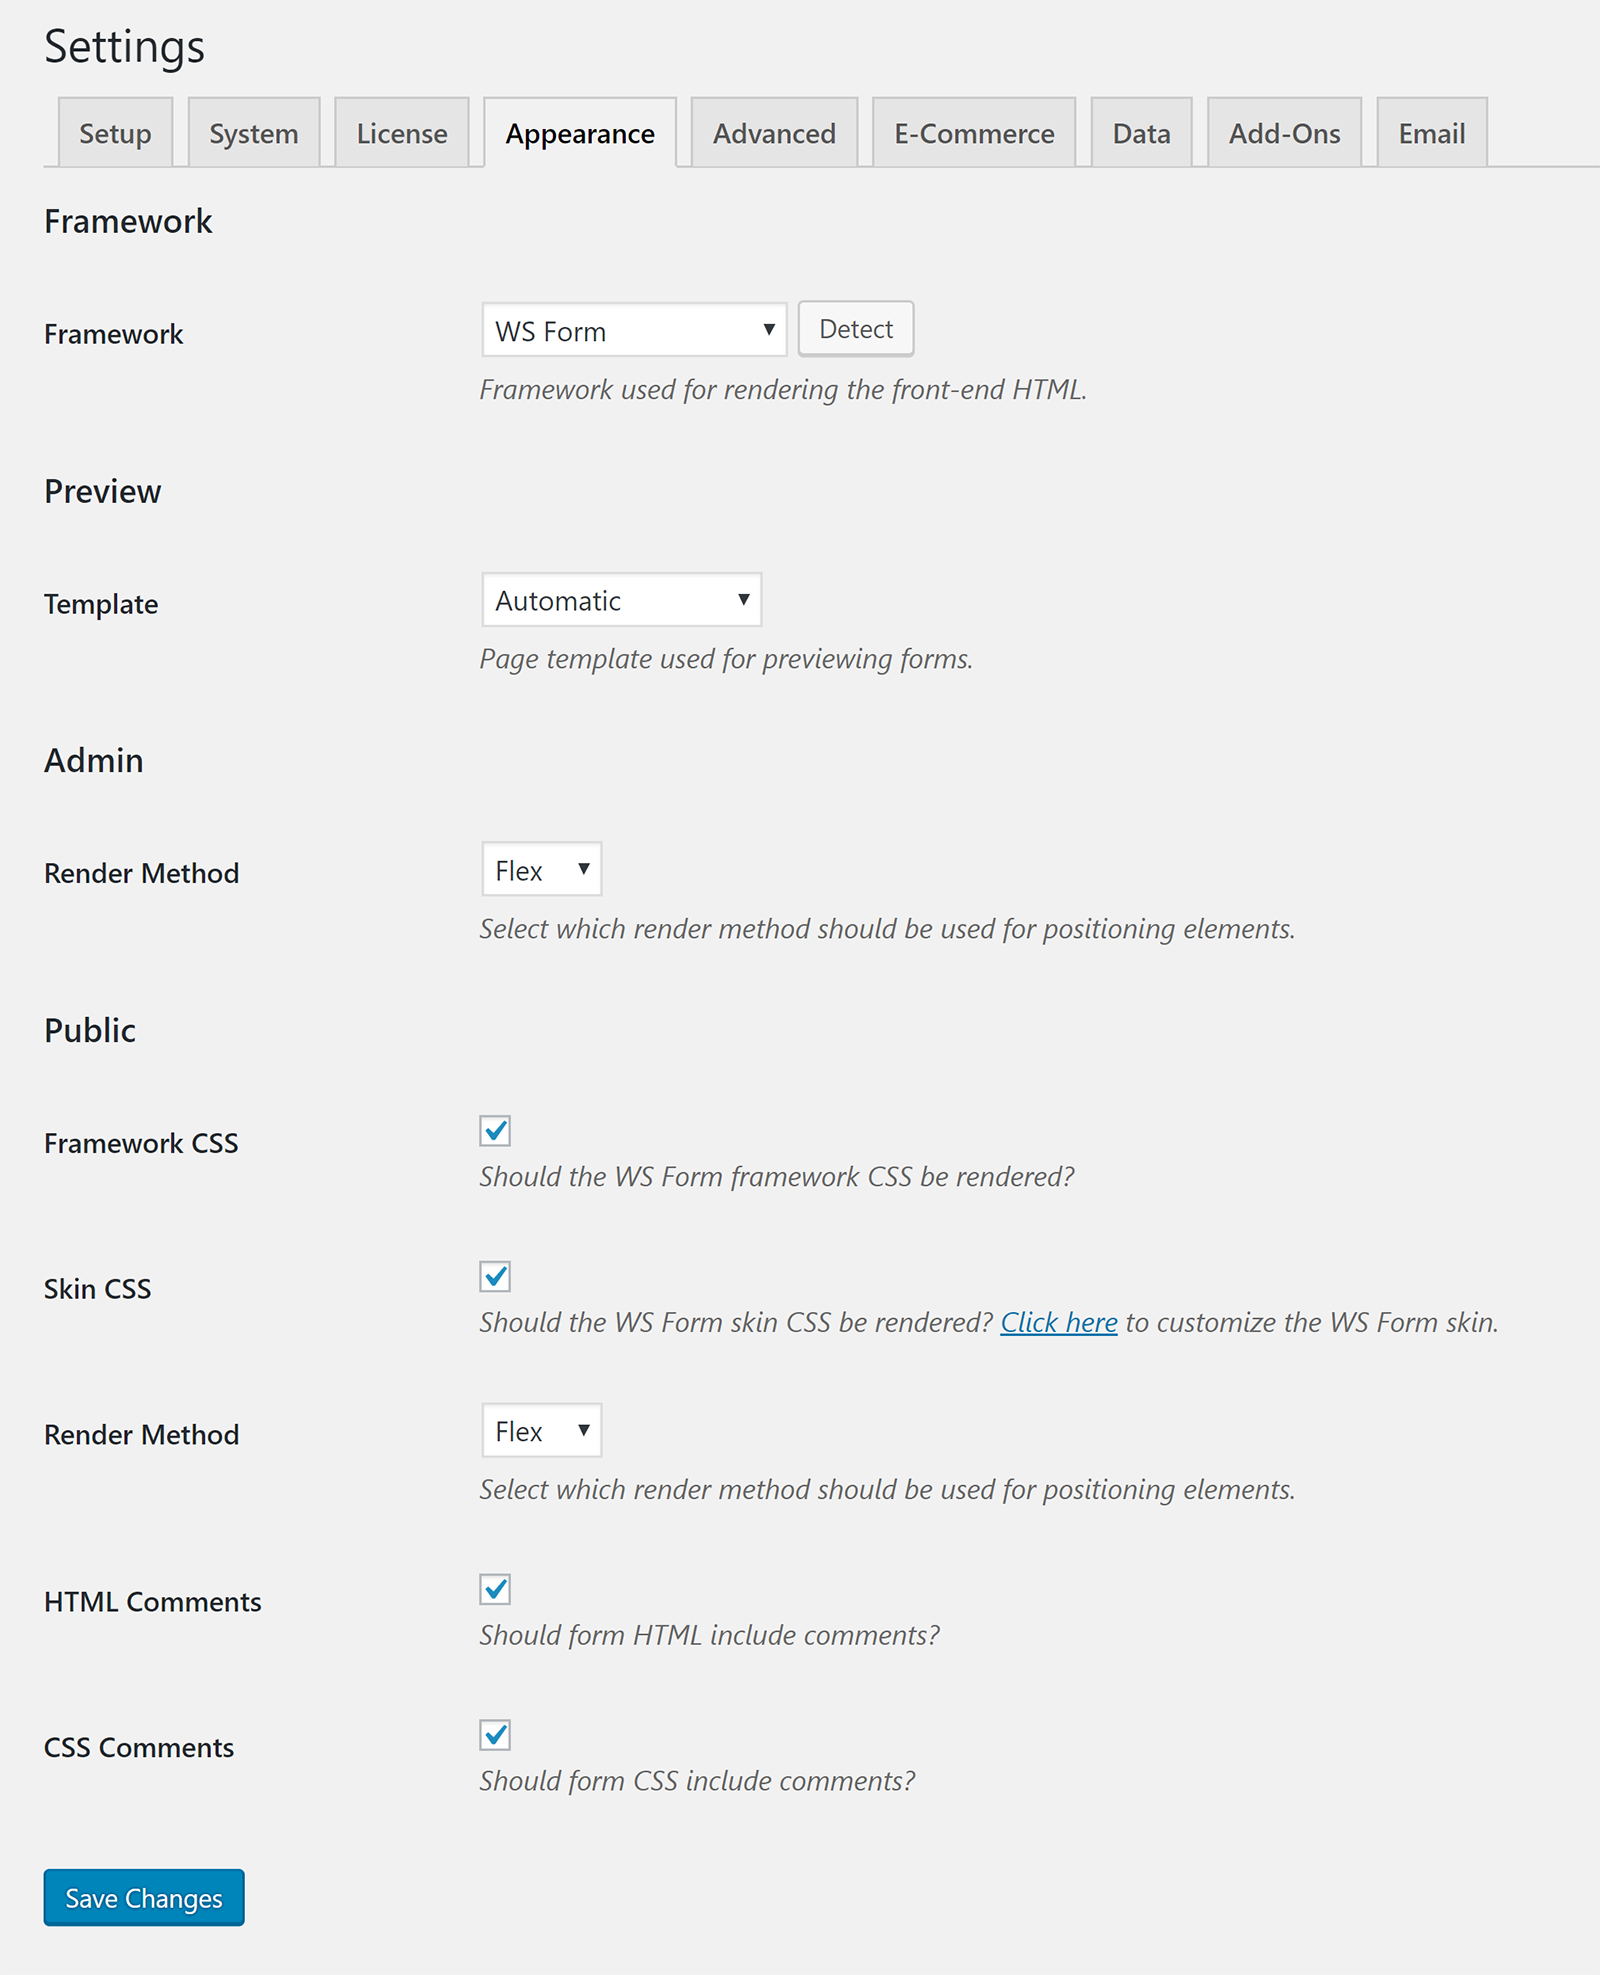
In the advanced tab, there is an option to enable the debug console, set the cookie timeout time, define the max file upload size, and much more.
The default currency and related settings can be defined in the eCommerce tab. In the next tab you can enable data encryption. There is also an option to remove all plugin data when you uninstall the plugin.
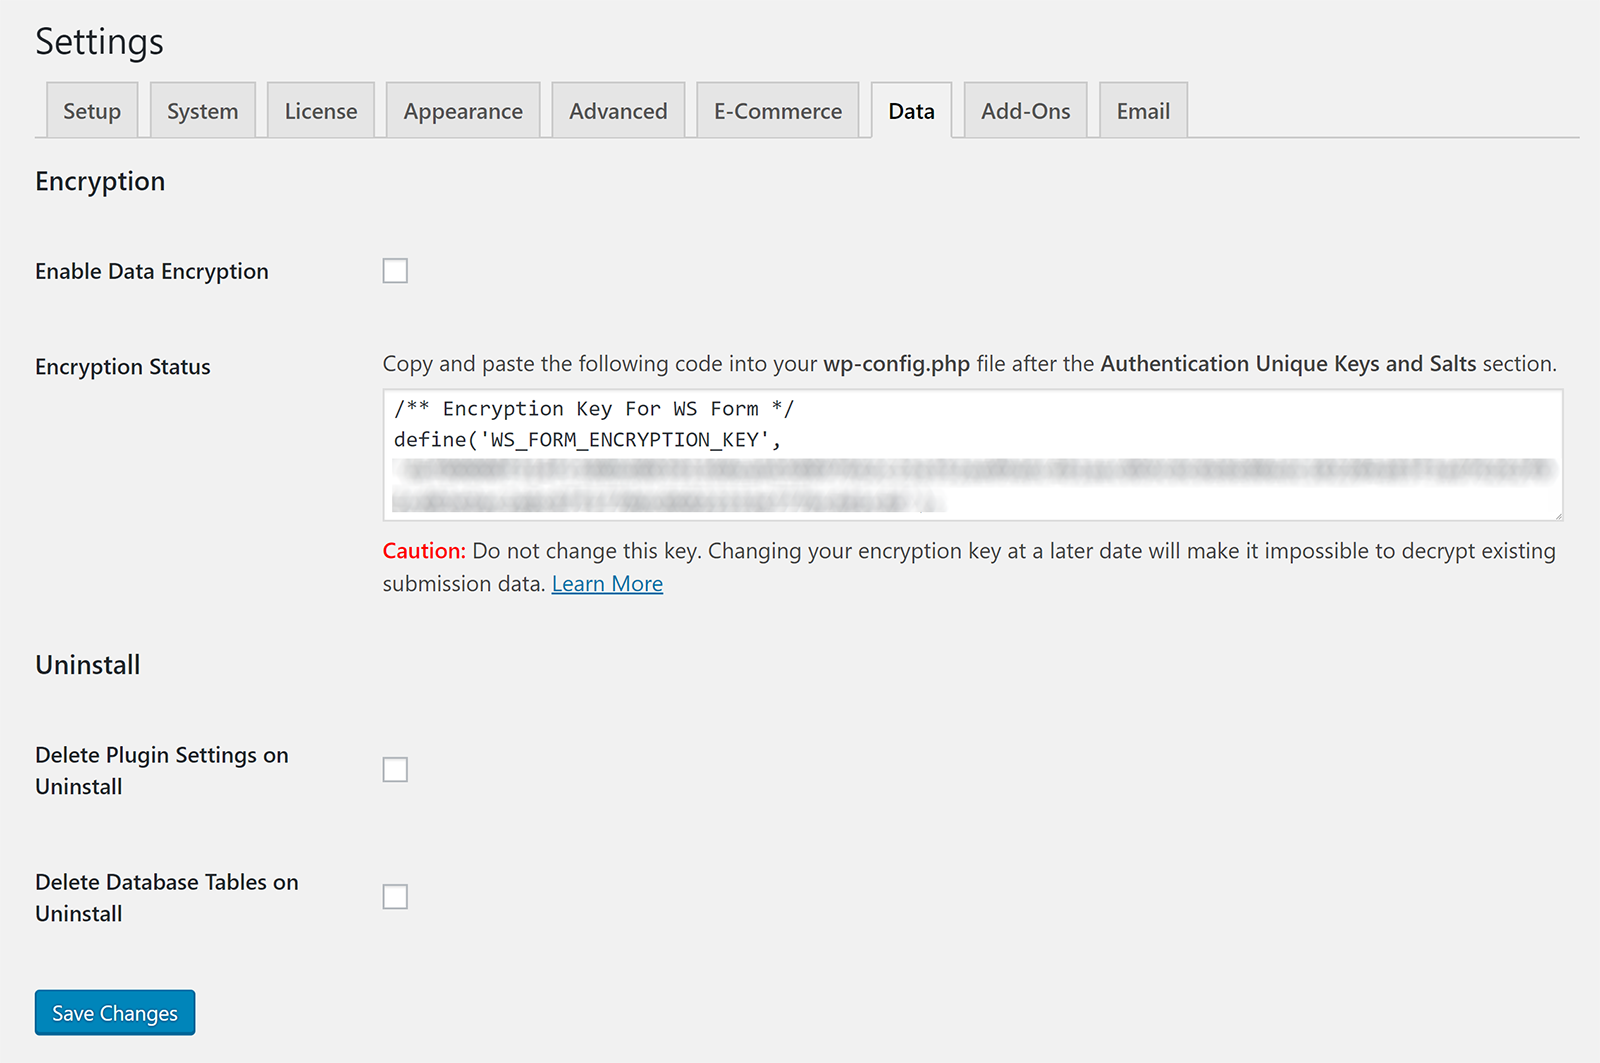
Available addons are detailed in the next tab and in the final email tab you can assign a logo to emails and configure how email submissions are handled.
As you will see in the next section, additional functionality can be added to WS Form PRO through addons. A new settings page is added for each addon you activate.
In order to display settings for most addons, you need to enter your addon license information.
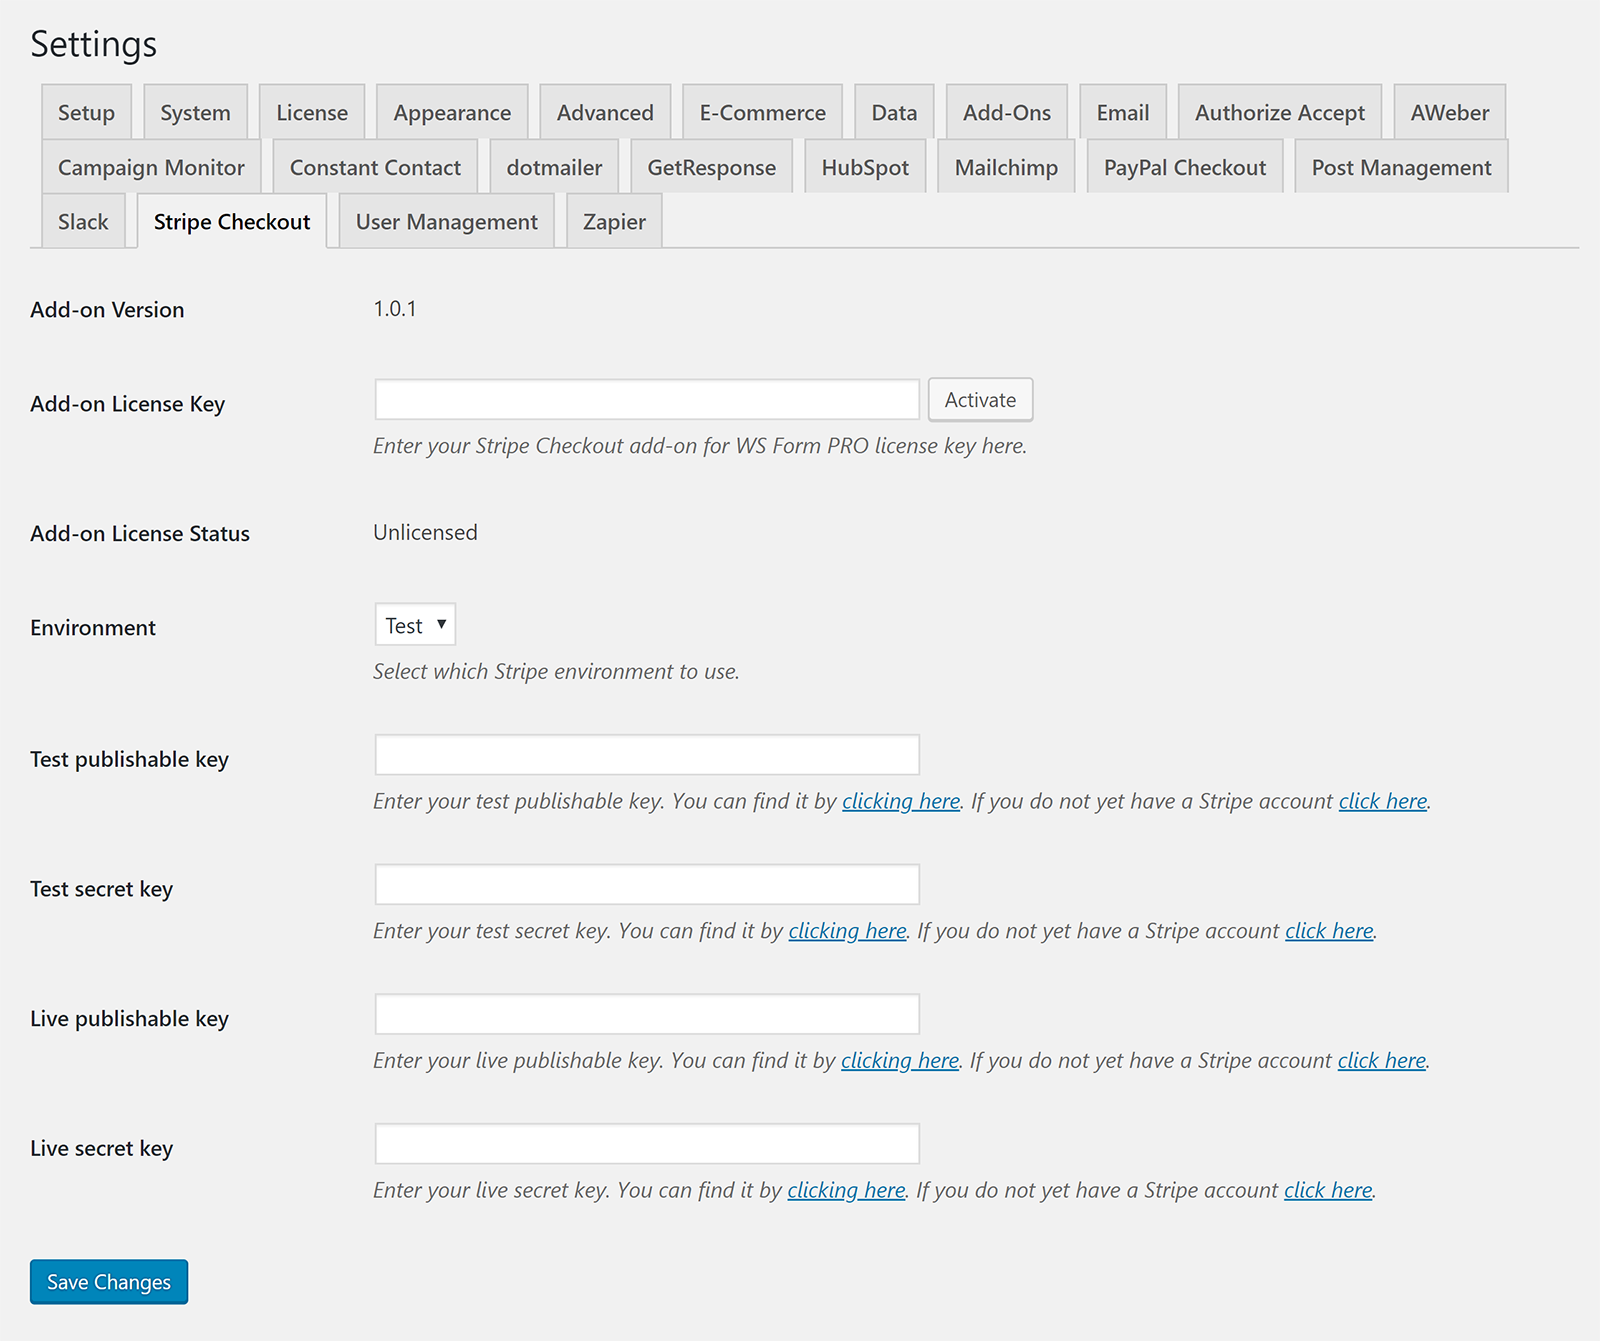
There are a lot of settings on offer in the plugin settings area, but do not let this discourage you. WS Form PRO works great right out of the box and most users will only need to change one or two settings there.
WS Form PRO Addons
16 addons are available for purchase. These cost $20 per year each, but if you upgrade to the agency license you gain access to all addons.
The addons can be used to integrate your forms with third-party services. Several email marketing addons are available. These can be used to sign people up to a specific email list. Functionality is available for users to unsubscribe too.
On the payment front, there are addons for Authorize.net, PayPal, and Stripe.

There is support for useful internet services such as Drip, Slack, and Zapier.
The PDF addon can be used to export PDFs by email, attach PDFs to emails, and more.
Post Management can be used to handle post submissions from users and User management gives you the ability to register users, update users, add login forms, and more.

I think there is a good selection of addons available at the moment but would like to see more apps and services be supported. In particular, I would like to see more payment services supported such as 2Checkout.
Zapier integration does bridge the gap in a lot of areas though as that can connect you to over 1,000 apps and services.
From a buyer’s point of view, I also think the developers need to add more information about each addon.
At the moment the information page for each addon shows you how to use it. This is useful for anyone who has bought an addon, but I would like to see a sales page for each addon too. This will help people see the benefits of buying the addon and help them see screenshots of how the plugin is used.
The Cost of WS Form PRO
A standard license for WS Form PRO costs $40 per year and grants you one year of support and updates for one website. There is no limit to how many forms you create or form submissions you save.
The agency license gives you a year of support and updates for as many websites as you wish. It retails at $250 per year.
Upgrading to the agency license will grant you access to all 16 addons. Standard license holders can gain access to these addons, but they have to pay an additional $20 per year per addon.
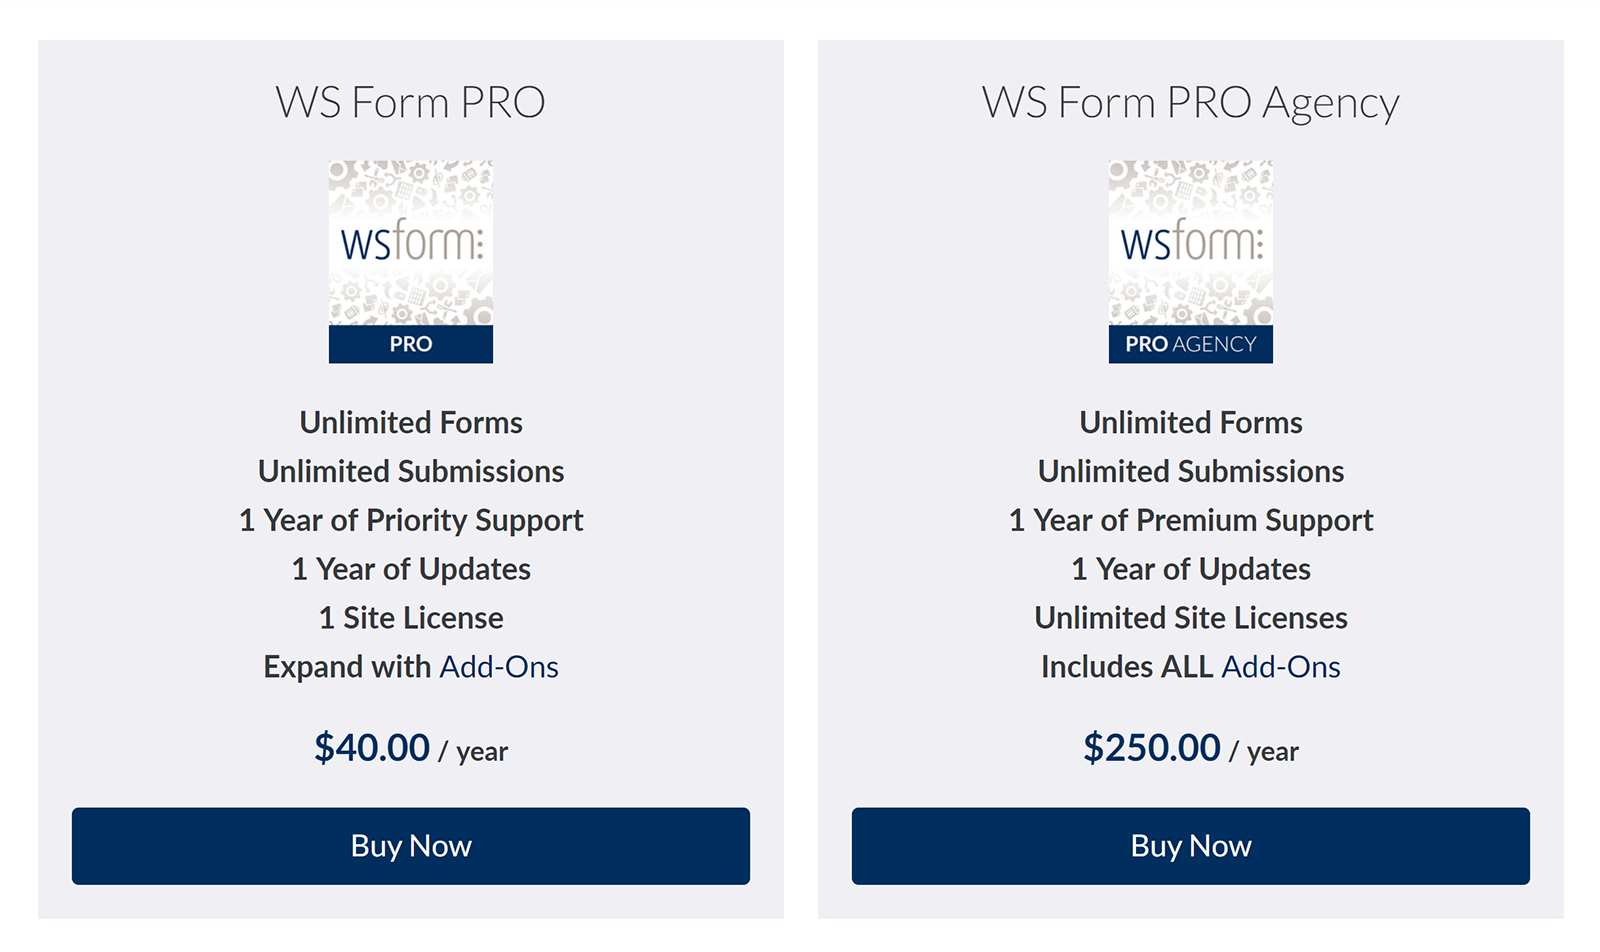
WS Form Pro can be tested for seven days free of charge via their online demo. I highly recommend trying this out to see if the plugin meets all your requirements.
Final Thoughts
WS Form PRO deserves to be mentioned alongside other great WordPress form solutions. It is available from only $40 per year and features a fantastic layout editor and a ton of advanced options.
I found the plugin to be easy to use, however, if you are unsure about anything you can refer to their extensive knowledgebase. It explains every feature of WS Form PRO in great detail.
I hope you have enjoyed this look at WS Form PRO. You can find out more about the plugin and what it can do on the official WS Form Pro website.
Should you wish a second opinion from other experienced WordPress bloggers, check out the reviews of WS Form PRO on CSS Tricks, Bob WP, ColorLib, and WP Lift.
Good luck.
Kevin

